VueJS是一個開源的漸進式JavaScript框架,用於開發交互式web界面。它是用來簡化web開發的著名框架之一。VueJS聚焦於視圖層。它可以輕鬆地集成到大型項目中進行前端開發,而無需任何問題。
VueJS的安裝很容易開始。任何開發人員都可以很容易地理解和構建交互式web界面。VueJS由Evan You創建,Evan You是谷歌的前僱員。VueJS的第一個版本於2014年2月發布。它最近在GitHub上已達到64828顆星,非常受歡迎。
Features
以下是WWW提供的功能。
Virtual DOM
VueJS使用虛擬DOM,其他框架(如React、Ember等)也使用虛擬DOM。不會對DOM進行更改,而是以JavaScript數據結構的形式創建DOM的副本。無論何時進行任何更改,都會對JavaScript數據結構進行更改,並將後者與原始數據結構進行比較。最後的更改將更新爲真正的DOM,用戶將看到它的更改。這在優化方面是很好的,它的成本更低,並且可以以更快的速度進行更改。
Data Binding
數據綁定功能有助於操作HTML屬性或爲其賦值、更改樣式、藉助VueJS提供的名爲v-bind的綁定指令分配類。
Components
組件是VueJS的重要特性之一,它有助於創建可在HTML中重用的自定義元素。
Event Handling
v-on是添加到DOM元素的屬性,用於監聽VueJS中的事件。
Animation/Transition
VueJS提供了各種方法,在HTML元素被添加/更新或從DOM中刪除時,將轉換應用於這些元素。VueJS有一個內置的轉換組件,需要將其包裝在元素周圍以獲得轉換效果。我們可以輕鬆地添加第三方動畫庫,也可以爲界面添加更多的交互性。
Computed Properties
這是VueJS的一個重要特性。它有助於監聽對UI元素所做的更改並執行必要的計算。這不需要額外的編碼。
Templates
VueJS提供基於HTML的模板,用於將DOM與Vue實例數據綁定。Vue將模板編譯爲虛擬DOM呈現函數。我們可以使用呈現函數的模板,爲此我們必須用呈現函數替換模板。
Directives
VueJS具有內置指令,如v-if、v-else、v-show、v-on、v-bind和v-model,這些指令用於在前端執行各種操作。
Watchers
監視程序應用於更改的數據。例如,表單輸入元素。在這裡,我們不需要添加任何額外的事件。Watcher負責處理任何數據更改,使代碼簡單快速。
Routing
頁面之間的導航是在vue路由器的幫助下執行的。
Lightweight
VueJS腳本非常輕量級,性能也非常快。
Vue-CLI
可以使用vue cli命令行界面在命令行安裝VueJS。它有助於使用vue cli輕鬆構建和編譯項目。
Comparison with Other Frameworks
現在讓我們將VueJS與其他框架(如React、Angular、Ember、Knockout和Polymer)進行比較。
VueJS v/s React
虛擬DOM
虛擬DOM是DOM樹的虛擬表示。使用虛擬DOM創建一個JavaScript對象,該對象與實際DOM相同。每當需要對DOM進行更改時,都會創建一個新的JavaScript對象並進行更改。稍後,對這兩個JavaScript對象進行比較,並在真正的DOM中更新最後的更改。
VueJS和React都使用虛擬DOM,這使其速度更快。
模板v/s JSX
VueJS分別使用html、js和css。初學者很容易理解和採用VueJS風格。基於模板的VueJS方法非常簡單。
React使用jsx方法。一切都是ReactJS的JavaScript。HTML和CSS都是JavaScript的一部分。
安裝工具
React使用創建React app,VueJS使用vue cli/CDN/npm。兩者都很容易使用,項目是建立與所有的基本要求。React需要用於構建的webpack,而VueJS不需要。我們可以從使用cdn庫在jsfiddle或codepen中的任何地方編寫VueJS開始。
受歡迎程度
React比VueJS更受歡迎。React的工作機會不僅僅是VueJS。React背後有一個大牌,即Facebook,使其更受歡迎。因爲,React使用JavaScript的核心概念,所以它使用JavaScript的最佳實踐。與React一起工作的人肯定會非常擅長所有JavaScript概念。
VueJS是一個開發框架。目前,與反應相比,VueJS的工作機會較少。根據一項調查,許多人正在適應VueJS,這使得它比反應和角度更受歡迎。有一個很好的社區正在研究VueJS的不同特性。vue路由器由此社區維護,並定期更新。
VueJS已經從角度和反應上獲取了好的部分,並構建了一個強大的庫。與React/Angular相比,VueJS要快得多,因爲它的輕量級庫。
VueJS v/s Angular
相似性
VueJS與Angular有很多相似之處。指令如v-if,v-for與ngIf,ngFor的角度幾乎相似。它們都有一個用於項目安裝和構建的命令行界面。VueJS使用Vue cli,Angular使用Angular cli。兩者都提供雙向數據綁定、伺服器端呈現等功能。
複雜性
Vuejs非常容易學習和開始。如前所述,初學者可以使用VueJS的CDN庫,開始使用codepen和jsfiddle。
對於Angular,我們需要經歷一系列的安裝步驟,對於初學者來說,開始使用Angular並不困難。它使用TypeScript進行編碼,這對於來自核心JavaScript背景的人來說是很困難的。不過,對於Java和C#背景的用戶來說,學習起來更容易。
性能
要決定性能,取決於用戶。VueJS文件大小比角度文件小得多。框架性能的比較見以下連結http://stefankrause.net/js-frameworks-benchmark4/webdriver ts/table.html
受歡迎程度
目前,Angular比VueJS更受歡迎。很多組織使用角度,使它非常受歡迎。求職機會也更多的是有角度經驗的候選人。然而,VueJS在市場上占有一席之地,可以被認爲是Angular和React的良好競爭對手。
依賴關係
Angular提供了很多內置功能。我們必須導入所需的模塊並開始使用,例如,@angular/animations,@angular/form。
VueJS並沒有像Angular那樣的所有內置特性,需要依賴第三方庫來處理它。
靈活性
VueJS可以輕鬆地與任何其他大型項目合併,而不會出現任何問題。角度將不是那麼容易開始工作與任何其他現有的項目。
向後兼容性
我們有AngularJS,Angular2,現在有Angular4。AngularJS和Angular2有很大的區別。由於核心差異,在AngularJS中開發的項目應用程式無法轉換爲Angular2。
VueJS的最新版本是2.0,它具有良好的向後兼容性。它提供了很好的文檔,很容易理解。
類型腳本
Angular使用TypeScript進行編碼。用戶需要了解Typescript才能開始使用Angular。但是,我們可以從使用cdn庫在jsfiddle或codepen中的任何地方進行VueJS編碼開始。我們可以使用標準的JavaScript,這很容易開始。
VueJS v/s Ember
相似性
Ember提供了Ember命令行工具,即Ember cli,以便於Ember項目的安裝和編譯。
VueJS還有一個命令行工具vue cli來啓動和構建項目。
它們都具有路由器、模板和組件等特性,這使得它們作爲UI框架非常豐富。
性能
與Ember相比,VueJS具有更好的性能。Ember添加了一個glimmer渲染引擎,目的是提高重新渲染性能,這與VueJS和React使用虛擬DOM是一個類似的概念。但是,與Ember相比,VueJS有更好的性能。
VueJS v/s Knockout
Knockout提供了良好的瀏覽器支持。它在較低版本的IE上受支持,而在IE8及以下版本上不支持VueJS。隨著時間的推移,淘汰賽的發展已經放緩。在最近一段時間裡,同樣的東西並不受歡迎。
另一方面,Vue團隊提供定期更新,VueJS已經開始流行起來。
VueJS v/s Polymer
聚合物庫是由谷歌開發的。它被用於許多Google項目,如Google I/O、Google Earth、Google Play Music等,它提供類似於VueJS的數據綁定和計算屬性。
聚合自定義元素定義包括純JavaScript/CSS、元素屬性、生命周期回調和JavaScript方法。相比之下,VueJS允許輕鬆使用JavaScript/html和CSS。
Polymer使用web組件特性,瀏覽器需要polyfill,而polyfill不支持這些特性。VueJS沒有這樣的依賴關係,在IE9+的所有瀏覽器中都可以正常工作。
VueJS - Environment Setup
安裝VueJS有很多方法。前面將討論如何進行安裝的一些方法。
Using the <script> tag directly in HTML file
<html>
   <head>
      <script type = "text/javascript" src = "vue.min.js"></script>
   </head>
   <body></body>
</html>
請訪問vuejs的主頁https://vue js.org/v2/guide/installation.html,並根據需要下載vue.js。有兩個版本可供使用-生產版本和開發版本。開發版本沒有最小化,而生產版本最小化,如下面的螢幕截圖所示。在項目開發期間,開發版本將幫助處理警告和調試模式。

Using CDN
我們還可以開始使用CDN庫中的VueJS文件。連結https://unpkg.com/vue將提供最新版本的VueJS。/2.4.0/vue.js)。
如果需要的話,我們可以在末尾託管文件並開始VueJS開發。
Using NPM
對於使用VueJS的大型應用程式,建議使用npm包安裝。它配有Browserify和Webpack以及其他必要的工具,有助於開發。下面是使用npm安裝的命令。
npm install vue
Using CLI Command Line
VueJS還提供CLI來安裝vue並開始伺服器激活。要使用CLI安裝,我們需要安裝CLI,這需要使用以下命令完成。
npm install --global vue-cli
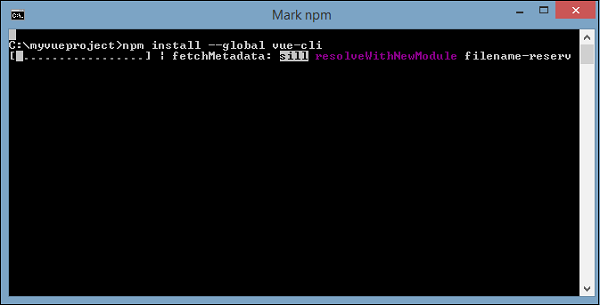
Once done, it shows the CLI version for VueJS. It takes a few minutes for the installation.
+ vue-cli@2.8.2
added 965 packages in 355.414s
Following is the command to create the project using Webpack.
vue init webpack myproject
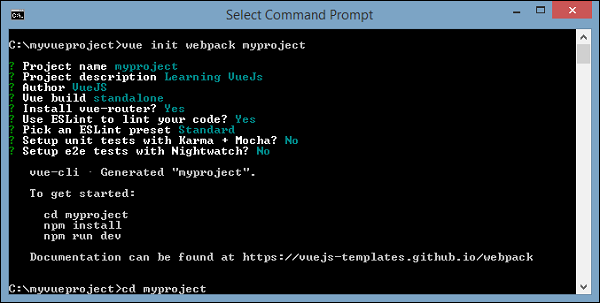
To get started, use the following command.
cd myproject
npm install
npm run dev
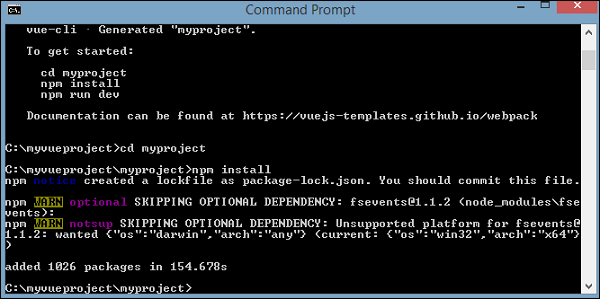
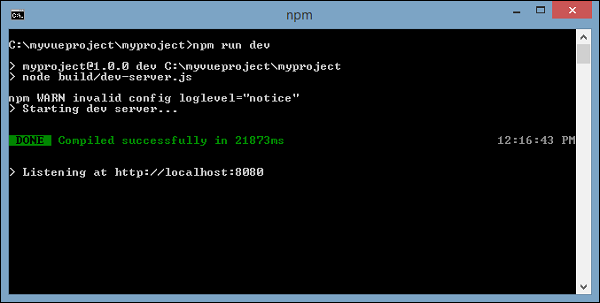
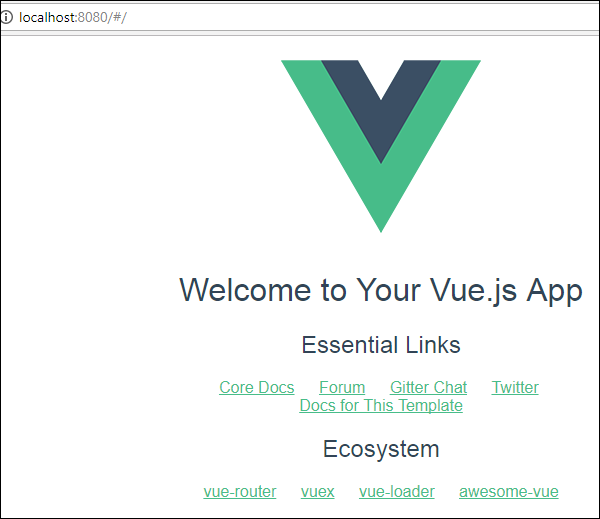
Once we execute npm run dev, it starts the server and provides the url for display to be seen in the browser which is as shown in the following screenshot.
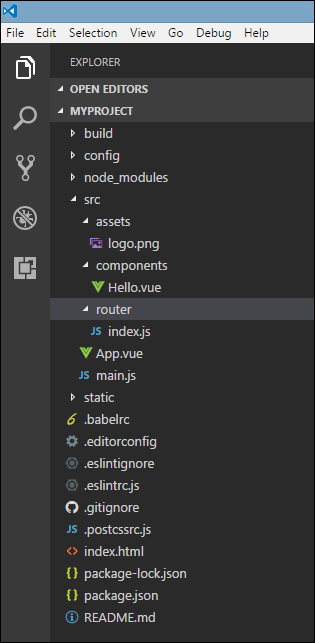
The project structure using CLI looks like the following.
VueJS - Introduction
Vue is a JavaScript framework for building user interfaces. Its core part is focused mainly on the view layer and it is very easy to understand. The version of Vue that we are going to use in this tutorial is 2.0.
由於Vue基本上是爲前端開發而構建的,因此我們將在接下來的章節中處理大量的HTML、JavaScript和CSS文件。爲了理解細節,讓我們從一個簡單的例子開始。
在本例中,我們將使用vuejs的開發版本。
Example
<html>
   <head>
      <title>VueJs Introduction</title>
      <script type = "text/javascript" src = "js/vue.js"></script>
   </head>
   <body>
      <div id = "intro" style = "text-align:center;">
         <h1>{{ message }}</h1>
      </div>
      <script type = "text/javascript">
         var vue_det = new Vue({
            el: '#intro',
            data: {
               message: 'My first VueJS Task'
            }
         });
      </script>
   </body>
</html>
Output

這是我們使用VueJS創建的第一個應用程式。如上面的代碼所示,我們在.html文件的開頭包含了vue.js。
<script type = "text/javascript" src = "js/vue.js"></script>
在正文中添加了一個div,用於在瀏覽器中列印「我的第一個VueJS任務」。
<div id = "intro" style = "text-align:center;">
   <h1>{{ message }}</h1>
</div>
我們還在插值中添加了一條消息,即{{}}。這將與VueJS交互並在瀏覽器中列印數據。爲了獲取DOM中消息的值,我們創建了一個vuejs實例,如下所示−
var vue_det = new Vue({
   el: '#intro',
   data: {
      message: 'My first VueJS Task'
   }
})
在上面的代碼片段中,我們調用的是Vue實例,該實例採用了DOM元素的id,即e1:「35; intro」,它是div的id。消息中有數據,該數據分配了值「我的第一個VueJS任務」。VueJS與DOM交互,並使用「我的第一個VueJS任務」更改DOM{{message}}中的值。
如果我們碰巧在控制台中更改了消息的值,瀏覽器中也會反映同樣的情況。例如−

Console Details
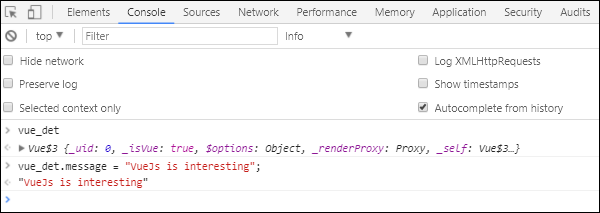
在上面的控制台中,我們列印了vue_det對象,它是vue的一個實例。我們正在用「VueJs is interest」更新消息,正如上面的螢幕截圖所示,瀏覽器中的內容也會立即更改。
這只是一個基本的例子,展示了VueJS與DOM的連結,以及如何操作它。在接下來的幾章中,我們將學習指令、組件、條件循環等。
VueJS - Instances
要從VueJS開始,我們需要創建Vue的實例,稱爲根Vue實例。
Syntax
var app = new Vue({
   // options
})
讓我們看一個例子來了解什麼需要成爲Vue構造函數的一部分。
<html>
   <head>
      <title>VueJs Instance</title>
      <script type = "text/javascript" src = "js/vue.js"></script>
   </head>
   <body>
      <div id = "vue_det">
         <h1>Firstname : {{firstname}}</h1>
         <h1>Lastname : {{lastname}}</h1>
         <h1>{{mydetails()}}</h1>
      </div>
      <script type = "text/javascript" src = "js/vue_instance.js"></script>
   </body>
</html>
vue_instance.js
var  vm = new Vue({
   el: '#vue_det',
   data: {
      firstname : "Ria",
      lastname  : "Singh",
      address    : "Mumbai"
   },
   methods: {
      mydetails : function() {
         return "I am "+this.firstname +" "+ this.lastname;
      }
   }
})
對於Vue,有一個名爲el的參數。它接受DOM元素的id。在上面的示例中,我們有id#vue_det。它是div元素的id,它出現在.html中。
<div id = "vue_det"></div>
現在,無論我們要做什麼,都將影響div元素,並且不會影響它之外的任何內容。
接下來,我們定義了數據對象。它有值firstname、lastname和address。
在div中分配相同的值。例如,
<div id = "vue_det">
   <h1>Firstname : {{firstname}}</h1>
   <h1>Lastname : {{lastname}}</h1>
</div>
Firstname:{{Firstname}值將在插值中被替換,即{{}替換爲在數據對象(即Ria)中分配的值。姓氏也一樣。
接下來,我們有定義函數mydetails和返回值的方法。在div中指定爲
<h1>{{mydetails()}}</h1>
因此,在{{}}內部調用函數mydetails。Vue實例中返回的值將在{{}}中列印。檢查輸出以供參考。
Output
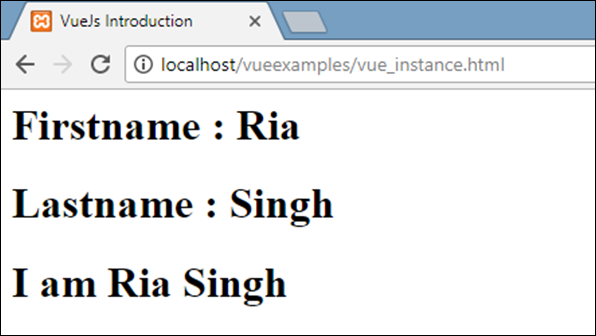
現在,我們需要將選項傳遞給Vue構造函數,它主要是數據、模板、要裝載的元素、方法、回調等。
讓我們看看傳遞給Vue的選項。
#數據−此類數據可以是對象或函數。Vue將其屬性轉換爲getter/setter以使其具有反應性。
讓我們看看如何在選項中傳遞數據。
Example
<html>
   <head>
      <title>VueJs Introduction</title>
      <script type = "text/javascript" src = "js/vue.js"></script>
   </head>
   <body>
      <script type = "text/javascript">
         var _obj = { fname: "Raj", lname: "Singh"}

         // direct instance creation
         var vm = new Vue({
            data: _obj
         });
         console.log(vm.fname);
         console.log(vm.$data);
         console.log(vm.$data.fname);
      </script>
   </body>
</html>
Output

console.log(vm.fname);/列印Raj
console.log(vm.$data);如上圖所示列印完整對象
console.log(vm.$data.fname);//列印Raj
如果存在組件,則必須從函數引用數據對象,如以下代碼所示。
<html>
   <head>
      <title>VueJs Introduction</title>
      <script type = "text/javascript" src = "js/vue.js"></script>
   </head>
   <body>
      <script type = "text/javascript">
         var _obj = { fname: "Raj", lname: "Singh"};

         // direct instance creation
         var vm = new Vue({
            data: _obj
         });
         console.log(vm.fname);
         console.log(vm.$data);
         console.log(vm.$data.fname);

         // must use function when in Vue.extend()
         var Component = Vue.extend({
            data: function () {
               return _obj
            }
         });
         var myComponentInstance = new Component();
         console.log(myComponentInstance.lname);
         console.log(myComponentInstance.$data);
      </script>
   </body>
</html>
對於組件,數據是一個函數,與Vue.extend一起使用,如上圖所示。數據是一個函數。例如,
data: function () {
   return _obj
}
要引用組件中的數據,我們需要創建它的實例。例如,
var myComponentInstance = new Component();
要從數據中獲取詳細信息,我們需要像處理上面的父組件一樣進行操作。例如,
console.log(myComponentInstance.lname);
console.log(myComponentInstance.$data);
以下是瀏覽器中顯示的詳細信息。

Props−Props的類型是字符串或對象的數組。它採用基於數組或基於對象的語法。它們被稱爲用於接受來自父組件的數據的屬性。
Example 1
Vue.component('props-demo-simple', {
   props: ['size', 'myMessage']
})
Example 2
Vue.component('props-demo-advanced', {
   props: {
      // just type check
      height: Number,

      // type check plus other validations
      age: {
         type: Number,
         default: 0,
         required: true,
         validator: function (value) {
            return value >= 0
         }
      }
   }
})
propsData−這用於單元測試。
鍵入字符串數組。例如,{[key:string]:any}。它需要在創建Vue實例期間傳遞。
Example
var Comp = Vue.extend({
   props: ['msg'],
   template: '<div>{{ msg }}</div>'
})
var vm = new Comp({
   propsData: {
      msg: 'hello'
   }
})
計算的−類型:{[key:string]:函數{get:Function,set:Function}
Example
<html>
   <head>
      <title>VueJs Introduction</title>
      <script type = "text/javascript" src = "js/vue.js"></script>
   </head>
   <body>
      <script type = "text/javascript">
         var vm = new Vue({
            data: { a: 2 },
            computed: {

               // get only, just need a function
               aSum: function () {
                  return this.a + 2;
               },

               // both get and set
               aSquare: {
                  get: function () {
                     return this.a*this.a;
                  },
                  set: function (v) {
                     this.a = v*2;
                  }
               }
            }
         })
         console.log(vm.aSquare);  // -> 4
         vm.aSquare = 3;
         console.log(vm.a);       // -> 6
         console.log(vm.aSum); // -> 8
      </script>
   </body>
</html>
Computed有兩個函數aSum和aSquare。
函數aSum只返回this.a+2。函數aSquare再次調用兩個函數:get和set。
變量vm是Vue的一個實例,它調用aSquare和aSum。另外vm.aSquare=3從aSquare調用set函數,vm.aSquare調用get函數。我們可以在瀏覽器中檢查輸出,如下截圖所示。

方法−方法將包含在Vue實例中,如以下代碼所示。我們可以使用Vue對象訪問函數。
<html>
   <head>
      <title>VueJs Introduction</title>
      <script type = "text/javascript" src = "js/vue.js"></script>
   </head>
   <body>
      <script type = "text/javascript">
         var vm = new Vue({
            data: { a: 5 },
            methods: {
               asquare: function () {
                  this.a *= this.a;
               }
            }
         })
         vm.asquare();
         console.log(vm.a); // 25
      </script>
   </body>
</html>
方法是Vue構造函數的一部分。讓我們使用Vue對象調用方法vm.asquare(),屬性a的值在asquare函數中更新。a的值從1更改爲25,在下面的瀏覽器控制台中可以看到相同的值。

VueJS - Template
在前面的章節中,我們學習了如何在螢幕上以文本內容的形式獲得輸出。在本章中,我們將學習如何在螢幕上以HTML模板的形式獲得輸出。
爲了理解這一點,讓我們考慮一個示例並在瀏覽器中查看輸出。
<html>
   <head>
      <title>VueJs Instance</title>
      <script type = "text/javascript" src = "js/vue.js"></script>
   </head>
   <body>
      <div id = "vue_det">
         <h1>Firstname : {{firstname}}</h1>
         <h1>Lastname : {{lastname}}</h1>
         <div>{{htmlcontent}}</div>
      </div>
      <script type = "text/javascript" src = "js/vue_template.js"></script>
   </body>
</html>
vue_template.js
var vm = new Vue({
   el: '#vue_det',
   data: {
      firstname : "Ria",
      lastname  : "Singh",
      htmlcontent : "<div><h1>Vue Js Template</h1></div>"
   }
})
現在,假設我們想在頁面上顯示html內容。如果我們碰巧將它與插值一起使用,即與雙花括號一起使用,這就是我們在瀏覽器中得到的結果。

如果我們看到html內容的顯示方式與變量html content中給出的相同,這不是我們想要的,我們希望它在瀏覽器上以適當的html內容顯示。
爲此,我們必須使用v-html指令。當我們將v-html指令分配給html元素時,VueJS知道它必須將其輸出爲html內容。讓我們在.html文件中添加v-html指令,看看區別。
<html>
   <head>
      <title>VueJs Instance</title>
      <script type = "text/javascript" src = "js/vue.js"></script>
   </head>
   <body>
      <div id = "vue_det">
         <h1>Firstname : {{firstname}}</h1>
         <h1>Lastname : {{lastname}}</h1>
         <div v-html = "htmlcontent"></div>
      </div>
      <script type = "text/javascript" src = "js/vue_template.js"></script>
   </body>
</html>
現在,我們不需要用雙花括號來顯示HTML內容,而是使用了v-HTML=「HTML content」,其中htmlcontent在js文件中定義如下−
var vm = new Vue({
   el: '#vue_det',
   data: {
      firstname : "Ria",
      lastname  : "Singh",
      htmlcontent : "<div><h1>Vue Js Template</h1></div>"
   }
})
瀏覽器中的輸出如下所示−
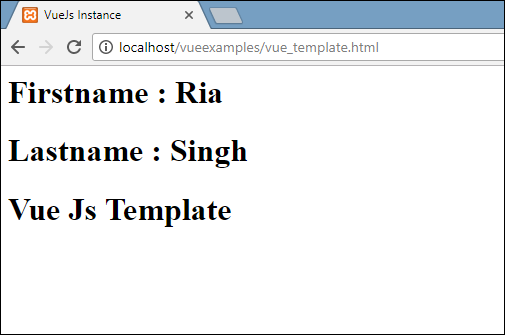
如果我們檢查瀏覽器,我們將看到內容以與.js文件中定義的相同方式添加到變量htmlcontent:「<div><h1>Vue js Template<h1><div>」。
讓我們看看瀏覽器中的inspect元素。

我們已經看到了如何將HTML模板添加到DOM中。現在,我們將看到如何向現有的HTML元素添加屬性。
考慮一下,我們在HTML文件中有一個圖像標記,我們希望分配src,它是Vue的一部分。
Example
<html>
   <head>
      <title>VueJs Instance</title>
      <script type = "text/javascript" src = "js/vue.js"></script>
   </head>
   <body>
      <div id = "vue_det">
         <h1>Firstname : {{firstname}}</h1>
         <h1>Lastname : {{lastname}}</h1>
         <div v-html = "htmlcontent"></div>
         <img src = "" width = "300" height = "250" />
      </div>
      <script type = "text/javascript" src = "js/vue_template1.js"></script>
   </body>
</html>
看上面的img標籤,src是空的。我們需要從vue js向其添加src。讓我們看看怎麼做。我們將img src存儲在.js文件中的數據對象中,如下所示−
var vm = new Vue({
   el: '#vue_det',
   data: {
      firstname : "Ria",
      lastname  : "Singh",
      htmlcontent : "<div><h1>Vue Js Template</h1></div>",
      imgsrc : "images/img.jpg"
   }
})
如果按如下方式分配src,瀏覽器中的輸出將如下面的螢幕截圖所示。
<img src = "{{imgsrc}}" width = "300" height = "250" />
我們得到了一個破碎的圖像。要將任何屬性分配給HMTL標記,我們需要使用v-bind指令。讓我們使用v-bind指令將src添加到圖像中。
這就是它在.html文件中的分配方式。
<html>
   <head>
      <title>VueJs Instance</title>
      <script type = "text/javascript" src = "js/vue.js"></script>
   </head>
   <body>
      <div id = "vue_det">
         <h1>Firstname : {{firstname}}</h1>
         <h1>Lastname : {{lastname}}</h1>
         <div v-html = "htmlcontent"></div>
         <img v-bind:src = "imgsrc" width = "300" height = "250" />
      </div>
      <script type = "text/javascript" src = "js/vue_template1.js"></script>
   </body>
</html>
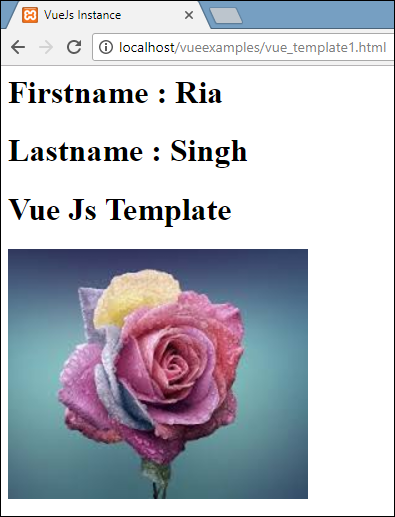
我們需要在src前面加上v-bind:src=「imgsrc」和帶有src的變量名。
以下是瀏覽器中的輸出。
讓我們檢查一下v-bind的src是什麼樣子的。
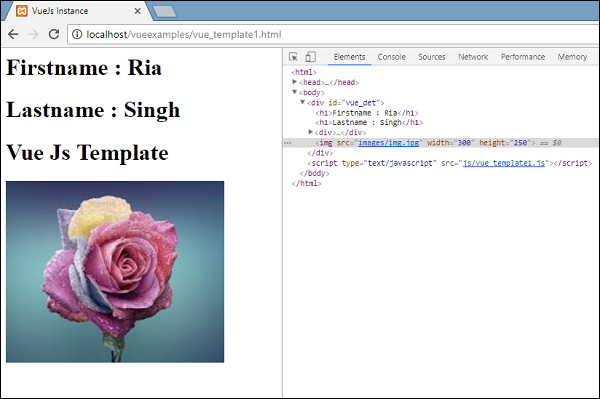
如上面的螢幕截圖所示,src是在沒有任何vuejs屬性的情況下分配給它的。
VueJS - Components
Vue組件是創建可在HTML中重用的自定義元素的VueJS的重要功能之一。
讓我們使用一個示例並創建一個組件,這將更好地了解組件如何與VueJS一起工作。
Example
<html>
   <head>
      <title>VueJs Instance</title>
      <script type = "text/javascript" src = "js/vue.js"></script>
   </head>
   <body>
      <div id = "component_test">
         <testcomponent></testcomponent>
      </div>
      <div id = "component_test1">
         <testcomponent></testcomponent>
      </div>
      <script type = "text/javascript" src = "js/vue_component.js"></script>
   </body>
</html>
vue_組件.js
Vue.component('testcomponent',{
   template : '<div><h1>This is coming from component</h1></div>'
});
var vm = new Vue({
   el: '#component_test'
});
var vm1 = new Vue({
   el: '#component_test1'
});
在.html文件中,我們創建了兩個div,idcomponent_test和component_test1。在上面顯示的.js文件中,使用div id創建了兩個Vue實例。我們已經創建了一個公共組件,用於兩個視圖實例。
要創建組件,語法如下。
Vue.component('nameofthecomponent',{ // options});
創建組件後,組件的名稱將成爲自定義元素,並且可以在創建的Vue實例元素中使用該名稱,即在具有idcomponent\u test和component\u test1的div中使用。
在.js文件中,我們使用了一個測試組件作爲組件的名稱,並使用了相同的名稱作爲div中的自定義元素。
Example
<div id = "component_test">
   <testcomponent></testcomponent>
</div>
<div id = "component_test1">
   <testcomponent></testcomponent>
</div>
在.js文件中創建的組件中,我們添加了一個模板,爲其分配了一個HTML代碼。這是一種註冊全局組件的方法,可以將其作爲任何vue實例的一部分,如下腳本所示。
Vue.component('testcomponent',{
   template : '<div><h1>This is coming from component</h1></div>'
});
執行時,瀏覽器中也會反映同樣的情況。
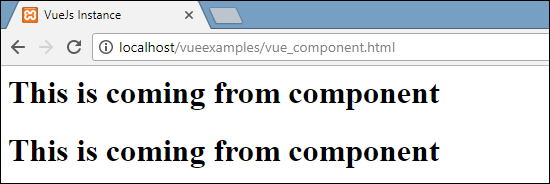
組件被賦予了自定義元素標記,即<testcomponent><testcomponent>。但是,當我們在瀏覽器中檢查相同的內容時,我們不會注意到模板中出現的純HTML格式的自定義標記,如下面的螢幕截圖所示。

我們還直接將組件作爲vue實例的一部分,如下面的腳本所示。
var vm = new Vue({
   el: '#component_test',
   components:{
      'testcomponent': {
         template : '<div><h1>This is coming from component</h1></div>'
      }
   }
});
這稱爲本地註冊,組件將僅是創建的vue實例的一部分。
到目前爲止,我們已經看到了帶有基本選項的基本組件。現在,我們再添加一些選項,比如數據和方法。正如Vue實例有數據和方法一樣,組件也共享相同的數據和方法。因此,我們將擴展代碼,我們已經看到了數據和方法。
Example
<html>
   <head>
      <title>VueJs Instance</title>
      <script type = "text/javascript" src = "js/vue.js"></script>
   </head>
   <body>
      <div id = "component_test">
         <testcomponent></testcomponent>
      </div>
      <div id = "component_test1">
         <testcomponent></testcomponent>
      </div>
      <script type = "text/javascript" src = "js/vue_component.js"></script>
   </body>
</html>
vue_組件.js
Vue.component('testcomponent',{
   template : '<div v-on:mouseover = "changename()" v-on:mouseout = "originalname();"><h1>Custom Component created by <span id = "name">{{name}}</span></h1></div>',
   data: function() {
      return {
         name : "Ria"
      }
   },
   methods:{
      changename : function() {
         this.name = "Ben";
      },
      originalname: function() {
         this.name = "Ria";
      }
   }
});
var vm = new Vue({
   el: '#component_test'
});
var vm1 = new Vue({
   el: '#component_test1'
});
在上面的.js文件中,我們添加了返回對象的函數數據。對象有一個name屬性,該屬性的值爲「Ria」。這在下面的模板中使用。
template : '<div v-on:mouseover = "changename()" v-on:mouseout = "originalname();"><h1>Custom Component created by <span id = "name">{{name}}</span></h1></div>',
儘管組件中有數據作爲函數,但我們可以像使用DirectVue實例一樣使用其屬性。此外,還添加了兩個方法,changename和originalname。在changename中,我們正在更改name屬性,在originalname中,我們正在將其重置回原始名稱。
我們還在div上添加了兩個事件mouseover和mouseout。事件的細節將在事件一章中討論。所以現在,mouseover調用changename方法,mouseout調用originalname方法。
其顯示將顯示在以下瀏覽器中。
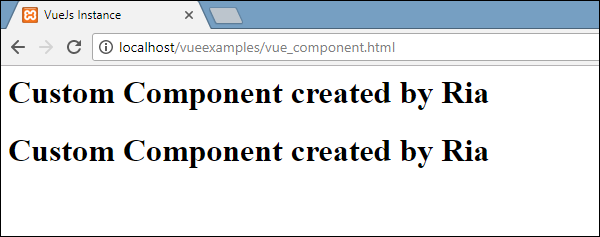
如上面的瀏覽器所示,它顯示在數據屬性中指定的名稱,該名稱是相同的。我們還爲div分配了mouseover事件和mouseout。讓我們看看當我們滑鼠懸停時會發生什麼。

在mouseover上,我們看到第一個組件的名稱更改爲Ben,但是,第二個組件保持原樣。這是因爲數據組件是一個函數,它返回一個對象。因此,當在一個地方更改時,在其他情況下不會覆蓋相同的內容。
Dynamic Components
動態組件是使用關鍵字<component><component>創建的,並使用屬性綁定,如下例所示。
Example
<html>
   <head>
      <title>VueJs Instance</title>
      <script type = "text/javascript" src = "js/vue.js"></script>
   </head>
   <body>
      <div id = "databinding">
         <component v-bind:is = "view"></component>
      </div>
      <script type = "text/javascript">
         var vm = new Vue({
            el: '#databinding',
            data: {
               view: 'component1'
            },
            components: {
               'component1': {
                  template: '<div><span style = "font-size:25;color:red;">Dynamic Component</span></div>'
               }
            }
         });
      </script>
   </body>
</html>
Output

使用以下語法創建動態組件。
<component v-bind:is = "view"></component>
它有v-bind:is=「view」,並爲它分配了一個值視圖。視圖在Vue實例中定義如下。
var vm = new Vue({
   el: '#databinding',
   data: {
      view: 'component1'
   },
   components: {
      'component1': {
         template: '<div><span style = "font-size:25;color:red;">Dynamic Component</span></div>'
      }
   }
});
執行時,瀏覽器中將顯示模板動態組件。
VueJS - Computed Properties
我們已經看到了Vue實例和組件的方法。計算性質類似於方法,但與我們將在本章討論的方法相比有一些差異。
在本章末尾,我們將能夠決定何時使用方法以及何時使用計算屬性。
讓我們用一個例子來理解計算屬性。
Example
<html>
   <head>
      <title>VueJs Instance</title>
      <script type = "text/javascript" src = "js/vue.js"></script>
   </head>
   <body>
      <div id = "computed_props">
         FirstName : <input type = "text" v-model = "firstname" /> <br/><br/>
         LastName : <input type = "text" v-model = "lastname"/> <br/><br/>
         <h1>My name is {{firstname}} {{lastname}}</h1>
         <h1>Using computed method : {{getfullname}}</h1>
      </div>
      <script type = "text/javascript" src = "js/vue_computedprops.js"></script>
   </body>
</html>
vue computeprops.js公司
var vm = new Vue({
   el: '#computed_props',
   data: {
      firstname :"",
      lastname :"",
      birthyear : ""
   },
   computed :{
      getfullname : function(){
         return this.firstname +" "+ this.lastname;
      }
   }
})
在這裡,我們用firstname和lastname創建了.html文件。Firstname和Lastname是一個文本框,使用Firstname和Lastname屬性綁定。
我們調用計算方法getfullname,它返回輸入的名字和姓氏。
computed :{
   getfullname : function(){
      return this.firstname +" "+ this.lastname;
   }
}
當我們在文本框中鍵入時,當屬性firstname或lastname更改時,函數將返回相同的結果。因此,在computed的幫助下,我們不必做任何特定的事情,比如記住調用函數。在computed中,當內部使用的屬性(即firstname和lastname)發生變化時,它會被自己調用。
以下瀏覽器中將顯示相同的內容。在文本框中鍵入,將使用計算函數對其進行更新。

現在,讓我們試著理解方法和計算屬性之間的區別。兩者都是物體。裡面有定義的函數,它返回一個值。
對於方法,我們將其作爲函數調用,並將其作爲屬性計算。使用下面的示例,讓我們了解方法和計算屬性之間的區別。
<html>
   <head>
      <title>VueJs Instance</title>
      <script type = "text/javascript" src = "js/vue.js"></script>
   </head>
   <body>
      <div id = "computed_props">
         <h1 style = "background-color:gray;">Random No from computed property: {{getrandomno}}</h1>
         <h1>Random No from method: {{getrandomno1()}}</h1>
         <h1>Random No from method : {{getrandomno1()}}</h1>
         <h1  style = "background-color:gray;">Random No from computed property: {{getrandomno}}</h1>
         <h1  style = "background-color:gray;">Random No from computed property: {{getrandomno}}</h1>
         <h1  style = "background-color:gray;">Random No from computed
            property: {{getrandomno}}</h1>
         <h1>Random No from method: {{getrandomno1()}}</h1>
         <h1>Random No from method: {{getrandomno1()}}</h1>
      </div>
      <script type = "text/javascript">
         var vm = new Vue({
            el: '#computed_props',
            data: {
               name : "helloworld"
            },
            methods: {
               getrandomno1 : function() {
                  return Math.random();
               }
            },
            computed :{
               getrandomno : function(){
                  return Math.random();
               }
            }
         });
      </script>
   </body>
</html>
在上面的代碼中,我們創建了一個名爲getrandomno1的方法和一個帶有函數getrandomno的計算屬性。兩者都使用Math.random()返回隨機數。
它顯示在瀏覽器中,如下所示。方法和計算屬性被多次調用以顯示差異。
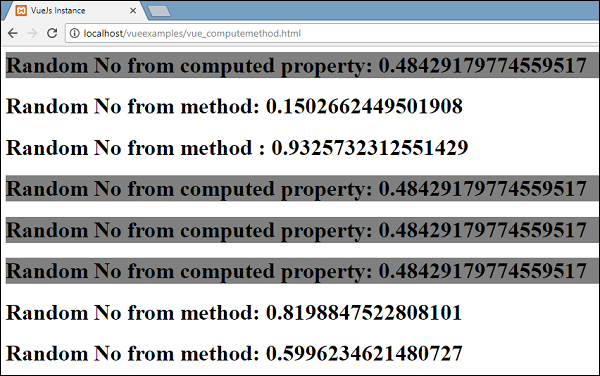
如果我們查看上面的值,我們將看到從computed屬性返回的隨機數保持不變,而不管它被調用的次數。這意味著每次調用它時,最後一個值都會更新。而對於一個方法,它是一個函數,因此,每次調用它都返回一個不同的值。
Get/Set in Computed Properties
在本節中,我們將通過一個示例了解計算屬性中的get/set函數。
Example
<html>
   <head>
      <title>VueJs Instance</title>
      <script type = "text/javascript" src = "js/vue.js"></script>
   </head>
   <body>
      <div id = "computed_props">
         <input type = "text" v-model = "fullname" />
         <h1>{{firstName}}</h1>
         <h1>{{lastName}}</h1>
      </div>
      <script type = "text/javascript">
         var vm = new Vue({
            el: '#computed_props',
            data: {
               firstName : "Terry",
               lastName : "Ben"
            },
            methods: {
            },
            computed :{
               fullname : {
                  get : function() {
                     return this.firstName+" "+this.lastName;
                  }
               }
            }
         });
      </script>
   </body>
</html>
我們定義了一個輸入框,它綁定到全名,這是一個計算屬性。它返回一個名爲get的函數,該函數提供全名,即名字和姓氏。此外,我們還將firstname和lastname顯示爲−
<h1>{{firstName}}</h1>
<h1>{{lastName}}</h1>
讓我們在瀏覽器中檢查一下。

現在,如果我們在文本框中更改名稱,我們將看到相同的內容不會反映在下面螢幕截圖中顯示的名稱中。
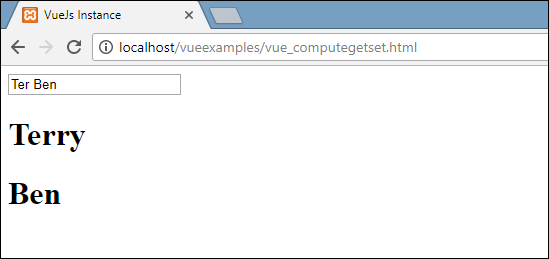
讓我們在fullname computed屬性中添加setter函數。
<html>
   <head>
      <title>VueJs Instance</title>
      <script type = "text/javascript" src = "js/vue.js"></script>
   </head>
   <body>
      <div id = "computed_props">
         <input type = "text" v-model = "fullname" />
         <h1>{{firstName}}</h1>
         <h1>{{lastName}}</h1>
      </div>
      <script type = "text/javascript">
         var vm = new Vue({
            el: '#computed_props',
            data: {
               firstName : "Terry",
               lastName : "Ben"
            },
            methods: {
            },
            computed :{
               fullname : {
                  get : function() {
                     return this.firstName+" "+this.lastName;
                  },
                  set : function(name) {
                     var fname = name.split(" ");
                     this.firstName = fname[0];
                     this.lastName = fname[1]
                  }
               }
            }
         });
      </script>
   </body>
</html>
我們在fullname computed屬性中添加了set函數。
computed :{
   fullname : {
      get : function() {
         return this.firstName+" "+this.lastName;
      },
      set : function(name) {
         var fname = name.split(" ");
         this.firstName = fname[0];
         this.lastName = fname[1]
      }
   }
}
它將名稱作爲參數,這只是文本框中的全名。稍後,它將在空間上拆分,並更新firstname和lastname。現在,當我們運行代碼並編輯文本框時,瀏覽器中將顯示相同的內容。由於set函數,firstname和lastname將被更新。get函數返回firstname和lastname,而set函數則更新它(如果編輯了任何內容)。

現在,文本框中鍵入的內容與上面螢幕截圖中顯示的內容匹配。
VueJS - Watch Property
在本章中,我們將學習手錶的特性。通過一個例子,我們將看到可以在VueJS中使用Watch屬性。
Example
<html>
   <head>
      <title>VueJs Instance</title>
      <script type = "text/javascript" src = "js/vue.js"></script>
   </head>
   <body>
      <div id = "computed_props">
         Kilometers : <input type = "text" v-model = "kilometers">
         Meters : <input type = "text" v-model = "meters">
      </div>
      <script type = "text/javascript">
         var vm = new Vue({
            el: '#computed_props',
            data: {
               kilometers : 0,
               meters:0
            },
            methods: {
            },
            computed :{
            },
            watch : {
               kilometers:function(val) {
                  this.kilometers = val;
                  this.meters = val * 1000;
               },
               meters : function (val) {
                  this.kilometers = val/ 1000;
                  this.meters = val;
               }
            }
         });
      </script>
   </body>
</html>
在上面的代碼中,我們創建了兩個文本框,一個帶有公里,另一個帶有米。在數據屬性中,公里和米初始化爲0。有一個監視對象,它具有兩個功能公里和米。在這兩個函數中,都完成了從公里到米和從米到公里的轉換。
當我們在任何一個文本框中輸入值時,無論更改了哪一個,Watch都會更新這兩個文本框。我們不需要特別分配任何事件,並等待它發生更改,並執行額外的驗證工作。Watch負責用在各個函數中完成的計算更新文本框。
讓我們看看瀏覽器中的輸出。

讓我們在公里文本框中輸入一些值,然後在米文本框中看到它的變化,反之亦然。

現在讓我們輸入米文本框並在公里文本框中看到它的變化。這是在瀏覽器中看到的顯示。

VueJS - Binding
在本章中,我們將學習如何使用VueJS提供的名爲v-bind的綁定指令來操作或分配HTML屬性的值、更改樣式和分配類。
讓我們考慮一個例子來理解爲什麼需要和何時使用v-bind指令進行數據綁定。
Example
<html>
   <head>
      <title>VueJs Instance</title>
      <script type = "text/javascript" src = "js/vue.js"></script>
   </head>
   <body>
      <div id = "databinding">
         {{title}}<br/>
         <a href = "hreflink" target = "_blank"> Click Me </a> <br/>
         <a href = "{{hreflink}}" target = "_blank">Click Me </a>  <br/>
         <a v-bind:href = "hreflink" target = "_blank">Click Me </a>   <br/>
      </div>
      <script type = "text/javascript">
         var vm = new Vue({
            el: '#databinding',
            data: {
               title : "DATA BINDING",
               hreflink : "http://www.google.com"
            }
         });
      </script>
   </body>
</html>
在上面的例子中,我們顯示了一個title變量和三個錨連結。我們還從數據對象中爲href分配了一個值。
現在,如果我們檢查瀏覽器中的輸出並檢查,我們將看到前兩個錨定連結沒有正確的ref,如下面的螢幕截圖所示。
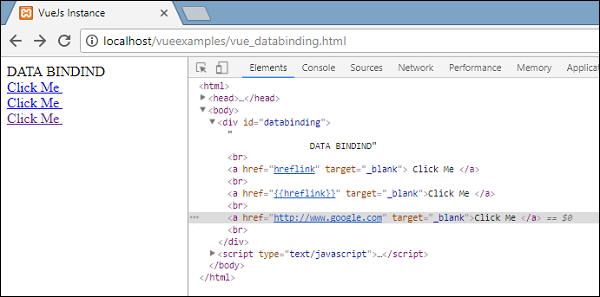
第一個clickme顯示的是hreflink,第二個顯示的是{{hreflink},而最後一個顯示的是我們需要的正確的url。
因此,要將值賦給HTML屬性,我們需要將其與指令v-bind綁定,如下所示。
<a v-bind:href = "hreflink" target = "_blank">Click Me </a>
VueJS還提供了v-bind的速記法,如下所示。
<a :href = "hreflink" target = "_blank">Click Me </a>
如果我們在瀏覽器中看到inspect元素,錨標記不會顯示v-bind屬性,但是它會顯示純HTML。當我們輸入DOM時,沒有看到任何VueJS屬性。
Binding HTML Classes
要綁定HTML類,我們需要使用v-bind:class。讓我們考慮一個例子並在其中綁定類。
Example
<html>
   <head>
      <title>VueJs Instance</title>
      <script type = "text/javascript" src = "js/vue.js"></script>
   </head>
   <body>
      <style>
         .active {
            background: red;
         }
      </style>
      <div id = "classbinding">
         <div v-bind:class = "{active:isactive}"><b>{{title}}</b></div>
      </div>
      <script type = "text/javascript">
         var vm = new Vue({
            el: '#classbinding',
            data: {
               title : "CLASS BINDING",
               isactive : true
            }
         });
      </script>
   </body>
</html>
有一個用v-bind:class={active:isactive}創建的div。
這裡,isactive是一個基於true或false的變量。它將把類active應用到div。在data對象中,我們將isactive變量賦值爲true。在樣式中定義了一個類。active的背景色爲紅色。
如果變量isactive爲true,則將應用顏色,否則不應用。以下是瀏覽器中的輸出。
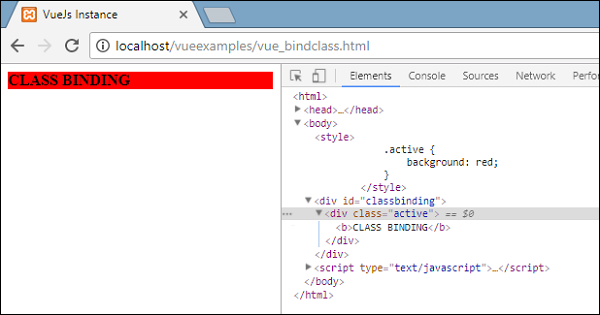
在上面的顯示中,我們可以看到背景色是紅色的。class=「active」應用於div。
現在,讓我們將變量的值更改爲false並查看輸出。變量isactive更改爲false,如下代碼所示。
<html>
   <head>
      <title>VueJs Instance</title>
      <script type = "text/javascript" src = "js/vue.js"></script>
   </head>
   <body>
      <style>
         .active {
            background: red;
         }
      </style>
      <div id = "classbinding">
         <div v-bind:class = "{active:isactive}"><b>{{title}}</b></div>
      </div>
      <script type = "text/javascript">
         var vm = new Vue({
            el: '#classbinding',
            data: {
               title : "CLASS BINDING",
               isactive : false
            }
         });
      </script>
   </body>
</html>
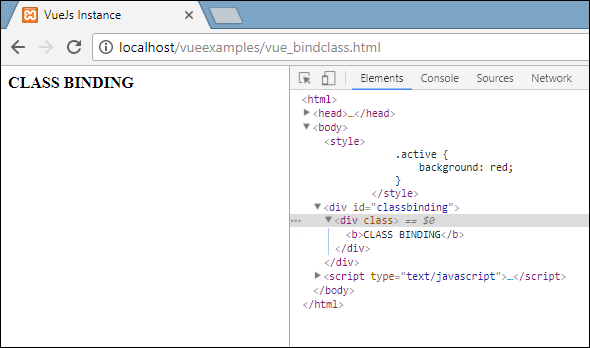
在上面的顯示中,我們可以看到活動類沒有應用到div。
我們還可以使用v-bind屬性爲HTML標記分配多個類。
Example
<html>
   <head>
      <title>VueJs Instance</title>
      <script type = "text/javascript" src = "js/vue.js"></script>
   </head>
   <body>
      <style>
         .info {
            color: #00529B;
            background-color: #BDE5F8;
         }
         div {
            margin: 10px 0;
            padding: 12px;
         }
         .active {
            color: #4F8A10;
            background-color: #DFF2BF;
         }
         .displayError{
            color: #D8000C;
            background-color: #FFBABA;
         }
      </style>
      <div id = "classbinding">
         <div class = "info"  v-bind:class = "{ active: isActive, 'displayError': hasError }">
            {{title}}
         </div>
      </div>
      <script type = "text/javascript">
         var vm = new Vue({
            el: '#classbinding',
            data: {
               title : "This is class binding example",
               isActive : false,
               hasError : false
            }
         });
      </script>
   </body>
</html>
對於上面代碼中的div,我們應用了一個普通類,例如class=「info」。基於isActive和hasError變量,其他類將應用於div。
Output

這是一個應用的普通類。兩個變量都是假的。我們將設爲active變量爲true並查看輸出。
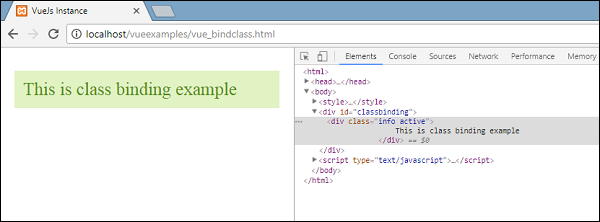
在上面的顯示中,在DOM中我們可以看到分配給div的兩個類info和active。讓我們將hasError變量設爲true,並將isActive設爲false。

現在,當我們在上面的顯示中看到時,info和displayError類被應用到div中,這就是我們如何根據條件應用多個類的方法。
我們也可以將類作爲數組傳遞。讓我們舉個例子來理解這一點。
Example
<html>
   <head>
      <title>VueJs Instance</title>
      <script type = "text/javascript" src = "js/vue.js"></script>
   </head>
   <body>
      <style>
         .info {
            color: #00529B;
            background-color: #BDE5F8;
         }
         div {
            margin: 10px 0;
            padding: 12px;
            font-size : 25px;
         }
         .active {
            color: #4F8A10;
            background-color: #DFF2BF;
         }
         .displayError{
            color: #D8000C;
            background-color: #FFBABA;
         }
      </style>
      <div id = "classbinding">
         <div v-bind:class = "[infoclass, errorclass]">{{title}}</div>
      </div>
      <script type = "text/javascript">
         var vm = new Vue({
            el: '#classbinding',
            data: {
               title : "This is class binding example",
               infoclass : 'info',
               errorclass : 'displayError'
            }
         });
      </script>
   </body>
</html>
Output

正如我們在上面看到的,兩個類都被應用到div。讓我們使用一個變量,並基於變量的值,分配這個類。
<html>
   <head>
      <title>VueJs Instance</title>
      <script type = "text/javascript" src = "js/vue.js"></script>
   </head>
   <body>
      <style>
         .info {
            color: #00529B;
            background-color: #BDE5F8;
         }
         div {
            margin: 10px 0;
            padding: 12px;
            font-size : 25px;
         }
         .active {
            color: #4F8A10;
            background-color: #DFF2BF;
         }
         .displayError{
            color: #D8000C;
            background-color: #FFBABA;
         }
      </style>
      <div id = "classbinding">
         <div v-bind:class = "[isActive ? infoclass : '', haserror ? errorclass : '']">{{title}}</div>
      </div>
      <script type = "text/javascript">
         var vm = new Vue({
            el: '#classbinding',
            data: {
               title : "This is class binding example",
               infoclass : 'info',
               errorclass : 'displayError',
               isActive : true,
               haserror : false
            }
         });
      </script>
   </body>
</html>
我們使用了兩個變量isActive和haserror,這兩個變量用於div while類綁定,如下div標記所示。
<div v-bind:class = "[isActive ? infoclass : '', haserror ? errorclass : '']">{{title}}</div>
如果isActive爲true,則將爲其分配infoclass。haserror也是如此,如果它是真的,那麼只有errorClass將應用於它。

現在,讓我們將haserror變量設爲true,將isActive變量設爲false。

我們現在將爲組件中的類添加v-bind。在下面的示例中,我們向組件模板和組件添加了一個類。
Example
<html>
   <head>
      <title>VueJs Instance</title>
      <script type = "text/javascript" src = "js/vue.js"></script>
   </head>
   <body>
      <style>
         .info {
            color: #00529B;
            background-color: #BDE5F8;
         }
         div {
            margin: 10px 0;
            padding: 12px;
            font-size : 25px;
         }
         .active {
            color: #4F8A10;
            background-color: #DFF2BF;
         }
         .displayError{
            color: #D8000C;
            background-color: #FFBABA;
         }
      </style>
      <div id = "classbinding">
         <new_component class = "active"></new_component>
      </div>
      <script type = "text/javascript">
         var vm = new Vue({
            el: '#classbinding',
            data: {
               title : "This is class binding example",
               infoclass : 'info',
               errorclass : 'displayError',
               isActive : false,
               haserror : true
            },
            components:{
               'new_component' : {
                  template : '<div class = "info">Class Binding for component</div>'
               }
            }
         });
      </script>
   </body>
</html>
以下是瀏覽器中的輸出。 It applies both the classes to final div.
<div class = 」info active」></div>

根據true/false在component部分添加一個變量以顯示。
<html>
   <head>
      <title>VueJs Instance</title>
      <script type = "text/javascript" src = "js/vue.js"></script>
   </head>
   <body>
      <style>
         .info {
            color: #00529B;
            background-color: #BDE5F8;
         }
         div {
            margin: 10px 0;
            padding: 12px;
            font-size : 25px;
         }
         .active {
            color: #4F8A10;
            background-color: #DFF2BF;
         }
         .displayError{
            color: #D8000C;
            background-color: #FFBABA;
         }
      </style>
      <div id = "classbinding">
         <new_component v-bind:class = "{active:isActive}"></new_component>
      </div>
      <script type = "text/javascript">
         var vm = new Vue({
            el: '#classbinding',
            data: {
               title : "This is class binding example",
               infoclass : 'info',
               errorclass : 'displayError',
               isActive : false,
               haserror : true
            },
            components:{
               'new_component' : {
                  template : '<div class = "info">Class Binding for component</div>'
               }
            }
         });
      </script>
   </body>
</html>
由於變量爲false,因此不應用活動類,而應用info類,如下面的螢幕截圖所示。

Binding Inline Styles
Object Syntax
示例
<html>
   <head>
      <title>VueJs Instance</title>
      <script type = "text/javascript" src = "js/vue.js"></script>
   </head>
   <body>
      <div id = "databinding">
         <div v-bind:style = "{ color: activeColor, fontSize: fontSize + 'px' }">{{title}}</div>
      </div>
      <script type = "text/javascript">
         var vm = new Vue({
            el: '#databinding',
            data: {
               title : "Inline style Binding",
               activeColor: 'red',
               fontSize :'30'
            }
         });
      </script>
   </body>
</html>
輸出

在上面的示例中,對於div,應用樣式並從數據對象獲取數據。
<div v-bind:style = "{ color: activeColor, fontSize: fontSize + 'px' }">{{title}}</div>
data: {
   title : "Inline style Binding",
   activeColor: 'red',
   fontSize :'30'
}
我們也可以通過將所有值賦給一個變量,然後將變量賦給div來完成同樣的工作。
示例
<html>
   <head>
      <title>VueJs Instance</title>
      <script type = "text/javascript" src = "js/vue.js"></script>
   </head>
   <body>
      <div id = "databinding">
         <div v-bind:style = "styleobj">{{title}}</div>
      </div>
      <script type = "text/javascript">
         var vm = new Vue({
            el: '#databinding',
            data: {
               title : "Inline style Binding",
               styleobj : {
                  color: 'red',
                  fontSize :'40px'
               }
            }
         });
      </script>
   </body>
</html>
顏色和字體大小被分配給名爲styleobj的對象,而相同的被分配給div。
<div v-bind:style = "styleobj">{{title}}</div>
輸出

Form Input Bindings
到目前爲止,在我們創建的示例中,我們已經看到v-model將輸入文本元素和值綁定到指定的變量。讓我們在這一節了解更多。
Example
<html>
   <head>
      <title>VueJs Instance</title>
      <script type = "text/javascript" src = "js/vue.js"></script>
   </head>
   <body>
      <div id = "databinding">
         <h3>TEXTBOX</h3>
         <input  v-model = "name" placeholder = "Enter Name" />
         <h3>Name entered is : {{name}}</h3>
         <hr/>
         <h3>Textarea</h3>
         <textarea v-model = "textmessage" placeholder = "Add Details"></textarea>
         <h1><p>{{textmessage}}</p></h1>
         <hr/>
         <h3>Checkbox</h3>
         <input type = "checkbox" id = "checkbox" v-model = "checked"> {{checked}}
      </div>
      <script type = "text/javascript">
         var vm = new Vue({
            el: '#databinding',
            data: {
               name:'',
               textmessage:'',
               checked : false
            }
         });
      </script>
   </body>
</html>
無論我們在文本框中鍵入什麼,都將顯示在下面。v-model被分配值名,名稱顯示在{{name}中,其中顯示文本框中鍵入的內容。
Output
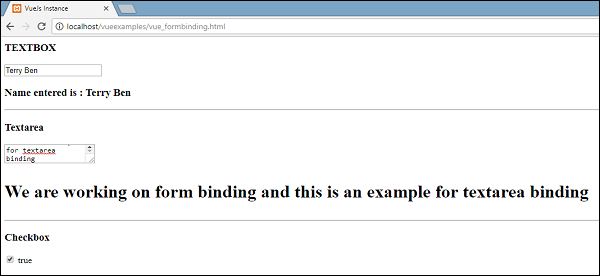
讓我們看看更多的例子和如何使用它。
Radio and Select
示例
<html>
   <head>
      <title>VueJs Instance</title>
      <script type = "text/javascript" src = "js/vue.js"></script>
   </head>
   <body>
      <div id = "databinding">
         <h3>Radio</h3>
         <input type = "radio" id = "black" value = "Black" v-model = "picked">Black
         <input type = "radio" id = "white" value = "White" v-model = "picked">White
         <h3>Radio element clicked : {{picked}} </h3>
         <hr/>
         <h3>Select</h3>
         <select v-model = "languages">
            <option disabled value = "">Please select one</option>
            <option>Java</option>
            <option>Javascript</option>
            <option>Php</option>
            <option>C</option>
            <option>C++</option>
         </select>
         <h3>Languages Selected is : {{ languages }}</h3>
         <hr/>
      </div>
      <script type = "text/javascript">
         var vm = new Vue({
            el: '#databinding',
            data: {
               picked : 'White',
               languages : "Java"
            }
         });
      </script>
   </body>
</html>
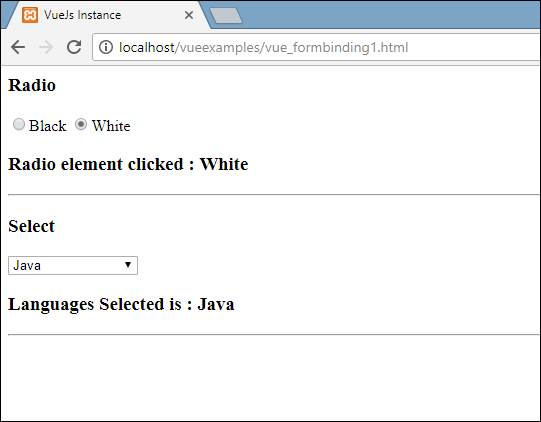
輸出
Modifiers
我們在示例中使用了三個修飾符-trim、number和lazy。
示例
<html>
   <head>
      <title>VueJs Instance</title>
      <script type = "text/javascript" src = "js/vue.js"></script>
   </head>
   <body>
      <div id = "databinding">
         <span style = "font-size:25px;">Enter Age:</span> <input v-model.number = "age" type = "number">
         <br/>
         <span style = "font-size:25px;">Enter Message:</span> <input v-model.lazy = "msg">
         <h3>Display Message : {{msg}}</h3>
         <br/>
         <span style = "font-size:25px;">Enter Message : </span><input v-model.trim = "message">
         <h3>Display Message : {{message}}</h3>
      </div>
      <script type = "text/javascript">
         var vm = new Vue({
            el: '#databinding',
            data: {
               age : 0,
               msg: '',
               message : ''
            }
         });
      </script>
   </body>
</html>
輸出
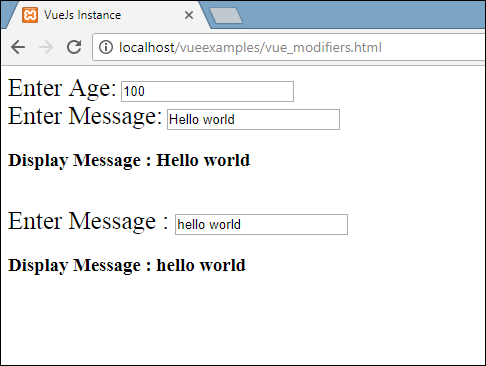
數字修改器只允許輸入數字。除了數字,它不需要任何其他輸入。
<span style = "font-size:25px;">Enter Age:</span> <input v-model.number = "age" type = "number">
惰性修飾符在完全輸入文本框並用戶離開文本框後,將顯示文本框中的內容。
<span style = "font-size:25px;">Enter Message:</span> <input v-model.lazy = "msg">
修剪修改器將刪除在開始和結束處輸入的任何空格。
<span style = "font-size:25px;">Enter Message : </span><input v-model.trim = "message">
VueJS - Events
v-on是添加到DOM元素的屬性,用於監聽VueJS中的事件。
Click Event
Example
<html>
   <head>
      <title>VueJs Instance</title>
      <script type = "text/javascript" src = "js/vue.js"></script>
   </head>
   <body>
      <div id = "databinding">
         <button v-on:click = "displaynumbers">Click ME</button>
         <h2> Add Number 100 + 200 = {{total}}</h2>
      </div>
      <script type = "text/javascript">
         var vm = new Vue({
            el: '#databinding',
            data: {
               num1: 100,
               num2 : 200,
               total : ''
            },
            methods : {
               displaynumbers : function(event) {
                  console.log(event);
                  return this.total =  this.num1+ this.num2;
               }
            },
         });
      </script>
   </body>
</html>
Output
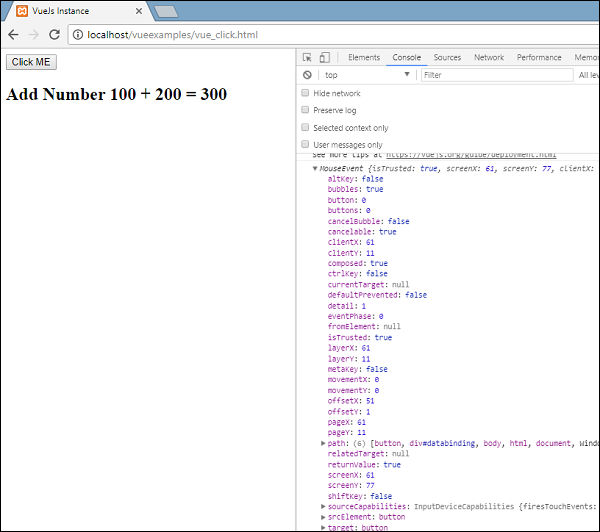
下面的代碼用於爲DOM元素分配一個click事件。
<button v-on:click = "displaynumbers">Click ME</button>
有一個v-on的簡寫,這意味著我們也可以將事件稱爲-;
<button @click = "displaynumbers">Click ME</button>
單擊按鈕時,它將調用方法「displaynumbers」,該方法接受事件,我們已在瀏覽器中對其進行了如上所示的安慰。
我們現在再檢查一個活動滑鼠懸停滑鼠懸停。
Example
<html>
   <head>
      <title>VueJs Instance</title>
      <script type = "text/javascript" src = "js/vue.js"></script>
   </head>
   <body>
      <div id = "databinding">
         <div v-bind:style = "styleobj" v-on:mouseover = "changebgcolor" v-on:mouseout = "originalcolor"></div>
      </div>
      <script type = "text/javascript">
         var vm = new Vue({
            el: '#databinding',
            data: {
               num1: 100,
               num2 : 200,
               total : '',
               styleobj : {
                  width:"100px",
                  height:"100px",
                  backgroundColor:"red"
               }
            },
            methods : {
               changebgcolor : function() {
                  this.styleobj.backgroundColor = "green";
               },
               originalcolor : function() {
                  this.styleobj.backgroundColor = "red";
               }
            },
         });
      </script>
   </body>
</html>
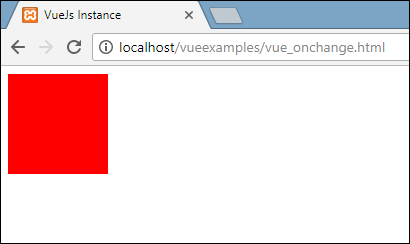
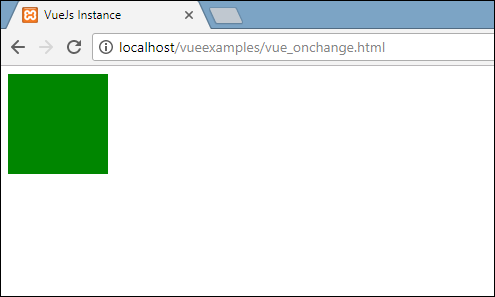
在上面的例子中,我們創建了一個寬度和高度爲100px的div。它的背景色是紅色。在滑鼠懸停時,我們將顏色改爲綠色,在滑鼠懸停時,我們將顏色改回紅色。
因此,在mouseover期間,一個方法被稱爲changebgcolor,一旦我們將滑鼠移出div,一個方法就被稱爲originalcolor。
這是按以下方式進行的&負;
<div v-bind:style = "styleobj" v-on:mouseover = "changebgcolor" v-on:mouseout = "originalcolor"></div>
兩個事件mouseover和mouseout被分配給div,如上圖所示。我們已經創建了一個styleobj變量,並給出了分配給div所需的樣式。使用v-bind:style=「styleobj」將相同的變量綁定到div
在changebgcolor中,我們使用以下代碼將顏色更改爲綠色。
changebgcolor : function() {
   this.styleobj.backgroundColor = "green";
}
使用stylobj變量,我們將顏色更改爲綠色。
類似地,下面的代碼用於將其更改回原始顏色。
originalcolor : function() {
   this.styleobj.backgroundColor = "red";
}
這就是我們在瀏覽器中看到的。
滑鼠懸停時,顏色將變爲綠色,如下圖所示。
Event Modifiers
Vue在v-on屬性上有可用的事件修飾符。以下是可用的修飾符−
.once
只允許事件執行一次。
Syntax
<button v-on:click.once = "buttonclicked">Click Once</button>
我們需要在調用修飾符時添加點運算符,如上面的語法所示。讓我們在一個例子中使用它,並理解once修飾符的工作原理。
Example
<html>
   <head>
      <title>VueJs Instance</title>
      <script type = "text/javascript" src = "js/vue.js"></script>
   </head>
   <body>
      <div id = "databinding">
         <button v-on:click.once = "buttonclickedonce" v-bind:style = "styleobj">Click Once</button>
         Output:{{clicknum}}
         <br/><br/>
         <button v-on:click = "buttonclicked"  v-bind:style = "styleobj">Click Me</button>
         Output:{{clicknum1}}
      </div>
      <script type = "text/javascript">
         var vm = new Vue({
            el: '#databinding',
            data: {
               clicknum : 0,
               clicknum1 :0,
               styleobj: {
                  backgroundColor: '#2196F3!important',
                  cursor: 'pointer',
                  padding: '8px 16px',
                  verticalAlign: 'middle',
               }
            },
            methods : {
               buttonclickedonce : function() {
                  this.clicknum++;
               },
               buttonclicked : function() {
                  this.clicknum1++;
               }
            }
         });
      </script>
   </body>
</html>
Output
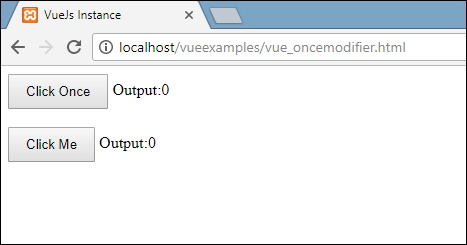
在上面的例子中,我們創建了兩個Buttons。帶有「單擊一次」標籤的按鈕添加了「一次」修改器,而另一個按鈕沒有任何修改器。這就是按鈕的定義方式。
<button v-on:click.once = "buttonclickedonce" v-bind:style = "styleobj">Click Once</button>
<button v-on:click = "buttonclicked"  v-bind:style = "styleobj">Click Me</button>
第一個按鈕調用方法「buttonclickedonce」,第二個按鈕調用方法「buttonclicked」。
buttonclickedonce : function() {
   this.clicknum++;
},
buttonclicked : function() {
   this.clicknum1++;
}
clicknum和clicknum1中定義了兩個變量。單擊按鈕時,兩者都將遞增。兩個變量都初始化爲0,顯示在上面的輸出中。
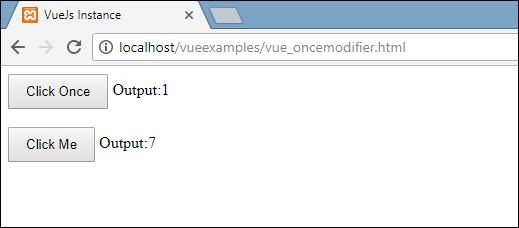
單擊第一個按鈕時,變量clicknum增加1。在第二次單擊時,數字不會遞增,因爲修改器阻止它執行或執行在單擊按鈕時指定的任何操作項。
單擊第二個按鈕,執行相同的操作,即變量遞增。每次單擊時,值都會遞增並顯示。
下面是我們在瀏覽器中得到的輸出。
.prevent
語法
<a href = "http://www.google.com" v-on:click.prevent = "clickme">Click Me</a>
示例
<html>
   <head>
      <title>VueJs Instance</title>
      <script type = "text/javascript" src = "js/vue.js"></script>
   </head>
   <body>
      <div id = "databinding">
         <a href = "http://www.google.com" v-on:click = "clickme" target = "_blank" v-bind:style = "styleobj">Click Me</a>
      </div>
      <script type = "text/javascript">
         var vm = new Vue({
            el: '#databinding',
            data: {
               clicknum : 0,
               clicknum1 :0,
               styleobj: {
                  color: '#4CAF50',
                  marginLeft: '20px',
                  fontSize: '30px'
               }
            },
            methods : {
               clickme : function() {
                  alert("Anchor tag is clicked");
               }
            }
         });
      </script>
   </body>
</html>
輸出
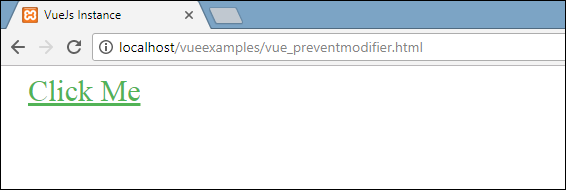
如果我們單擊clickme連結,它將發送一個警報,顯示爲「Anchor tag is clicked」(錨標記已單擊),並將在新選項卡中打開連結https://www.google.comhttps://www.google.com,如以下螢幕截圖所示。


Now this works as a normal way, i.e. the link opens up as we want. In case we don』t want the link to open up, we need to add a modifier 『prevent』 to the event as shown in the following code.
<a href = "http://www.google.com" v-on:click.prevent = "clickme" target = "_blank" v-bind:style = "styleobj">Click Me</a>
Once added, if we click on the button, it will send an alert message and will not open the link anymore. The prevent modifier prevents the link from opening and only executes the method assigned to the tag.
示例
<html>
   <head>
      <title>VueJs Instance</title>
      <script type = "text/javascript" src = "js/vue.js"></script>
   </head>
   <body>
      <div id = "databinding">
         <a href = "http://www.google.com" v-on:click.prevent = "clickme" target = "_blank" v-bind:style = "styleobj">Click Me</a>
      </div>
      <script type = "text/javascript">
         var vm = new Vue({
            el: '#databinding',
            data: {
               clicknum : 0,
               clicknum1 :0,
               styleobj: {
                  color: '#4CAF50',
                  marginLeft: '20px',
                  fontSize: '30px'
               }
            },
            methods : {
               clickme : function() {
                  alert("Anchor tag is clicked");
               }
            }
         });
      </script>
   </body>
</html>
輸出

On the click of the link, it will display the alert message and does not open the url anymore.
Event - Key Modifiers
VueJS offers key modifiers based on which we can control the event handling. Consider we have a textbox and we want the method to be called only when we press Enter. We can do so by adding key modifiers to the events as follows.
Syntax
<input type = "text" v-on:keyup.enter = "showinputvalue"/>
The key that we want to apply to our event is V-on.eventname.keyname (as shown above)
We can make use of multiple keynames. For example, V-on.keyup.ctrl.enter
Example
<html>
   <head>
      <title>VueJs Instance</title>
      <script type = "text/javascript" src = "js/vue.js"></script>
   </head>
   <body>
      <div id = "databinding">
         <input type = "text" v-on:keyup.enter = "showinputvalue" v-bind:style = "styleobj" placeholder = "Enter your name"/>
         <h3> {{name}}</h3>
      </div>
      <script type = "text/javascript">
         var vm = new Vue({
            el: '#databinding',
            data: {
               name:'',
               styleobj: {
                  width: "30%",
                  padding: "12px 20px",
                  margin: "8px 0",
                  boxSizing: "border-box"
               }
            },
            methods : {
               showinputvalue : function(event) {
                  this.name=event.target.value;
               }
            }
         });
      </script>
   </body>
</html>
Output

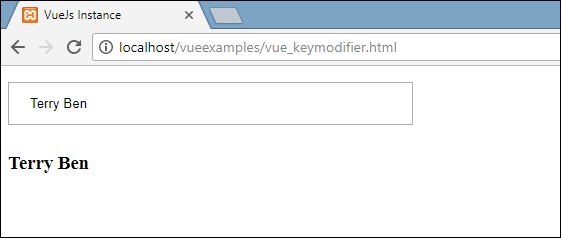
Type something in the textbox and we will see it is displayed only when we press Enter.
Custom Events
Parent can pass data to its component using the prop attribute, however, we need to tell the parent when there are changes in the child component. For this, we can use custom events.
The parent component can listen to the child component event using v-on attribute.
Example
<html>
   <head>
      <title>VueJs Instance</title>
      <script type = "text/javascript" src = "js/vue.js"></script>
   </head>
   <body>
      <div id = "databinding">
         <div id = "counter-event-example">
            <p style = "font-size:25px;">Language displayed : <b>{{ languageclicked }}</b></p>
            <button-counter
            v-for = "(item, index) in languages"
            v-bind:item = "item"
            v-bind:index = "index"
            v-on:showlanguage = "languagedisp"></button-counter>
         </div>
      </div>
      <script type = "text/javascript">
         Vue.component('button-counter', {
            template: '<button v-on:click = "displayLanguage(item)"><span style = "font-size:25px;">{{ item }}</span></button>',
            data: function () {
               return {
                  counter: 0
               }
            },
            props:['item'],
            methods: {
               displayLanguage: function (lng) {
                  console.log(lng);
                  this.$emit('showlanguage', lng);
               }
            },
         });
         var vm = new Vue({
            el: '#databinding',
            data: {
               languageclicked: "",
               languages : ["Java", "PHP", "C++", "C", "Javascript", "C#", "Python", "HTML"]
            },
            methods: {
               languagedisp: function (a) {
                  this.languageclicked = a;
               }
            }
         })
      </script>
   </body>
</html>
Output

The above code shows the data transfer between the parent component and the child component.
The component is created using the following code.
<button-counter
   v-for = "(item, index) in languages"
   v-bind:item = "item"
   v-bind:index = "index"
   v-on:showlanguage = "languagedisp">
</button-counter>
有一個v-for屬性,它將與languages數組一起循環。數組中有一個語言列表。我們需要將詳細信息發送給子組件。數組的值存儲在項和索引中。
v-bind:item = "item"
v-bind:index = "index"
要引用數組的值,我們需要首先將其綁定到變量,然後使用props屬性引用varaiable,如下所示。
Vue.component('button-counter', {
   template: '<button v-on:click = "displayLanguage(item)"><span style = "font-size:25px;">{{ item }}</span></button>',
   data: function () {
      return {
         counter: 0
      }
   },
   props:['item'],
   methods: {
      displayLanguage: function (lng) {
         console.log(lng);
         this.$emit('showlanguage', lng);
      }
   },
});
props屬性包含數組形式的項。我們也可以把指數稱爲負;
props:[『item』, 『index』]
還有一個事件添加到組件中,如下所示−
<button-counter
   v-for = "(item, index) in languages"
   v-bind:item = "item"
   v-bind:index = "index"
   v-on:showlanguage = "languagedisp">
</button-counter>
事件的名稱是showlanguage,它調用在Vue實例中定義的名爲languagedisp的方法。
在組件中,模板定義如下−
template: '<button v-on:click = "displayLanguage(item)"><span style = "font-size:25px;">{{ item }}</span></button>',
創建了一個按鈕。將使用語言數組中的相同計數創建按鈕。單擊按鈕時,有一個名爲displayLanguage的方法,單擊的按鈕項作爲參數傳遞給函數。現在組件需要將單擊的元素髮送到父組件進行顯示,如下所示−
Vue.component('button-counter', {
   template: '<button v-on:click = "displayLanguage(item)"><span style = "font-size:25px;">{{ item }}</span></button>',
   data: function () {
      return {
         counter: 0
      }
   },
   props:['item'],
   methods: {
      displayLanguage: function (lng) {
         console.log(lng);
         this.$emit('showlanguage', lng);
      }
   },
});
方法displayLanguage調用this.$emit('showlanguage',lng)
$emit用於調用父組件方法。showlanguage方法是在v-on組件上給定的事件名。
<button-counter
   v-for = "(item, index) in languages"
   v-bind:item = "item"
   v-bind:index = "index"
   v-on:showlanguage = "languagedisp">
</button-counter>
我們正在傳遞一個參數,即單擊的語言名稱到主父Vue實例的方法,該方法定義如下。
var vm = new Vue({
   el: '#databinding',
   data: {
      languageclicked: "",
      languages : ["Java", "PHP", "C++", "C", "Javascript", "C#", "Python", "HTML"]
   },
   methods: {
      languagedisp: function (a) {
         this.languageclicked = a;
      }
   }
})
在這裡,emit觸發showlanguage,進而從Vue實例方法調用languagedisp。它將語言單擊值分配給變量languageclicked,並在瀏覽器中顯示,如下面的螢幕截圖所示。
<p style = "font-size:25px;">Language displayed : <b>{{ languageclicked }}</b></p>
下面是我們在瀏覽器中得到的輸出。

VueJS - Rendering
在本章中,我們將學習條件呈現和列表呈現。在條件呈現中,我們將討論如何使用if、if else、if else if、show等。在列表呈現中,我們將討論如何使用for循環。
Conditional Rendering
讓我們開始並首先處理一個示例來解釋條件呈現的細節。對於條件呈現,我們只希望在滿足條件時輸出,並且條件檢查是在if、if else、if else if、show等幫助下完成的。
v-if
示例
<html>
   <head>
      <title>VueJs Instance</title>
      <script type = "text/javascript" src = "js/vue.js"></script>
   </head>
   <body>
      <div id = "databinding">
         <button v-on:click = "showdata" v-bind:style = "styleobj">Click Me</button>
         <span style = "font-size:25px;"><b>{{show}}</b></span>
         <h1 v-if = "show">This is h1 tag</h1>
         <h2>This is h2 tag</h2>
      </div>
      <script type = "text/javascript">
         var vm = new Vue({
            el: '#databinding',
            data: {
               show: true,
               styleobj: {
                  backgroundColor: '#2196F3!important',
                  cursor: 'pointer',
                  padding: '8px 16px',
                  verticalAlign: 'middle',
               }
            },
            methods : {
               showdata : function() {
                  this.show = !this.show;
               }
            },
         });
      </script>
   </body>
</html>
輸出
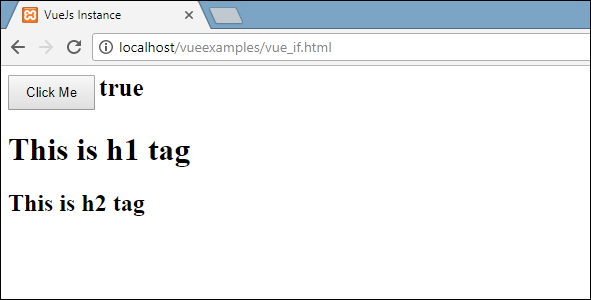
在上面的例子中,我們用消息創建了一個按鈕和兩個h1標記。
一個名爲show的變量被聲明並初始化爲一個值true。它顯示在按鈕附近。單擊按鈕時,我們將調用一個方法showdata,該方法將切換變量show的值。這意味著單擊按鈕時,變量show的值將從true更改爲false,並從false更改爲true。
我們已經將if分配給h1標記,如下面的代碼片段所示。
<button v-on:click = "showdata" v-bind:style = "styleobj">Click Me</button>
<h1 v-if = "show">This is h1 tag</h1>
現在它要做的是,檢查變量show的值,如果它是真的,則顯示h1標記。單擊按鈕並在瀏覽器中查看,當「顯示變量」的值更改爲false時,h1標記不會顯示在瀏覽器中。僅當show變量爲true時才顯示。
以下是瀏覽器中的顯示。
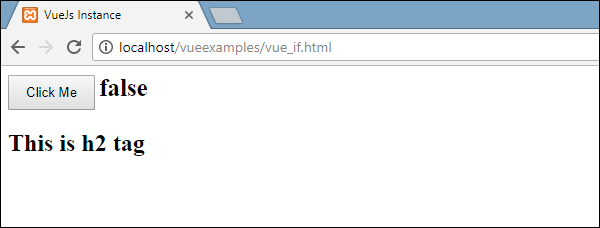
如果我們簽入瀏覽器,這就是當show爲false時得到的結果。

當變量show設置爲false時,h1標記將從DOM中移除。

這就是我們在變量爲真時看到的。
v-else
在下面的示例中,我們將v-else添加到第二個h1標記中。
示例
<html>
   <head>
      <title>VueJs Instance</title>
      <script type = "text/javascript" src = "js/vue.js"></script>
   </head>
   <body>
      <div id = "databinding">
         <button v-on:click = "showdata" v-bind:style = "styleobj">Click Me</button>
         <span style = "font-size:25px;"><b>{{show}}</b></span>
         <h1 v-if = "show">This is h1 tag</h1>
         <h2 v-else>This is h2 tag</h2>
      </div>
      <script type = "text/javascript">
         var vm = new Vue({
            el: '#databinding',
            data: {
               show: true,
               styleobj: {
                  backgroundColor: '#2196F3!important',
                  cursor: 'pointer',
                  padding: '8px 16px',
                  verticalAlign: 'middle',
               }
            },
            methods : {
               showdata : function() {
                  this.show = !this.show;
               }
            },
         });
      </script>
   </body>
</html>
使用以下代碼段添加v-else。
<h1 v-if = "show">This is h1 tag</h1>
<h2 v-else>This is h2 tag</h2>
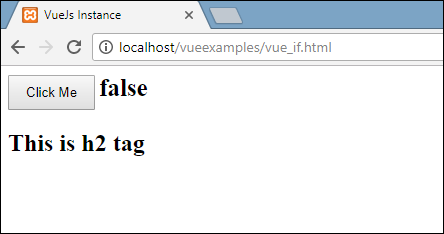
現在,如果show爲true,則顯示「This is h1 tag」,如果爲false,則顯示「This is h2 tag」。這是我們將在瀏覽器中得到的。
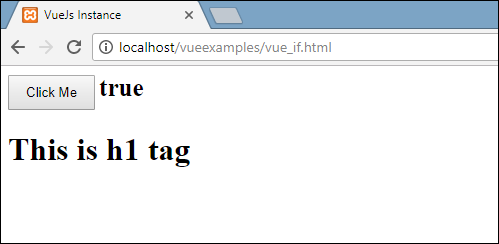
當show變量爲true時,顯示上述內容。因爲,我們添加了v-else,所以第二個語句不存在。現在,當我們單擊按鈕時,show變量將變爲false,第二條語句將顯示在下面的螢幕截圖中。
v-show
v-show的行爲與v-if相同。它還根據分配給它的條件顯示和隱藏元素。v-if和v-show之間的區別在於,如果條件爲false,v-if將從DOM中刪除HTML元素,如果條件爲true,則將其添加回DOM中。而v-show隱藏元素,如果display:none條件爲false。如果條件爲真,則返回元素。因此,元素始終存在於dom中。
示例
<html>
   <head>
      <title>VueJs Instance</title>
      <script type = "text/javascript" src = "js/vue.js"></script>
   </head>
   <body>
      <div id = "databinding">
         <button v-on:click = "showdata" v-bind:style = "styleobj">Click Me</button>
         <span style = "font-size:25px;"><b>{{show}}</b></span>
         <h1 v-if = "show">This is h1 tag</h1>
         <h2 v-else>This is h2 tag</h2>
         <div v-show = "show">
            <b>V-Show:</b>
            <img src = "images/img.jpg" width = "100" height = "100" />
         </div>
      </div>
      <script type = "text/javascript">
         var vm = new Vue({
            el: '#databinding',
            data: {
               show: true,
               styleobj: {
                  backgroundColor: '#2196F3!important',
                  cursor: 'pointer',
                  padding: '8px 16px',
                  verticalAlign: 'middle',
               }
            },
            methods : {
               showdata : function() {
                  this.show = !this.show;
               }
            },
         });
      </script>
   </body>
</html>
v-show使用以下代碼段分配給HTML元素。
<div v-show = "show"><b>V-Show:</b><img src = "images/img.jpg" width = "100" height = "100" /></div>
我們使用了相同的變量show,根據它的真/假,圖像將顯示在瀏覽器中。
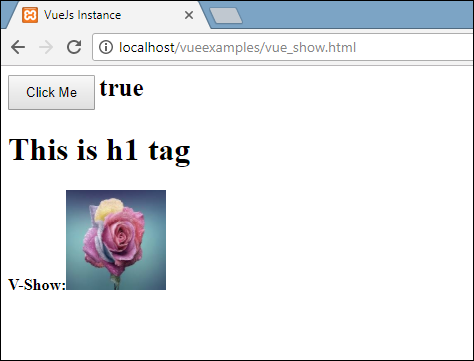
現在,由於變量show爲true,因此圖像顯示在上面的螢幕截圖中。讓我們按一下按鈕,看看顯示器。

變量show爲false,因此圖像被隱藏。如果我們檢查並查看元素,div和圖像仍然是DOM的一部分,樣式屬性display:none如上面的螢幕截圖所示。
List Rendering
v-for
現在讓我們討論使用v-for指令的列表呈現。
示例
<html>
   <head>
      <title>VueJs Instance</title>
      <script type = "text/javascript" src = "js/vue.js"></script>
   </head>
   <body>
      <div id = "databinding">
         <input type = "text" v-on:keyup.enter = "showinputvalue"
            v-bind:style = "styleobj" placeholder = "Enter Fruits Names"/>
         <h1 v-if = "items.length>0">Display Fruits Name</h1>
         <ul>
            <li v-for = "a in items">{{a}}</li>
         </ul>
      </div>
      <script type = "text/javascript">
         var vm = new Vue({
            el: '#databinding',
            data: {
               items:[],
               styleobj: {
                  width: "30%",
                  padding: "12px 20px",
                  margin: "8px 0",
                  boxSizing: "border-box"
               }
            },
            methods : {
               showinputvalue : function(event) {
                  this.items.push(event.target.value);
               }
            },
         });
      </script>
   </body>
</html>
名爲items的變量聲明爲數組。在方法中,有一個名爲showinputvalue的方法,該方法被分配給接受水果名稱的輸入框。在該方法中,文本框中輸入的水果將使用以下代碼添加到數組中。
showinputvalue : function(event) {
   this.items.push(event.target.value);
}
我們已經使用v-for來顯示輸入的水果,如下代碼所示。V-for有助於遍歷數組中的值。
<ul>
   <li v-for = "a in items">{{a}}</li>
</ul>
要使用for循環遍歷數組,我們必須使用v-for=「a in items」,其中a保存數組中的值,並顯示到所有項完成爲止。
輸出
以下是瀏覽器中的輸出。
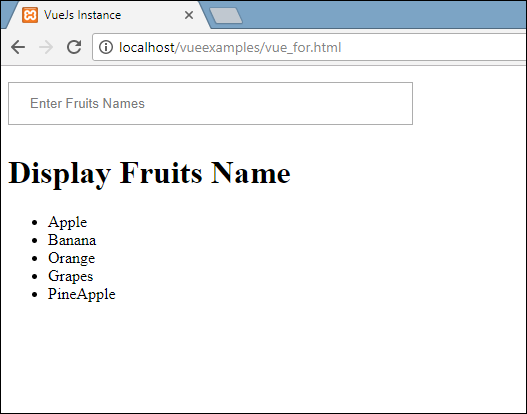
在檢查項目時,這是它在瀏覽器中顯示的內容。在DOM中,我們看不到li元素的任何v-for指令。它在不使用任何VueJS指令的情況下顯示DOM。
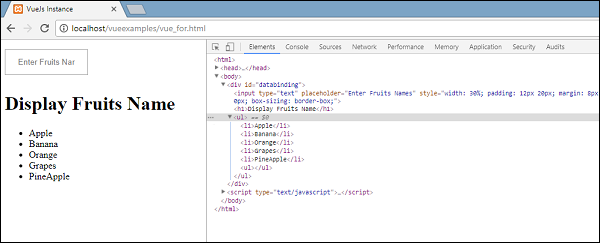
如果要顯示數組的索引,可以使用以下代碼完成。
<html>
   <head>
      <title>VueJs Instance</title>
      <script type = "text/javascript" src = "js/vue.js"></script>
   </head>
   <body>
      <div id = "databinding">
         <input type = "text" v-on:keyup.enter = "showinputvalue"
            v-bind:style = "styleobj" placeholder = "Enter Fruits Names"/>
         <h1 v-if = "items.length>0">Display Fruits Name</h1>
         <ul>
            <li v-for = "(a, index) in items">{{index}}--{{a}}</li>
         </ul>
      </div>
      <script type = "text/javascript">
         var vm = new Vue({
            el: '#databinding',
            data: {
               items:[],
               styleobj: {
                  width: "30%",
                  padding: "12px 20px",
                  margin: "8px 0",
                  boxSizing: "border-box"
               }
            },
            methods : {
               showinputvalue : function(event) {
                  this.items.push(event.target.value);
               }
            },
         });
      </script>
   </body>
</html>
爲了獲得索引,我們在括號中又添加了一個變量,如下面的代碼所示。
<li v-for = "(a, index) in items">{{index}}--{{a}}</li>
在(a,index)中,a是值,index是鍵。瀏覽器顯示將如下面的螢幕截圖所示。因此,藉助索引,可以顯示任何特定值。

VueJS - Transition and Animation
在本章中,我們將討論VueJS中可用的轉換和動畫功能。
Transition
當HTML元素在DOM中添加/更新時,VueJS提供了各種方法來將轉換應用於HTML元素。VueJS有一個內置的轉換組件,需要包裝在元素周圍,而元素需要轉換。
Syntax
<transition name = "nameoftransition">
   <div></div>
</transition>
讓我們舉一個例子來理解轉換的工作。
Example
<html>
   <head>
      <title>VueJs Instance</title>
      <script type = "text/javascript" src = "js/vue.js"></script>
   </head>
   <body>
      <style>
         .fade-enter-active, .fade-leave-active {
            transition: opacity 2s
         }
         .fade-enter, .fade-leave-to /* .fade-leave-active below version 2.1.8 */ {
            opacity: 0
         }
      </style>
      <div id = "databinding">
         <button v-on:click = "show = !show">Click Me</button>
         <transition name = "fade">
            <p v-show = "show" v-bind:style = "styleobj">Animation Example</p>
         </transition>
      </div>
      <script type = "text/javascript">
         var vm = new Vue({
            el: '#databinding',
            data: {
               show:true,
               styleobj :{
                  fontSize:'30px',
                  color:'red'
               }
            },
            methods : {
            }
         });
      </script>
   </body>
</html>
有一個名爲clickme created的按鈕,我們可以使用它將變量show的值更改爲true到false,反之亦然。有一個p標記僅當變量爲真時才顯示文本元素。我們已經用轉換元素包裝了p標記,如下代碼所示。
<transition name = "fade">
   <p v-show = "show" v-bind:style = "styleobj">Animation Example</p>
</transition>
轉換的名稱是淡入。VueJS提供了一些用於轉換的標準類,這些類的前綴是轉換的名稱。
下面是一些轉換的標準類−
v-enter−在更新/添加元素之前,首先調用該類。它是起始狀態。
v-enter-active−此類用於定義進入過渡階段的延遲、持續時間和緩和曲線。這是整個的活動狀態,類在整個進入階段都可用。
v-leave−在觸發離開轉換時添加,刪除。
在離開階段應用v-leave-active&minus。轉換完成時將刪除它。這個類用於在離開階段應用延遲、持續時間和緩和曲線。
上面的每個類都將以轉換的名稱作爲前綴。我們將轉換命名爲fade,因此類的名稱變爲。fade\u enter,.fade\u enter\u active,.fade\u leave,.fade\u leave\u active。
它們在下面的代碼中定義。
<style>
   .fade-enter-active, .fade-leave-active {
      transition: opacity 2s
   }
   .fade-enter, .fade-leave-to /* .fade-leave-active below version 2.1.8 */ {
      opacity: 0
   }
</style>
.fade_enter_active和.fade_leave_active一起定義,並在開始和離開階段應用轉換。不透明度屬性在2秒內更改爲0。
持續時間在.fade_enter_active和.fade_leave_active中定義。最後階段在.fade_enter、.fade_leave_to中定義。
瀏覽器中的顯示如下。
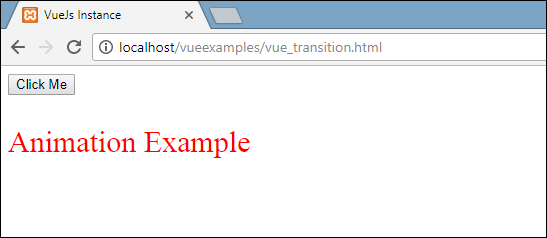
點擊按鈕,文本將在兩秒鐘內消失。
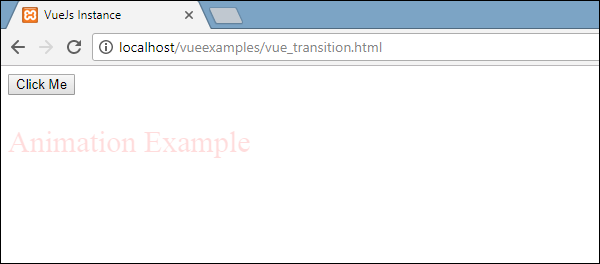
兩秒鐘後,文本將完全消失。
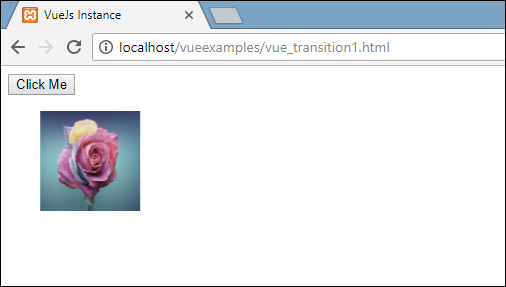
讓我們考慮另一個例子,其中有一個圖像,單擊按鈕時它在x軸上移動。
Example
<html>
   <head>
      <title>VueJs Instance</title>
      <script type = "text/javascript" src = "js/vue.js"></script>
   </head>
   <body>
      <style>
         .shiftx-enter-active, .shiftx-leave-active {
            transition: all 2s ease-in-out;
         }
         .shiftx-enter, .shiftx-leave-to /* .fade-leave-active below version 2.1.8 */ {
            transform :  translateX(100px);
         }
      </style>
      <div id = "databinding">
         <button v-on:click = "show = !show">Click Me</button>
         <transition name = "shiftx">
            <p v-show = "show">
               <img src = "images/img.jpg" style = "width:100px;height:100px;" />
            </p>
         </transition>
      </div>
      <script type = "text/javascript">
         var vm = new Vue({
            el: '#databinding',
            data: {
               show:true
            },
            methods : {
            }
         });
      </script>
   </body>
</html>
轉換的名稱是shiftx。transform屬性用於使用以下代碼將x軸上的圖像移動100px。
<style>
   .shiftx-enter-active, .shiftx-leave-active {
      transition: all 2s ease-in-out;
   }
   .shiftx-enter, .shiftx-leave-to /* .fade-leave-active below version 2.1.8 */ {
      transform :  translateX(100px);
   }
</style>
以下是輸出。
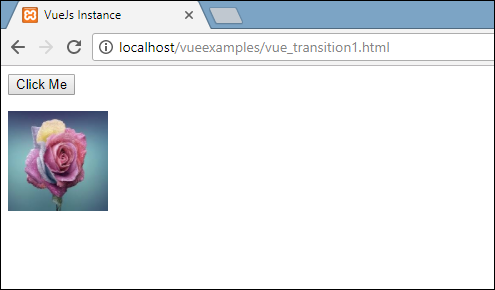
點擊按鈕,圖像將向右移動100px,如下圖所示。
Animation
動畫的應用方式與轉換的應用方式相同。動畫也有需要聲明才能產生效果的類。
讓我們舉一個例子來看看動畫是如何工作的。
Example
<html>
   <head>
      <title>VueJs Instance</title>
      <script type = "text/javascript" src = "js/vue.js"></script>
   </head>
   <body>
      <style>
         .shiftx-enter-active {
            animation: shift-in 2s;
         }
         .shiftx-leave-active {
            animation: shift-in 2s reverse;
         }
         @keyframes shift-in {
            0%   {transform:rotateX(0deg);}
            25%  {transform:rotateX(90deg);}
            50%  {transform:rotateX(120deg);}
            75%  {transform:rotateX(180deg);}
            100% {transform:rotateX(360deg);}
         }
      </style>
      <div id = "databinding">
         <button v-on:click = "show = !show">Click Me</button>
         <transition name = "shiftx">
            <p v-show = "show">
               <img src = "images/img.jpg" style = "width:100px;height:100px;" />
            </p>
         </transition>
      </div>
      <script type = "text/javascript">
         var vm = new Vue({
            el: '#databinding',
            data: {
               show:true
            },
            methods : {
            }
         });
      </script>
   </body>
</html>
要應用動畫,有與transition相同的類。在上面的代碼中,我們有一個包含在p標記中的圖像,如下面的代碼所示。
<transition name = "shiftx">
   <p v-show = "show"><img src = "images/img.jpg" style = "width:100px;height:100px;" /></p>
</transition>
轉換的名稱是shiftx。應用的類如下所示;
<style>
   .shiftx-enter-active {
      animation: shift-in 2s;
   }
   .shiftx-leave-active {
      animation: shift-in 2s reverse;
   }
   @keyframes shift-in {
      0%   {transform:rotateX(0deg);}
      25%  {transform:rotateX(90deg);}
      50%  {transform:rotateX(120deg);}
      75%  {transform:rotateX(180deg);}
      100% {transform:rotateX(360deg);}
   }
</style>
類的前綴是轉換名稱,即shiftx enter active和.shiftx leave active。動畫由0%到100%的關鍵幀定義。在每個關鍵幀處都定義了一個變換,如下代碼所示。
@keyframes shift-in {
   0%   {transform:rotateX(0deg);}
   25%  {transform:rotateX(90deg);}
   50%  {transform:rotateX(120deg);}
   75%  {transform:rotateX(180deg);}
   100% {transform:rotateX(360deg);}
}
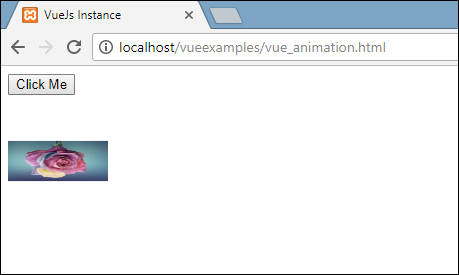
以下是輸出。

單擊該按鈕時,它將從0旋轉到360度並消失。
Custom Transition Classes
VueJS提供了自定義類的列表,這些類可以作爲屬性添加到轉換元素中。
- enter-class
- enter-active-class
- leave-class
- leave-active-class
當我們想要使用外部CSS庫(如animate.CSS)時,自定義類基本上就發揮了作用。
Example
<html>
   <head>
      <link href = "https://cdn.jsdelivr.net/npm/animate.css@3.5.1" rel = "stylesheet" type = "text/css">
      <script type = "text/javascript" src = "js/vue.js"></script>
   </head>
   <body>
      <div id = "animate" style = "text-align:center">
         <button @click = "show = !show"><span style = "font-size:25px;">Animate</span></button>
         <transition
            name = "custom-classes-transition"
            enter-active-class = "animated swing"
            leave-active-class = "animated bounceIn">
            <p v-if = "show"><span style = "font-size:25px;">Example</span></p>
         </transition>
      </div>
      <script type = "text/javascript">
         var vm =  new Vue({
            el: '#animate',
            data: {
               show: true
            }
         });
      </script>
   </body>
</html>
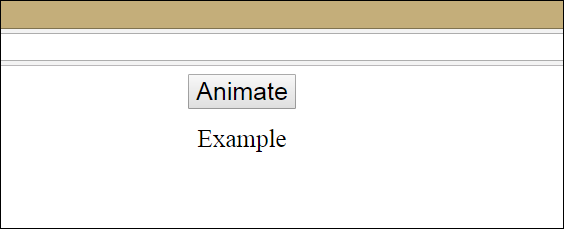
Output
Output
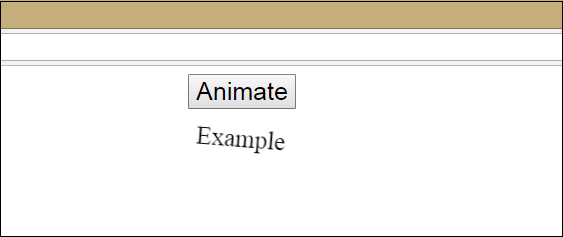
Output
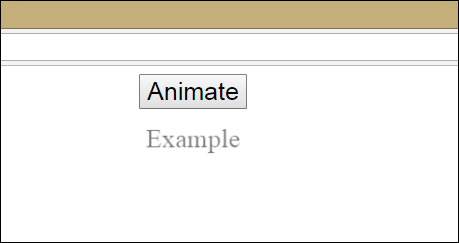
上面的代碼中應用了兩個動畫。一個輸入active class=「animated swing」,另一個輸入active class=「animated bounceIn」。我們正在使用自定義動畫類從第三方庫應用動畫。
Explicit Transition Duration
我們可以使用VueJS在元素上應用轉換和動畫。Vue等待transionend和animationend事件檢測動畫或轉換是否完成。
有時過渡會導致延遲。在這種情況下,我們可以如下顯式地應用持續時間。
<transition :duration = "1000"></transition>
<transition :duration = "{ enter: 500, leave: 800 }">...</transition>
我們可以將duration屬性與轉換元素上的:一起使用,如上圖所示。如果需要分別指定進出時間,可以按照上面的代碼進行。
JavaScript Hooks
轉換類可以作爲使用JavaScript事件的方法調用。讓我們考慮一個例子,以便更好地理解。
Example
<html>
   <head>
      <title>VueJs Instance</title>
      <script type = "text/javascript" src = "js/vue.js"></script>
   </head>
   <body>
      <script src = "https://cdnjs.cloudflare.com/ajax/libs/velocity/1.2.3/velocity.min.js"></script>
      <div id = "example-4">
         <button @click = "show = !show">
            <span style = "font-size:25px;">Toggle</span>
         </button>
         <transition  v-on:before-enter = "beforeEnter"
            v-on:enter = "enter"
            v-on:leave = "leave"
            v-bind:css = "false">
            <p v-if = "show" style = "font-size:25px;">Animation Example with velocity</p>
         </transition>
      </div>
      <script type = "text/javascript">
         var vm = new Vue({
            el: '#example-4',
            data: {
               show: false
            },
            methods: {
               beforeEnter: function (el) {
                  el.style.opacity = 0
               },
               enter: function (el, done) {
                  Velocity(el, { opacity: 1, fontSize: '25px' }, { duration: 1000 })
                  Velocity(el, { fontSize: '10px' }, { complete: done })
               },
               leave: function (el, done) {
                  Velocity(el, { translateX: '15px', rotateZ: '50deg' }, { duration: 1500 })
                  Velocity(el, { rotateZ: '100deg' }, { loop: 2 })
                  Velocity(el, {
                     rotateZ: '45deg',
                     translateY: '30px',
                     translateX: '30px',
                     opacity: 0
                  }, { complete: done })
               }
            }
         });
      </script>
   </body>
</html>
Output
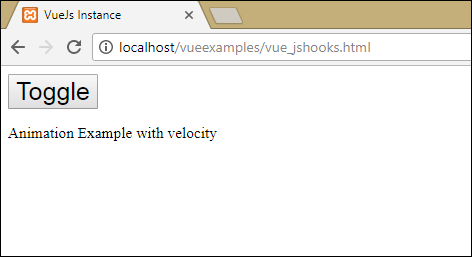
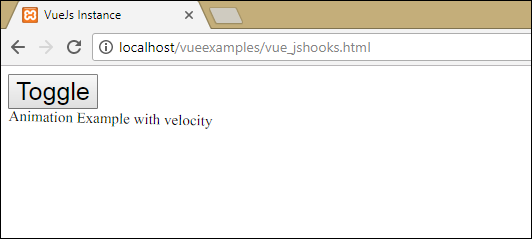
In the above example, we are performing animation using js methods on the transition element.
The methods on transition are applied as follows −
<transition  v-on:before-enter = "beforeEnter"
   v-on:enter = "enter"
   v-on:leave = "leave"
   v-bind:css = "false">
   <p v-if = "show" style = "font-size:25px;">Animation Example with velocity</p>
</transition>
There is a prefix added v-on and the name of the event to which the method is called. The methods are defined in the Vue instance as follows −
methods: {
   beforeEnter: function (el) {
      el.style.opacity = 0
   },
   enter: function (el, done) {
      Velocity(el, { opacity: 1, fontSize: '25px' }, { duration: 1000 })
      Velocity(el, { fontSize: '10px' }, { complete: done })
   },
   leave: function (el, done) {
      Velocity(el, { translateX: '15px', rotateZ: '50deg' }, { duration: 1500 })
      Velocity(el, { rotateZ: '100deg' }, { loop: 2 })
      Velocity(el, {
         rotateZ: '45deg',
         translateY: '30px',
         translateX: '30px',
         opacity: 0
      }, { complete: done })
   }
}
The required transition is applied in each of these methods. There is an opacity animation applied on the click of the button and also when the animation is done. Third party library is used for animation.
There is a property added on transition v-bind:css = "false", which is done so that Vue understands it is a JavaScript transition.
Transition at the Initial Render
In order to add animation at the start, we need to add 『appear』 property to the transition element.
Let’s look at an example to understand it better.
Example
<html>
   <head>
      <link href = "https://cdn.jsdelivr.net/npm/animate.css@3.5.1" rel = "stylesheet" type = "text/css">
      <script type = "text/javascript" src = "js/vue.js"></script>
   </head>
   <body>
      <div id = "animate" style = "text-align:center">
         <transition
            appear
            appear-class = "custom-appear-class"
            appear-active-class = "animated bounceIn">
            <h1>BounceIn - Animation Example</h1>
         </transition>
         <transition
            appear
            appear-class = "custom-appear-class"
            appear-active-class = "animated swing">
            <h1>Swing - Animation Example</h1>
         </transition>
         <transition
            appear
            appear-class = "custom-appear-class"
            appear-active-class = "animated rubberBand">
            <h1>RubberBand - Animation Example</h1>
         </transition>
      </div>
      <script type = "text/javascript">
         var vm =  new Vue({
            el: '#animate',
            data: {
               show: true
            }
         });
      </script>
   </body>
</html>
In the above example, we have used three different animations from animate.css library. We have added appear to the transition element.
On execution of the above code, following will be the output in the browser.

Animation on Components
We can wrap the transition for the components using the following code. We have used dynamic component here.
Example
<html>
   <head>
      <title>VueJs Instance</title>
      <script type = "text/javascript" src = "js/vue.js"></script>
      <link href = "https://cdn.jsdelivr.net/npm/animate.css@3.5.1" rel = "stylesheet" type = "text/css">
   </head>
   <body>
      <div id = "databinding" style = "text-align:center;">
         <transition  appear
            appear-class = "custom-appear-class"
            appear-active-class = "animated wobble">
            <component v-bind:is = "view"></component>
         </transition>
      </div>
      <script type = "text/javascript">
         var vm = new Vue({
            el: '#databinding',
            data: {
               view: 'component1'
            },
            components: {
               'component1': {
                  template: '<div><span style = "font-
                  size:25;color:red;">Animation on Components</span></div>'
               }
            }
         });
      </script>
   </body>
</html>
Output

VueJS - Directives
Directives are instruction for VueJS to do things in a certain way. We have already seen directives such as v-if, v-show, v-else, v-for, v-bind , v-model, v-on, etc.
In this chapter, we will take a look at custom directives. We will create global directives similar to how we did for components.
Syntax
Vue.directive('nameofthedirective', {
   bind(e1, binding, vnode) {
   }
})
We need to create a directive using Vue.directive. It takes the name of the directive as shown above. Let us consider an example to show the details of the working of directives.
Example
<html>
   <head>
      <title>VueJs Instance</title>
      <script type = "text/javascript" src = "js/vue.js"></script>
   </head>
   <body>
      <div id = "databinding">
         <div v-changestyle>VueJS Directive</div>
      </div>
      <script type = "text/javascript">
         Vue.directive("changestyle",{
            bind(e1,binding, vnode) {
               console.log(e1);
               e1.style.color = "red";
               e1.style.fontSize = "30px";
            }
         });
         var vm = new Vue({
            el: '#databinding',
            data: {
            },
            methods : {
            },
         });
      </script>
   </body>
</html>
In this example, we have created a custom directive changestyle as shown in the following piece of code.
Vue.directive("changestyle",{
   bind(e1,binding, vnode) {
      console.log(e1);
      e1.style.color = "red";
      e1.style.fontSize = "30px";
   }
});
我們將以下變更樣式分配給div。
<div v-changestyle>VueJS Directive</div>
如果我們在瀏覽器中看到,它將以紅色顯示文本VueJs指令,字體大小增加到30px。
Output

我們使用了bind方法,它是指令的一部分。它接受三個參數e1,這個元素需要應用自定義指令。綁定類似於傳遞給自定義指令的參數,例如v-changestyle=「{color:'green'}」,其中在綁定參數中將讀取green,而vnode是元素,即nodename。
在下一個例子中,我們已經安慰了所有的論點,它顯示了每一個論點都給出了哪些細節。
下面是傳遞給自定義指令的值的示例。
<html>
   <head>
      <title>VueJs Instance</title>
      <script type = "text/javascript" src = "js/vue.js"></script>
   </head>
   <body>
      <div id = "databinding">
         <div v-changestyle = "{color:'green'}">VueJS Directive</div>
      </div>
      <script type = "text/javascript">
         Vue.directive("changestyle",{
            bind(e1,binding, vnode) {
               console.log(e1);
               console.log(binding.value.color);
               console.log(vnode);
               e1.style.color=binding.value.color;
               e1.style.fontSize = "30px";
            }
         });
         var vm = new Vue({
            el: '#databinding',
            data: {
            },
            methods : {
            },
         });
      </script>
   </body>
</html>
Output
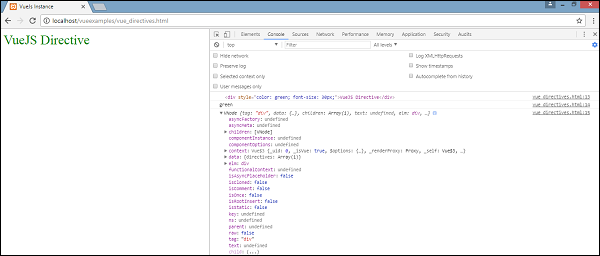
文本的顏色改爲綠色。使用以下代碼傳遞值。
<div v-changestyle = "{color:'green'}">VueJS Directive</div>
And it is accessed using the following piece of code.
Vue.directive("changestyle",{
   bind(e1,binding, vnode) {
      console.log(e1);
      console.log(binding.value.color);
      console.log(vnode);
      e1.style.color=binding.value.color;
      e1.style.fontSize = "30px";
   }
});
Filters
VueJS支持幫助設置文本格式的篩選器。它與v-bind和插值({{})一起使用。我們需要一個管道符號在JavaScript表達式的末尾用於過濾器。
Example
<html>
   <head>
      <title>VueJs Instance</title>
      <script type = "text/javascript" src = "js/vue.js"></script>
   </head>
   <body>
      <div id = "databinding">
         <input  v-model = "name" placeholder = "Enter Name" /><br/>
         <span style = "font-size:25px;"><b>Letter count is : {{name | countletters}}</b></span>
      </div>
      <script type = "text/javascript">
         var vm = new Vue({
            el: '#databinding',
            data: {
               name : ""
            },
            filters : {
               countletters : function(value) {
                  return value.length;
               }
            }
         });
      </script>
   </body>
</html>
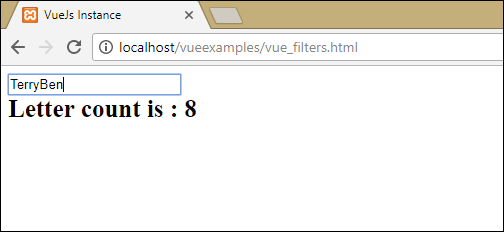
在上面的例子中,我們創建了一個簡單的過濾器countletters。Countletters篩選器統計文本框中輸入的字符數。要使用過濾器,我們需要使用filter屬性並通過下面的代碼定義使用的過濾器。
filters : {
   countletters : function(value) {
      return value.length;
   }
}
我們定義方法countletters並返回輸入字符串的長度。
要在顯示中使用filter,我們使用了pipe運算符和filter的名稱,即countletters。
<span style = "font-size:25px;"><b>Letter count is : {{name | countletters}}</b></span>
以下是瀏覽器中的顯示。
我們還可以使用下面的代碼將參數傳遞給過濾器。
<span style = "font-size:25px;"><b>Letter count is : {{name | countletters('a1', 'a2')}}</b></span>
現在,倒計時字母將有三個參數,即消息、a1和a2。
我們還可以使用下面的代碼將多個過濾器傳遞給插值。
<span style = "font-size:25px;"><b>Letter count is : {{name | countlettersA, countlettersB}}</b></span>
在filter屬性中,countlettersA和countlettersB將是兩種方法,countlettersA將把詳細信息傳遞給countlettersB。
VueJS - Routing
VueJS沒有內置路由器功能。我們需要遵循一些附加步驟來安裝它。
Direct Download from CDN
vue路由器的最新版本可在https://unpkg.com/vue router@3.0.1/dist/vue router.js「>https://unpkg.com/vue-router/dist/vue-router.js」上獲得
Unpkg.com提供基於npm的cdn連結。上面的連結總是更新到最新版本。我們可以下載並託管它,並將它與一個腳本標記一起使用,與vue.js一起使用,如下所示−
<script src = "/path/to/vue.js"></script>
<script src = "/path/to/vue-router.js"></script>
Using NPM
運行以下命令安裝vue路由器。
npm install vue-router
Using GitHub
我們可以從GitHub克隆存儲庫,如下所示;
git clone https://github.com/vuejs/vue-router.git node_modules/vue-router
cd node_modules/vue-router
npm install
npm run build
讓我們從一個使用vue-router.js的簡單示例開始。
示例
<html>
   <head>
      <title>VueJs Instance</title>
      <script type = "text/javascript" src = "js/vue.js"></script>
      <script type = "text/javascript" src = "js/vue-router.js"></script>
   </head>
   <body>
      <div id = "app">
         <h1>Routing Example</h1>
         <p>
            <router-link to = "/route1">Router Link 1</router-link>
            <router-link to = "/route2">Router Link 2</router-link>
         </p>
         <!-- route outlet -->
         <!-- component matched by the route will render here -->
         <router-view></router-view>
      </div>
      <script type = "text/javascript">
         const Route1 = { template: '<div style = "border-radius:20px;background-color:cyan;width:200px;height:50px;margin:10px;font-size:25px;padding:10px;">This is router 1</div>' }
         const Route2 = { template: '<div style = "border-radius:20px;background-color:green;width:200px;height:50px;margin:10px;font-size:25px;padding:10px;">This is router 2</div>' }
         const routes = [
            { path: '/route1', component: Route1 },
            { path: '/route2', component: Route2 }
         ];
         const router = new VueRouter({
            routes // short for `routes: routes`
         });
         var vm = new Vue({
            el: '#app',
            router
         });
      </script>
   </body>
</html>
輸出
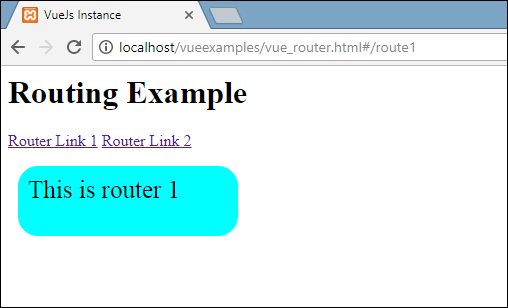

To start with routing, we need to add the vue-router.js file. Take the code from https://unpkg.com/vue-router/dist/vue-router.js and save it in the file vue-router.js.
The script is added after vue.js as follows −
<script type = "text/javascript" src = "js/vue.js"></script>
<script type = "text/javascript" src = "js/vue-router.js"></script>
In the body section, there is a router link defined as follows −
<p>
   <router-link   to = "/route1">Router Link 1</router-link>
   <router-link    to = "/route2">Router Link 2</router-link>
</p>
<router-link> is a component used to navigate to the HTML content to be displayed to the user. The to property is the destination, i.e the source file where the contents to be displayed will be picked.
In the above piece of code, we have created two router links.
Take a look at the script section where the router is initialized. There are two constants created as follows −
const  Route1 = { template: '<div style = "border-radius:20px;background-color:cyan;width:200px;height:50px;margin:10px;font-size:25px;padding:10px;">This is router 1</div>' };
const Route2 = { template: '<div style = "border-radius:20px;background-color:green;width:200px;height:50px;margin:10px;font-size:25px;padding:10px;">This is router 2</div>' }
They have templates, which needs to be shown when the router link is clicked.
Next, is the routes const, which defines the path to be displayed in the URL.
const routes = [
   { path: '/route1', component: Route1 },
   { path: '/route2', component: Route2 }
];
路由定義路徑和組件。當用戶單擊路由器連結時,URL中將顯示路徑,即/route1。
組件接受要顯示的模板名稱。路由的路徑需要與到屬性的路由器連結匹配。
例如,<router linkto=「path here」></路由器連結>
接下來,使用下面的代碼將實例創建到VueRouter。
const router = new VueRouter({
   routes // short for `routes: routes`
});
VueRouter構造函數將路由作爲參數。路由器對象使用以下代碼分配給主vue實例。
var vm = new Vue({
   el: '#app',
   router
});
執行該示例並查看瀏覽器中的顯示。在檢查和檢查路由器連結時,我們會發現它向活動元素添加了類,如下面的螢幕截圖所示。

添加的類是class=「router link exact active router link active」。活動連結獲取類,如上面的螢幕截圖所示。另一個需要注意的是,<路由器連結>被呈現爲標記。
Props for Router Link
讓我們看看要傳遞給<路由器連結>的更多屬性;。
to
這是指定給「路由器連結」的目標路徑;。單擊時,to的值將在內部傳遞給router.push()。值必須是字符串或位置對象。當使用一個對象時,我們需要如例2所示綁定它。
e.g. 1:  <router-link to = "/route1">Router Link 1</router-link>
renders as
<a href = 」#/route」>Router Link </a>
e.g. 2:  <router-link v-bind:to = "{path:'/route1'}">Router Link 1</router-link>
e.g. 3: <router-link v-bind:to =
   "{path:'/route1', query: { name: 'Tery' }}">Router Link 1</router-link>//router link with query string.
下面是例3的輸出。

在URL路徑中,name=Tery是查詢字符串的一部分。E、 例如:http://localhost/vueexamples/vue_router.html#/route1?名稱=特里
replace
將replace添加到路由器連結將調用router.replace(),而不是router.push()。使用replace時,不會存儲導航歷史記錄。
示例
<router-link v-bind:to = "{path:'/route1', query: { name: 'Tery' }}" replace>Router Link 1</router-link>
append
向「路由器連結」中添加「附加」<router link><router link>將使路徑相對。
如果我們想從路徑爲/route1的路由器連結轉到路徑爲/route2的路由器連結,它將在瀏覽器中顯示路徑爲/route1/route2。
示例
<router-link v-bind:to = "{ path: '/route1'}" append>Router Link 1</router-link>
tag
目前,路由器連結呈現爲標記。如果要將其呈現爲其他標記,則需要使用tag=「tagname」指定相同的標記;
示例
<p>
   <router-link v-bind:to = "{ path: '/route1'}" tag = "span">Router Link 1</router-link>
   <router-link v-bind:to = "{ path: '/route2'}" tag = "span">Router Link 2</router-link>
</p>
我們已將標記指定爲span,這就是瀏覽器中顯示的內容。

現在顯示的標記是一個跨度標記。我們仍然會看到點擊進行,因爲我們點擊路由器連結導航。
active-class
默認情況下,路由器連結處於活動狀態時添加的活動類是路由器連結處於活動狀態。我們可以通過如下代碼所示的設置來覆蓋類。
<style>
   ._active{
      background-color : red;
   }
</style>
<p>
   <router-link v-bind:to = "{ path: '/route1'}" active-class = "_active">Router Link 1</router-link>
   <router-link v-bind:to = "{ path: '/route2'}" tag = "span">Router Link 2</router-link>
</p>
使用的類是活動的。這是顯示在瀏覽器中的輸出。

exact-active-class
應用的默認exact active類是router link exactactive。我們可以使用精確的活動類覆蓋它。
示例
<p>
   <router-link v-bind:to = "{ path: '/route1'}" exact-active-class = "_active">Router Link 1</router-link>
   <router-link v-bind:to = "{ path: '/route2'}" tag = "span">Router Link 2</router-link>
</p>
這就是瀏覽器中顯示的內容。

event
目前路由器鏈路的默認事件是點擊事件。我們可以使用event屬性更改相同的內容。
示例
<router-link v-bind:to = "{ path: '/route1'}" event = "mouseover">Router Link 1</router-link>
現在,當我們滑鼠移動路由器連結時,它將按如下瀏覽器所示導航。滑鼠懸停在路由器連結1上,我們將看到導航正在改變。
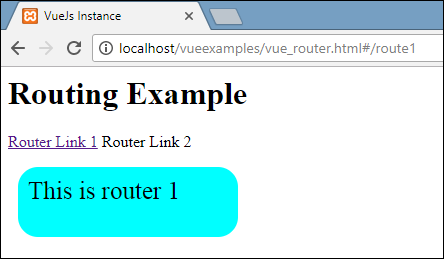
VueJS - Mixins
mixin基本上與組件一起使用。它們在組件之間共享可重用代碼。當組件使用mixin時,mixin的所有選項都成爲組件選項的一部分。
Example
<html>
   <head>
      <title>VueJs Instance</title>
      <script type = "text/javascript" src = "js/vue.js"></script>
   </head>
   <body>
      <div id = "databinding"></div>
      <script type = "text/javascript">
         var vm = new Vue({
            el: '#databinding',
            data: {
            },
            methods : {
            },
         });
         var myMixin = {
            created: function () {
               this.startmixin()
            },
            methods: {
               startmixin: function () {
                  alert("Welcome  to mixin example");
               }
            }
         };
         var Component = Vue.extend({
            mixins: [myMixin]
         })
         var component = new Component();
      </script>
   </body>
</html>
Output

當mixin和組件包含重疊選項時,它們將被合併,如下例所示。
<html>
   <head>
      <title>VueJs Instance</title>
      <script type = "text/javascript" src = "js/vue.js"></script>
   </head>
   <body>
      <div id = "databinding"></div>
      <script type = "text/javascript">
         var mixin = {
            created: function () {
               console.log('mixin called')
            }
         }
         new Vue({
            mixins: [mixin],
            created: function () {
               console.log('component called')
            }
         });
      </script>
   </body>
</html>
現在mixin和vue實例創建了相同的方法。這是我們在控制台中看到的輸出。如圖所示,vue和mixin的選項將被合併。

如果在方法中碰巧有相同的函數名,則主vue實例將優先。
Example

<html>
   <head>
      <title>VueJs Instance</title>
      <script type = "text/javascript" src = "js/vue.js"></script>
   </head>
   <body>
      <div id = "databinding"></div>
      <script type = "text/javascript">
         var mixin = {
            methods: {
               hellworld: function () {
                  console.log('In HelloWorld');
               },
               samemethod: function () {
                  console.log('Mixin:Same Method');
               }
            }
         };
         var vm = new Vue({
            mixins: [mixin],
            methods: {
               start: function () {
                  console.log('start method');
               },
               samemethod: function () {
                  console.log('Main: same method');
               }
            }
         });
         vm.hellworld();
         vm.start();
         vm.samemethod();
      </script>
   </body>
</html>
我們將看到mixin有一個方法屬性,其中定義了helloworld和samemethod函數。類似地,vue實例有一個methods屬性,其中再次定義了start和samemethod兩個方法。
調用以下每個方法。
vm.hellworld(); // In HelloWorld
vm.start(); // start method
vm.samemethod(); // Main: same method
如上所示,我們調用了helloworld、start和samemethod函數。samemethod也存在於mixin中,但是,將優先考慮主實例,如下面的控制台所示。
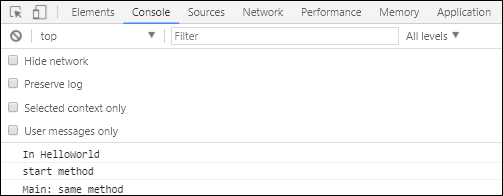
VueJS - Render Function
我們已經看到了組件和它的使用。例如,我們有一個需要在整個項目中重用的內容。我們可以將其轉換爲組件並使用它。
讓我們看一個簡單組件的例子,看看render函數在其中要做什麼。
Example
<html>
   <head>
      <title>VueJs Instance</title>
      <script type = "text/javascript" src = "js/vue.js"></script>
   </head>
   <body>
      <div id = "component_test">
         <testcomponent></testcomponent>
      </div>
      <script type = "text/javascript">
         Vue.component('testcomponent',{
            template : '<h1>Hello World</h1>',
            data: function() {
            },
            methods:{
            }
         });
         var vm = new Vue({
            el: '#component_test'
         });
      </script>
   </body>
</html>
考慮上面一個列印Hello World的簡單組件的例子,如下面的螢幕截圖所示。

現在,如果我們想重用組件,只需再次列印即可。例如,
<div id = "component_test">
   <testcomponent></testcomponent>
   <testcomponent></testcomponent>
   <testcomponent></testcomponent>
   <testcomponent></testcomponent>
</div>
輸出如下。
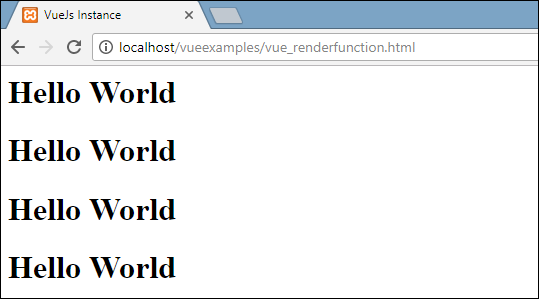
但是,現在我們需要對組件進行一些更改。我們不希望列印相同的文本。我們怎樣才能改變它?萬一,我們在組件中鍵入一些內容,會考慮到嗎?
讓我們考慮下面的例子,看看會發生什麼。
<div id = "component_test">
   <testcomponent>Hello Jai</testcomponent>
   <testcomponent>Hello Roy</testcomponent>
   <testcomponent>Hello Ria</testcomponent>
   <testcomponent>Hello Ben</testcomponent>
</div>
產出與我們之前看到的一樣。它並沒有按我們的要求更改文本。

組件確實提供了稱爲插槽的功能。讓我們好好利用它看看是否能達到預期的效果。
Example
<html>
   <head>
      <title>VueJs Instance</title>
      <script type = "text/javascript" src = "js/vue.js"></script>
   </head>
   <body>
      <div id = "component_test">
         <testcomponent>Hello Jai</testcomponent>
         <testcomponent>Hello Roy</testcomponent>
         <testcomponent>Hello Ria</testcomponent>
         <testcomponent>Hello Ben</testcomponent>
      </div>
      <script type = "text/javascript">
         Vue.component('testcomponent',{
            template : '<h1><slot></slot></h1>',
            data: function() {
            },
            methods:{
            }
         });
         var vm = new Vue({
            el: '#component_test'
         });
      </script>
   </body>
</html>
如上面的代碼所示,在模板中我們添加了slot,因此現在需要將值發送到組件內部,如下面的螢幕截圖所示。
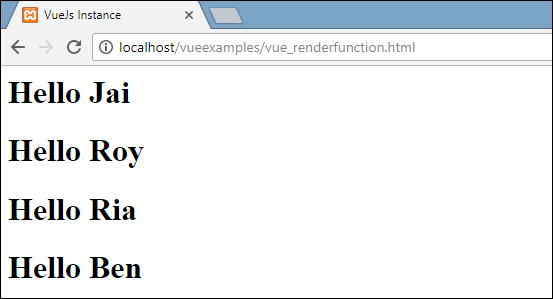
現在,讓我們考慮一下我們想改變顏色和尺寸。例如,目前我們正在使用h1標記,我們希望將同一組件的HTML標記更改爲p標記或div標記。我們怎麼能有這麼多的靈活性來進行這麼多的改變呢?
我們可以在render函數的幫助下這樣做。Render函數通過保持組件的通用性並幫助使用同一組件傳遞參數,有助於使組件動態化並按需要的方式使用它。
Example
<html>
   <head>
      <title>VueJs Instance</title>
      <script type = "text/javascript" src = "js/vue.js"></script>
   </head>
   <body>
      <div id = "component_test">
         <testcomponent :elementtype = "'div,red,25,div1'">Hello Jai</testcomponent>
         <testcomponent :elementtype = "'h3,green,25,h3tag'">Hello Roy</testcomponent>
         <testcomponent :elementtype = "'p,blue,25,ptag'">Hello Ria</testcomponent>
         <testcomponent :elementtype = "'div,green,25,divtag'">Hello Ben</testcomponent>
      </div>
      <script type = "text/javascript">
         Vue.component('testcomponent',{
            render :function(createElement){
               var a = this.elementtype.split(",");
               return createElement(a[0],{
                  attrs:{
                     id:a[3],
                     style:"color:"+a[1]+";font-size:"+a[2]+";"
                  }
               },
               this.$slots.default
               )
            },
            props:{
               elementtype:{
                  attributes:String,
                  required:true
               }
            }
         });
         var vm = new Vue({
            el: '#component_test'
         });
      </script>
   </body>
</html>
在上面的代碼中,我們已經更改了組件,並使用下面的代碼添加了render函數with props屬性。
Vue.component('testcomponent',{
   render :function(createElement){
      var a = this.elementtype.split(",");
      return createElement(a[0],{
         attrs:{
            id:a[3],
            style:"color:"+a[1]+";font-size:"+a[2]+";"
         }
      },
      this.$slots.default
      )
   },
   props:{
      elementtype:{
         attributes:String,
         required:true
      }
   }
});
道具如下。
props:{
   elementtype:{
      attributes:String,
      required:true
   }
}
我們定義了一個名爲elementtype的屬性,它接受類型爲string的attributes欄位。另一個必需欄位,其中提到該欄位是必需的。
在render函數中,我們使用了elementtype屬性,如下面的代碼所示。
render :function(createElement){
   var a = this.elementtype.split(",");
   return createElement(a[0],{
      attrs:{
         id:a[3],
         style:"color:"+a[1]+";font-size:"+a[2]+";"
      }
   },
   this.$slots.default
   )
}
Render函數將createElement作爲參數並返回相同的值。CreateElement創建DOM元素的方式與在JavaScript中相同。我們還使用attrs欄位中的值在逗號上拆分了elementtype。
CreateElement將第一個參數作爲要創建的elementtag。它使用以下代碼傳遞給組件。
<testcomponent :elementtype = "'div,red,25,div1'">Hello Jai</testcomponent>
組件需要使用上面顯示的props欄位。開頭是:還有道具的名字。在這裡,我們傳遞元素標籤、顏色、字體大小和元素的id。
在render函數中,在createElement中,我們是用逗號分隔的,因此第一個元素是elementtag,它被賦予createElemet,如下一段代碼所示。
return createElement(
   a[0],{
      attrs:{
         id:a[3],
         style:"color:"+a[1]+";font-size:"+a[2]+";"
      }
   },
   this.$slots.default
)
a[0]是html元素標記。下一個參數是元素標記的屬性。它們在下面代碼的attr欄位中定義。
attrs:{
   id:a[3],
   style:"color:"+a[1]+";font-size:"+a[2]+";"
}
我們爲元素標記定義了兩個屬性-id和style。對於id,我們傳遞一個[3],這是我們在逗號上拆分後得到的值。使用樣式,我們定義了顏色和字體大小。
最後一個是插槽,這是我們在下面的代碼中在組件中給出的消息。
<testcomponent :elementtype = "'div,red,25,div1'">Hello Jai</testcomponent>
我們使用下面的代碼定義了要在createElement中列印的文本。
this.$slots.default
它採用組件欄位中指定的默認值。
下面是我們在瀏覽器中得到的輸出。
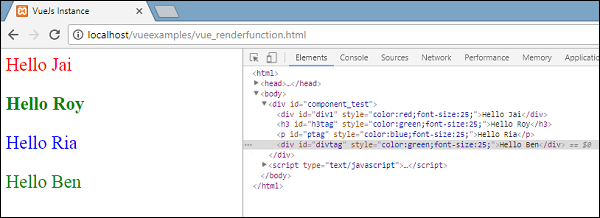
元素也顯示了結構。這些是我們定義的組件;
<div id = "component_test">
   <testcomponent :elementtype = "'div,red,25,div1'">Hello Jai</testcomponent>
   <testcomponent :elementtype = "'h3,green,25,h3tag'">Hello Roy</testcomponent>
   <testcomponent :elementtype = "'p,blue,25,ptag'">Hello Ria</testcomponent>
   <testcomponent :elementtype = "'div,green,25,divtag'">Hello Ben</testcomponent>
</div>
VueJS - Reactive Interface
VueJS提供了向動態添加的屬性添加反應性的選項。考慮到我們已經創建了vue實例,需要添加watch屬性。它可以按以下方式完成&負;
Example
<html>
   <head>
      <title>VueJs Instance</title>
      <script type = "text/javascript" src = "js/vue.js"></script>
   </head>
   <body>
      <div id = "app">
         <p style = "font-size:25px;">Counter: {{ counter }}</p>
         <button @click = "counter++" style = "font-size:25px;">Click Me</button>
      </div>
      <script type = "text/javascript">
         var vm = new Vue({
            el: '#app',
            data: {
               counter: 1
            }
         });
         vm.$watch('counter', function(nval, oval) {
            alert('Counter is incremented :' + oval + ' to ' + nval + '!');
         });
         setTimeout(
            function(){
               vm.counter = 20;
            },2000
         );
      </script>
   </body>
</html>
數據對象中有一個定義爲1的屬性計數器。當我們單擊按鈕時,計數器將遞增。
已創建Vue實例。要給它加上手錶,我們需要按以下步驟操作&負;
vm.$watch('counter', function(nval, oval) {
   alert('Counter is incremented :' + oval + ' to ' + nval + '!');
});
我們需要使用$watch在vue實例之外添加watch。添加了一個警報,顯示計數器屬性的值更改。還添加了一個定時器功能,即setTimeout,它將計數器值設置爲20。
setTimeout(
   function(){
      vm.counter = 20;
   },2000
);
每當計數器更改時,watch方法發出的警報將觸發,如下面的螢幕截圖所示。

VueJS無法檢測屬性的添加和刪除。最好的方法是始終聲明屬性,這需要在Vue實例中預先進行響應。如果需要在運行時添加屬性,可以使用Vue global、Vue.set和Vue.delete方法。
Vue.set
此方法有助於設置對象的屬性。它用於繞過Vue無法檢測屬性添加的限制。
Syntax
Vue.set( target, key, value )
哪裡,
目標:可以是對象或數組
key:可以是字符串或數字
值:可以是任何類型
讓我們看一個例子。
Example
<html>
   <head>
      <title>VueJs Instance</title>
      <script type = "text/javascript" src = "js/vue.js"></script>
   </head>
   <body>
      <div id = "app">
         <p style = "font-size:25px;">Counter: {{ products.id }}</p>
         <button @click = "products.id++" style = "font-size:25px;">Click Me</button>
      </div>
      <script type = "text/javascript">
         var myproduct = {"id":1, name:"book", "price":"20.00"};
         var vm = new Vue({
            el: '#app',
            data: {
               counter: 1,
               products: myproduct
            }
         });
         vm.products.qty = "1";
         console.log(vm);
         vm.$watch('counter', function(nval, oval) {
            alert('Counter is incremented :' + oval + ' to ' + nval + '!');
         });
      </script>
   </body>
</html>
在上面的例子中,有一個變量myproduct是在開始時使用下面的代碼創建的。
var myproduct = {"id":1, name:"book", "price":"20.00"};
它被賦予Vue實例中的數據對象,如下所示−
var vm = new Vue({
   el: '#app',
   data: {
      counter: 1,
      products: myproduct
   }
});
考慮一下,我們希望在創建Vue實例之後,再向myproduct數組添加一個屬性。它可以按以下方式完成&負;
vm.products.qty = "1";
讓我們看看控制台中的輸出。
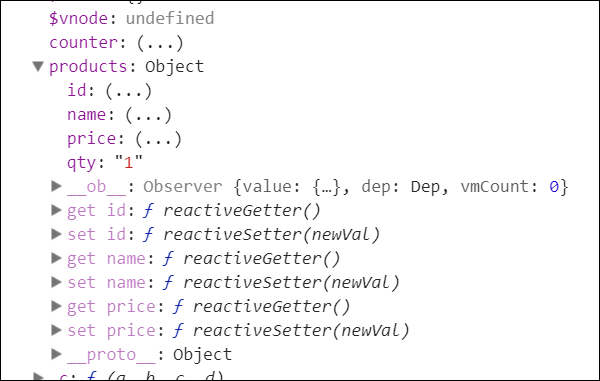
如上所示,在產品中添加數量。get/set方法基本上增加了id、name和price的反應性,而不是qty。
我們不能僅僅通過添加vue物體來達到反應性。VueJS主要希望在開始時創建其所有屬性。但是,如果以後需要添加,可以使用Vue.set。爲此,我們需要使用vue global設置它,即vue.set。
Example
<html>
   <head>
      <title>VueJs Instance</title>
      <script type = "text/javascript" src = "js/vue.js"></script>
   </head>
   <body>
      <div id = "app">
         <p style = "font-size:25px;">Counter: {{ products.id }}</p>
         <button @click = "products.id++" style = "font-size:25px;">Click Me</button>
      </div>
      <script type = "text/javascript">
         var myproduct = {"id":1, name:"book", "price":"20.00"};
         var vm = new Vue({
            el: '#app',
            data: {
               counter: 1,
               products: myproduct
            }
         });
         Vue.set(myproduct, 'qty', 1);
         console.log(vm);
         vm.$watch('counter', function(nval, oval) {
            alert('Counter is incremented :' + oval + ' to ' + nval + '!');
         });
      </script>
   </body>
</html>
我們使用Vue.set使用以下代碼將數量添加到數組中。
Vue.set(myproduct, 'qty', 1);
我們已經對vue對象進行了安慰,下面是輸出。

現在,我們可以看到使用Vue.set添加的數量的get/set。
Vue.delete
此函數用於動態刪除屬性。
Example
Vue.delete( target, key )
哪裡,
目標:可以是對象或數組
key:可以是字符串或數字
要刪除任何屬性,可以使用Vue.delete,如下代碼所示。
Example
<html>
   <head>
      <title>VueJs Instance</title>
      <script type = "text/javascript" src = "js/vue.js"></script>
   </head>
   <body>
      <div id = "app">
         <p style = "font-size:25px;">Counter: {{ products.id }}</p>
         <button @click = "products.id++" style = "font-size:25px;">Click Me</button>
      </div>
      <script type = "text/javascript">
         var myproduct = {"id":1, name:"book", "price":"20.00"};
         var vm = new Vue({
            el: '#app',
            data: {
               counter: 1,
               products: myproduct
            }
         });
         Vue.delete(myproduct, 'price');
         console.log(vm);
         vm.$watch('counter', function(nval, oval) {
            alert('Counter is incremented :' + oval + ' to ' + nval + '!');
         });
      </script>
   </body>
</html>
在上面的示例中,我們使用Vue.delete從數組中刪除價格,方法是使用以下代碼。
Vue.delete(myproduct, 'price');
下面是輸出,我們在控制台中看到。

刪除後,由於價格被刪除,我們只能看到id和name。我們還可以注意到get/set方法被刪除了。
VueJS - Examples
Example 1: Currency Converter
<html>
   <head>
      <title>VueJs Instance</title>
      <script type = "text/javascript" src = "js/vue.js"></script>
   </head>
   <body>
      <style>
         #databinding{
            padding: 20px 15px 15px 15px;
            margin: 0 0 25px 0;
            width: auto;
            background-color: #e7e7e7;
         }
         span, option, input {
            font-size:25px;
         }
      </style>

      <div id = "databinding" style = "">
         <h1>Currency Converter</h1>
         <span>Enter Amount:</span><input type = "number" v-model.number = "amount" placeholder = "Enter Amount" /><br/><br/>
         <span>Convert From:</span>
         <select v-model = "convertfrom" style = "width:300px;font-size:25px;">
            <option v-for = "(a, index) in currencyfrom"  v-bind:value = "a.name">{{a.desc}}</option>
         </select>
         <span>Convert To:</span>
         <select v-model = "convertto" style = "width:300px;font-size:25px;">
            <option v-for = "(a, index) in currencyfrom" v-bind:value = "a.name">{{a.desc}}</option>
         </select><br/><br/>
         <span> {{amount}} {{convertfrom}} equals {{finalamount}} {{convertto}}</span>
      </div>

      <script type = "text/javascript">
         var vm = new Vue({
            el: '#databinding',
            data: {
               name:'',
               currencyfrom : [
                  {name : "USD", desc:"US Dollar"},
                  {name:"EUR", desc:"Euro"},
                  {name:"INR", desc:"Indian Rupee"},
                  {name:"BHD", desc:"Bahraini Dinar"}
               ],
               convertfrom: "INR",
               convertto:"USD",
               amount :""
            },
            computed :{
               finalamount:function() {
                  var to = this.convertto;
                  var from = this.convertfrom;
                  var final;
                  switch(from) {
                     case "INR":
                     if (to == "USD") {
                        final = this.amount * 0.016;
                     }
                     if (to == "EUR") {
                        final = this.amount * 0.013;
                     }
                     if (to == "INR") {
                        final = this.amount;
                     }
                     if (to == "BHD") {
                        final = this.amount * 0.0059;
                     }
                     break;
                     case "USD":
                     if (to == "INR") {
                        final = this.amount * 63.88;
                     }
                     if (to == "EUR") {
                        final = this.amount * 0.84;
                     }
                     if (to == "USD") {
                        final = this.amount;
                     }
                     if (to == "BHD") {
                        final = this.amount * 0.38;
                     }
                     break;
                     case "EUR":
                     if (to == "INR") {
                        final = this.amount * 76.22;
                     }
                     if (to == "USD") {
                        final = this.amount * 1.19;
                     }
                     if (to == "EUR") {
                        final = this.amount;
                     }
                     if (to == "BHD") {
                        final = this.amount * 0.45;
                     }
                     break;
                     case "BHD":
                     if (to == "INR") {
                        final = this.amount *169.44;
                     }
                     if (to == "USD") {
                        final = this.amount * 2.65;
                     }
                     if (to == "EUR") {
                        final = this.amount * 2.22;
                     }
                     if (to == "BHD") {
                        final = this.amount;
                     }
                     break
                  }
                  return final;
               }
            }
         });
      </script>
   </body>
</html>
Output (Conversion to USD)

Output: Conversion to BHD

解釋在上面的示例中,我們創建了一個貨幣轉換器,它將一種貨幣值轉換爲另一種貨幣的選定值。我們已經創建了兩個貨幣下拉列表。當我們在文本框中輸入要轉換的金額時,轉換後的金額將顯示在下面。我們正在使用computed屬性進行必要的貨幣轉換計算。
Example 2: Customer Details
<html>
   <head>
      <title>VueJs Instance</title>
      <script type = "text/javascript" src = "js/vue.js"></script>
   </head>
   <body>
      <style>
         #databinding{
            padding: 20px 15px 15px 15px;
            margin: 0 0 25px 0;
            width: auto;
         }
         span, option, input {
            font-size:20px;
         }
         .Table{
            display: table;
            width:80%;
         }
         .Title{
            display: table-caption;
            text-align: center;
            font-weight: bold;
            font-size: larger;
         }
         .Heading{
            display: table-row;
            font-weight: bold;
            text-align: center;
         }
         .Row{
            display: table-row;
         }
         .Cell{
            display: table-cell;
            border: solid;
            border-width: thin;
            padding-left: 5px;
            padding-right: 5px;
            width:30%;
         }
      </style>

      <div id = "databinding" style = "">
         <h1>Customer Details</h1>
         <span>First Name</span>
         <input type = "text" placeholder = "Enter First Name" v-model = "fname"/>
         <span>Last Name</span>
         <input type = "text" placeholder = "Enter Last Name" v-model = "lname"/>
         <span>Address</span>
         <input type = "text" placeholder = "Enter Address" v-model = "addr"/>
         <button v-on:click = "showdata" v-bind:style = "styleobj">Add</button>
         <br/>
         <br/>
         <customercomponent
            v-for = "(item, index) in custdet"
            v-bind:item = "item"
            v-bind:index = "index"
            v-bind:itr = "item"
            v-bind:key = "item.fname"
            v-on:removeelement = "custdet.splice(index, 1)">
         </customercomponent>
      </div>

      <script type = "text/javascript">
         Vue.component('customercomponent',{
            template : '<div class = "Table"><div class = "Row"  v-bind:style = "styleobj"><div class = "Cell"><p>{{itr.fname}}</p></div><div class = "Cell"><p>{{itr.lname}}</p></div><div class = "Cell"><p>{{itr.addr}}</p></div><div class = "Cell"><p><button v-on:click = "$emit(\'removeelement\')">X</button></p></div></div></div>',
            props: ['itr', 'index'],
            data: function() {
               return {
                  styleobj : {
                     backgroundColor:this.getcolor(),
                     fontSize : 20
                  }
               }
            },
            methods:{
               getcolor : function() {
                  if (this.index % 2) {
                     return "#FFE633";
                  } else {
                     return "#D4CA87";
                  }
               }
            }
         });
         var vm = new Vue({
            el: '#databinding',
            data: {
               fname:'',
               lname:'',
               addr : '',
               custdet:[],
               styleobj: {
                  backgroundColor: '#2196F3!important',
                  cursor: 'pointer',
                  padding: '8px 16px',
                  verticalAlign: 'middle',
               }
            },
            methods :{
               showdata : function() {
                  this.custdet.push({
                     fname: this.fname,
                     lname: this.lname,
                     addr : this.addr
                  });
                  this.fname = "";
                  this.lname = "";
                  this.addr = "";
               }
            }
         });
      </script>
   </body>
</html>
Output

Output after deletion

解釋在上面的例子中,我們有三個文本框要輸入-名字、姓氏和地址。有一個add按鈕,它使用delete按鈕以表格格式添加在文本框中輸入的值。
表格格式是使用組件創建的。單擊按鈕使用emit事件從數組中刪除elemet與父組件交互。輸入的值存儲在數組中,並使用prop屬性與子組件共享。