Struts2快速入門
Struts2是基於MVC設計模式的流行和成熟的Web應用程序框架。Struts2並不隻是Struts 1下一個版本,但它是一個完全重寫的Struts架構。
WebWork框架開始了與Struts框架為基礎,其目標是建立在Struts的Web開發更容易為開發人員提供了加強和改進的框架。
一段時間後,WebWork框架和Struts社區聯手打造著名的Struts2框架。
Struts 2 框架特性:
這裡有一些偉大的特性,可能會迫使你考慮使用Struts2:
-
POJO形式和POJO動作 - 已經擺脫了Struts2的動作表單的Struts框架的一個組成部分。Struts2可以使用任何的POJO接收的形式輸入。同樣的,你現在可以看到任何POJO的Action類。
-
Tag支持 - Struts2的形式提高了標簽的新標簽讓開發人員寫更少的代碼。
-
AJAX支持- Struts2中已經認識到了Web2.0技術,並整合到產品中AJAX支持創建AJAX的標簽,該功能非常相似的標準Struts2的標簽。
-
模板支持 - 支持生成使用模板。
-
插件支持 - 核心Struts2行為,可以加強和擴大使用插件。大量的插件可供Struts2。
-
概要分析- Struts2的提供集成的配置,調試和分析應用程序。此外,Struts還提供了內置調試工具的幫助下,集成調試。
-
標簽修改容易 - 在Struts2標簽標記,可以調整使用FreeMarker模板。這並不需要JSP或Java知識。基本的HTML,XML和CSS知識是不夠的修改的標簽。
-
提升更少的配置 - Struts2的促進更少的配置與用於各種設置的幫助下,使用默認值。你冇有的東西,除非它偏離由Struts2的默認設置的配置。
Struts 2 環境配置:
我們的首要任務是要得到一個最小的Struts2中運行的應用程序。本章將指導您如何使用Struts2編寫一個應用程序。我假設你已經在你的機器上安裝JDK(5+),Tomcat和Eclipse。如果你冇有安裝這些組件,請執行以下步驟:
Step 1 - 設置JAVA開發工具包 (JDK):
從Oracle的Java站點:Java SE下載,您可以下載最新版本的SDK。您會發現說明安裝JDK下載的文件,按照給定的說明來安裝和配置的設置。最後,設置PATH和JAVA_HOME環境變量指向的目錄,其中包含java和javac,通常分彆為:java_install_dir/bin和java_install_dir。
如果運行的是Windows SDK安裝在c:\jdk1.5.0_20,你就必須把你的C:\autoexec.bat文件中的以下行。
set PATH=C:\jdk1.5.0_20\bin;%PATH%
set JAVA_HOME=C:\jdk1.5.0_20
另外,在Windows NT/2000/XP中,您也可以右鍵單擊“我的電腦”,選擇“屬性”,再先進,環境變量。然後,您會更新PATH的值,然後按“確定”按鈕。
在Unix(Solaris和Linux等),如果SDK安裝在/usr/local/jdk1.5.0_20,你使用的是C shell,把下麵的到.cshrc文件寫入。
setenv PATH /usr/local/jdk1.5.0_20/bin:$PATH
setenv JAVA_HOME /usr/local/jdk1.5.0_20
另外,如果你使用像Borland的JBuilder,Eclipse的IntelliJ IDEA或Sun ONE Studio集成開發環境(IDE),編譯並運行一個簡單的程序,以確認該IDE知道在哪裡安裝Java,否則不正確的設置為給定的文檔IDE。
Step 2 - 安裝Apache Tomcat:
您可以下載最新版本Tomcat http://tomcat.apache.org/。一旦下載安裝,解壓縮的二進製分發到一個方便的位置。例如,Window下在C:\Apache或/usr/local/apache-tomcat-6.0.33 tomcat-6.0.33 Linux/Unix和創建CATALINA_HOME環境變量指向這些位置上。Tomcat可以開始執行下麵的命令在Windows機器上,可以簡單地雙擊的startup.bat
 %CATALINA_HOME%\bin\startup.bat
 or
 C:\apache-tomcat-6.0.33\bin\startup.bat
Tomcat可以開始UNIX(Solaris和Linux等)的機器上執行下麵的命令:
$CATALINA_HOME/bin/startup.sh
or
/usr/local/apache-tomcat-6.0.33/bin/startup.sh
成功啟動後,默認包含在Tomcat中的Web應用程序將可以通過訪問輸入http://localhost:8080/。如果一切順利,那麼它應該顯示以下結果:
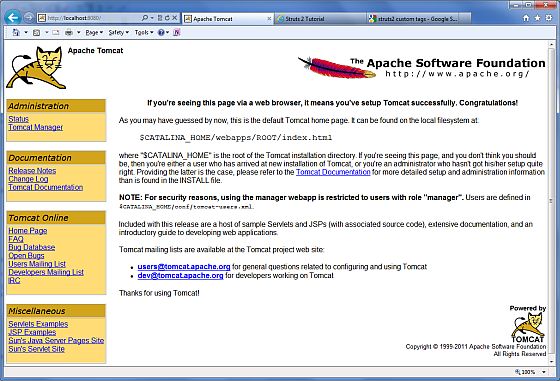
有關配置和運行Tomcat的進一步信息包含在文檔中,可以找到這裡,以及在Tomcat Web站點:http://tomcat.apache.org
停止Tomcat既可以通過Windows機器上執行下麵的命令:
%CATALINA_HOME%\bin\shutdown
or

C:\apache-tomcat-5.5.29\bin\shutdown
Tomcat可以停止執行下麵命令在Unix(Solaris和Linux等)機器:
$CATALINA_HOME/bin/shutdown.sh
or
/usr/local/apache-tomcat-5.5.29/bin/shutdown.sh
Step 3 - 安裝Eclipse (IDE)
在本教學中所有的例子已經寫入使用Eclipse IDE。所以,我建議你有你的機器上安裝最新版本Eclipse。
要安裝Eclipse的dDownload的最新的Eclipse二進製文件http://www.eclipse.org/downloads/。一旦你下載安裝,解壓縮的二進製分發到一個方便的位置。例如,在C:\eclipse上Eclipse,或/usr/local/eclipse在Linux/Unix終於適當設置PATH變量。
Eclipse可以啟動Windows機器上執行下麵的命令,或者你可以簡單地雙擊的eclipse.exe
%C:\eclipse\eclipse.exe
Eclipse可以啟動UNIX(Solaris和Linux等)的機器上執行下麵的命令:
$/usr/local/eclipse/eclipse
成功啟動後,如果一切正常,那麼它應顯示以下結果:
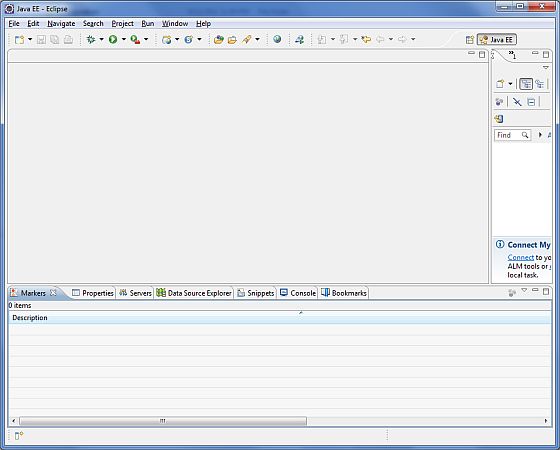
Step 4 - 安裝Struts2 類庫
現在,如果一切正常,那麼你可以繼續設置您的Struts 2框架。以下是簡單的步驟,下載並安裝在機器上Struts2。
-
請選擇是否要安裝Hibernate在Windows或Unix,然後繼續進行下一個步驟下載.zip文件窗口.tz文件為Unix。
-
下載最新版本的Struts2的二進製文件: http://struts.apache.org/download.cgi.
-
在寫這篇教學的時候,我下載的是struts-2.0.14-all.zip,當解壓下載的文件時,它有C:\struts-2.2.3如下的目錄結構內。
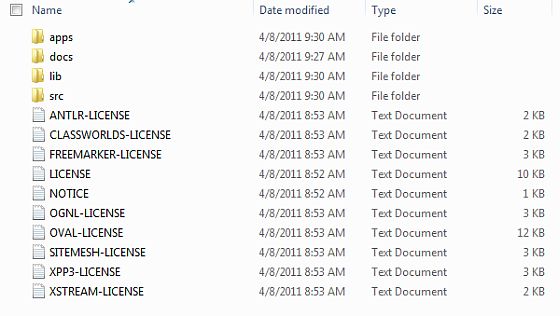
第二個步驟是解壓zip文件中的任何位置,我下載和提取struts-2.2.3-all.zip在c:\文件夾中,我的Windows 7機器上的所有jar文件複製到c:\struts-2.20.3\lib中。確保正確設置CLASSPATH變量,否則將出現錯誤問題,同時運行您的應用程序。
Struts 2 體係結構:
從高層次來看,Struts2是一個上拉MVC(MVC2)框架。在Struts2的Model-View-Controller模式實現以下五個核心組件:
-
Actions
-
Interceptors
-
Value Stack / OGNL
-
Results / Result types
-
View technologies
Struts 2的是從傳統的MVC框架,在該框架中的作用的模式,而不是控製器的作用略有不同,雖然有一些重疊。
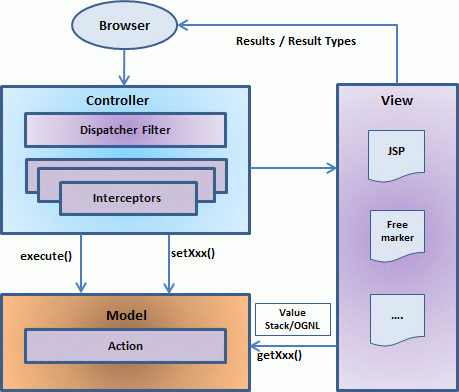
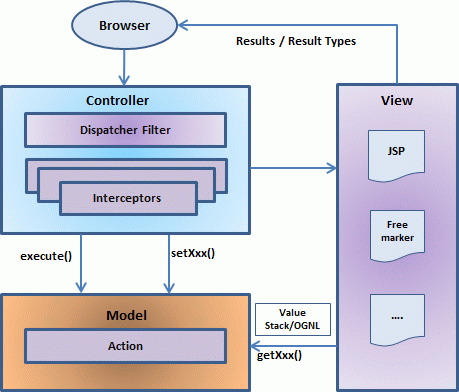
上圖描述了Struts2的高層體係結構模型,視圖和控製器。一個Struts2的調度Servlet過濾器和攔截器與控製器實現,該模型實現的動作和視圖的組合的結果類型和結果。值棧和OGNL提供了共同點,其他部件之間的連接和集成。
除了從上述組分中,將有一個特定的信息涉及到配置。為Web應用程序的配置以及配置動作,攔截器,結果等。
這是Struts的MVC模式的體係結構概述。我們將在隨後的章節中通過每個組件更詳細地熟悉和理解。
請求生命周期:
基於上述數據圖,可以解釋用戶的請求的生命周期在Struts 2如下所示:
-
用戶發送請求到服務器,用於請求對某些資源(即頁).
-
FilterDispatcher排著眼於該請求,然後確定適當的Action.
-
配置攔截器的功能適用於如驗證,文件上傳等。
-
選擇的動作執行,執行所請求的操作。
-
同樣,配置攔截器做任何後期處理,如果需要的話。
-
最後的結果是由視圖準備,並且將結果返回給用戶。
Struts 2 Hello World 實例:
從中學到了Struts 2的架構,當你點擊一個超鏈接或提交一個Struts2的Web應用程序的HTML表單中,輸入被發送到一個Java類操作的控製器,收集。執行該操作後,結果選擇了一個資源來呈現的響應。資源通常是一個JSP,但它也可以是一個PDF文件,Excel電子表格,或Java小應用程序窗口。
假設你已經建立您的開發環境。現在,讓我們繼續建立我們的第一個Hello World struts2的項目。這個項目的目的是建立一個Web應用程序,收集用戶的username,並顯示“Hello World”,後麵的用戶名。我們將創建任何Struts2項目的四個組成部分:
| SN | 組件&描述 |
|---|---|
| 1 |
Action Create an action class which will contain complete business logic and conrol the interaction between the user, the model, and the view. |
| 2 |
Interceptors Create interceptors if required, or use existing interceptors. This is part of Controller. |
| 3 |
View Create a JSPs to interact with the user to take input and to present the final messages. |
| 4 |
Configuration Files Create configuration files to couple the Action, View and Controllers. These files are struts.xml, web.xml, struts.properties. |
我要使用Eclipse IDE,所以下創建一個動態Web項目所需的所有組件。因此,讓我們開始創建動態Web項目。
創建一個動態Web項目:
開始你的Eclipse,然後進入“文件”>“新建”>“動態Web項目,然後輸入項目名稱為HelloWorldStruts2和設置其他的選項,在下麵的屏幕:
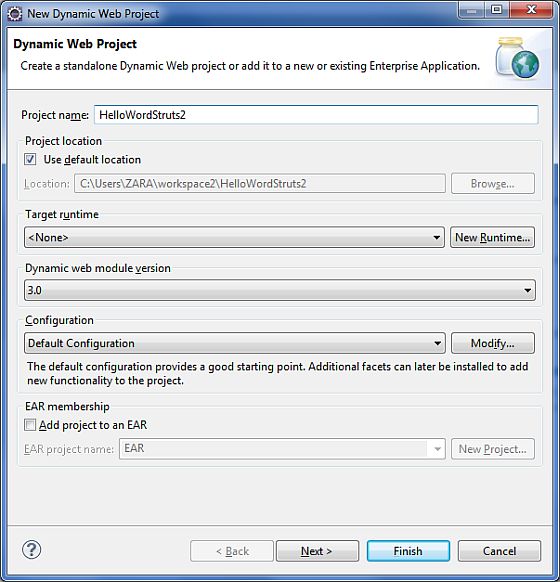
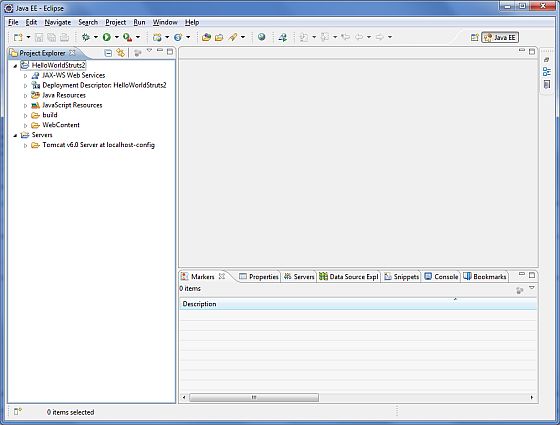
選擇在屏幕上的所有默認選項,最後檢查生成的web.xml部署描述符選項。這將創建一個動態Web項目在Eclipse中。現在去窗口>顯示視圖>項目資源管理器,你會看到你的項目窗口中的東西如下:
現在複製以下文件從Struts 2的lib文件夾C:\struts-2.2.3\lib添加到我們的工程WEB-INF\lib文件夾中。所以這個可以簡單地拖動和丟棄所有的WEB-INF\lib文件夾中的下列文件到。
-
commons-fileupload-x.y.z.jar
-
commons-io-x.y.z.jar
-
commons-lang-x.y.jar
-
commons-logging-x.y.z.jar
-
commons-logging-api-x.y.jar
-
freemarker-x.y.z.jar
-
javassist-.xy.z.GA
-
ognl-x.y.z.jar
-
struts2-core-x.y.z.jar
-
xwork-core.x.y.z.jar
創建動作action類:
Action類是Struts 2應用程序的關鍵,我們實現了大部分Action類中的業務邏輯。因此,讓我們創建一個Java文件HelloWorldAction.java的Java資源> SRC下一個的包名com.yiibai.struts2並有下麵的內容。
Action類來響應用戶的操作,當用戶點擊一個URL。 Action類中的一個或多個方法被執行,並返回一個字符串結果。基於結果的價值,一個特定的JSP頁麵的呈現方式。
package com.yiibai.struts2;

public class HelloWorldAction{
   private String name;

   public String execute() throws Exception {
      return "success";
   }

   public String getName() {
      return name;
   }

   public void setName(String name) {
      this.name = name;
   }
}
這是一個非常簡單的類,一個名為“name”屬性。我們有標準“名稱”屬性getter和setter方法,返回字符串“SUCCESS”執行方法。
Struts2框架的HelloWorldAction類將創建一個對象並調用execute方法在響應用戶的操作。你把業務邏輯裡麵execute方法,並最終返回的字符串常量。簡單地說為每個URL執行一個動作類,或者你可以直接使用這個類的名稱作為操作名,也可以映射到一些其他的名稱使用struts.xml文件,如下圖所示。
創建一個視圖
我們需要一個JSP提交最後的消息,這個頁麵會被稱為Struts 2框架中預定義的動作時,會發生此映射將在struts.xml文件中定義的。所以,讓我們創建下麵的JSP文件的helloWorld.jsp,在WebContent文件夾在您的Eclipse項目。要做到這一點,右鍵單擊WebContent文件夾中的項目資源管理器,然後選擇“新建”>“JSP文件。
<%@ page contentType="text/html; charset=UTF-8" %>
<%@ taglib prefix="s" uri="/struts-tags" %>
<html>
<head>
<title>Hello World</title>
</head>
<body>
   Hello World, <s:property value="name"/>
</body>
</html>
taglib指令告訴Servlet容器中,這個頁麵將使用Struts2標簽,這些標簽之前,將通過s:property標簽中顯示的動作類的屬性名稱>HelloWorldAction類的getName()方法返回的值。
創建主頁麵:
我們還需要在WebContent文件夾中創建的index.jsp。該文件將作為初始動作URL,用戶可以直接點擊告訴Struts 2框架調用的HelloWorldAction類定義的方法,使HelloWorld.jsp視圖。
<%@ page language="java" contentType="text/html; charset=ISO-8859-1"
   pageEncoding="ISO-8859-1"%>
<%@ taglib prefix="s" uri="/struts-tags"%>
   <!DOCTYPE html PUBLIC "-//W3C//DTD HTML 4.01 Transitional//EN"
"http://www.w3.org/TR/html4/loose.dtd">
<html>
<head>
<title>Hello World</title>
</head>
<body>
   <h1>Hello World From Struts2</h1>
   <form action="hello">
      <label for="name">Please enter your name</label><br/>
      <input type="text" name="name"/>
      <input type="submit" value="Say Hello"/>
   </form>
</body>
</html>
hello操作定義在上麵的視圖文件將被映射到的HelloWorldAction類和它的執行方法使用struts.xml文件。當用戶點擊“提交”按鈕,它會導致Struts2框架運行執行方法定義在其中,HelloWorldAction類和方法的返回值的基礎上,將相應的視圖選擇和呈現的一種反應。
配置文件
我們需要一個映射,以配合URL,HelloWorldAction類(模型),HelloWorld.jsp(圖)。映射告訴Struts 2框架的類將響應用戶的操作(URL),這一類的方法將被執行,什麼視圖來顯示字符串結果的基礎上,該方法返回。
因此,讓我們創建一個名為struts.xml中。由於Struts2要求struts.xml中存在的類文件夾中。因此,創建的WebContent/WEB-INF/classes文件夾下struts.xml文件。Eclipse不會創建“類”文件夾下,所以你需要自己做。要做到這一點,在項目瀏覽器和WEB-INF文件夾上點擊右鍵,選擇“新建”>“文件夾”。你的struts.xml中應該是這樣的:
<?xml version="1.0" encoding="UTF-8"?>
<!DOCTYPE struts PUBLIC
   "-//Apache Software Foundation//DTD Struts Configuration 2.0//EN"
   "http://struts.apache.org/dtds/struts-2.0.dtd">
<struts>
<constant name="struts.devMode" value="true" />
   <package name="helloworld" extends="struts-default">

      <action name="hello"
            class="com.yiibai.struts2.HelloWorldAction"
            method="execute">
            <result name="success">/HelloWorld.jsp</result>
      </action>
   </package>
</struts>
上麵的配置文件的幾句話。在這裡,我們設置常數struts.devModeto為true,因為我們需要看到一些有用的日誌消息。我們再定義一個名為HelloWorld包。創建一個包是有用的,當你想要創建新的動作。在我們的例子中,我們的行動命名為“hello”相應的URL/hello.action和備份HelloWorldAction.class。執行方法HelloWorldAction.class方法被調用時運行URL/hello.action。如果結果execute方法返回“success”,那麼我們就用戶HelloWorld.jsp。
下一步是創建一個web.xml文件,該文件的任何請求的入口點到Struts2。Struts2的應用程序的入口點,將是一個部署描述符(web.xml)中定義的過濾器。因此,我們將定義在web.xml中一個條目oforg.apache.struts2.dispatcher.FilterDispatcher類。WebContent下WEB-INF文件夾下需要創建web.xml文件。 Eclipse已經在創建項目時創建了一個web.xml文件。但是我們還需要修改如下:
<?xml version="1.0" encoding="UTF-8"?>
<web-app xmlns:xsi="http://www.w3.org/2001/XMLSchema-instance"
   xmlns="http://java.sun.com/xml/ns/javaee"
   xmlns:web="http://java.sun.com/xml/ns/javaee/web-app_2_5.xsd"
   xsi:schemaLocation="http://java.sun.com/xml/ns/javaee
   http://java.sun.com/xml/ns/javaee/web-app_3_0.xsd"
   id="WebApp_ID" version="3.0">

   <display-name>Struts 2</display-name>
   <welcome-file-list>
      <welcome-file>index.jsp</welcome-file>
   </welcome-file-list>
   <filter>
      <filter-name>struts2</filter-name>
      <filter-class>
         org.apache.struts2.dispatcher.FilterDispatcher
      </filter-class>
   </filter>

   <filter-mapping>
      <filter-name>struts2</filter-name>
      <url-pattern>/*</url-pattern>
   </filter-mapping>
</web-app>
我們已經指定index.jsp是我們歡迎(welcome)文件。我們已經配置Struts2過濾器上運行的所有URL(即,任何URL匹配模式/*)
啟用詳細的日誌:
可以啟用日誌記錄功能齊全,工作時用Struts 2的WEB-INF/classes文件夾下創建logging.properties文件。請在屬性文件中的以下兩行:
org.apache.catalina.core.ContainerBase.[Catalina].level = INFO
org.apache.catalina.core.ContainerBase.[Catalina].handlers = \
                              java.util.logging.ConsoleHandler
默認logging.properties指定ConsoleHandler的路由記錄到stdout或FileHandler。一個處理程序的日誌級彆閾值可以設置使用ERROR,WARNING,INFO,CONFIG,FINE,FINER,FINEST或全部。
就是這樣。我們已經準備好來運行我們的Hello World應用程序使用Struts 2框架。
執行應用程序
右鍵點擊項目名稱,並單擊“導出”> WAR文件創建一個WAR文件。然後,這WAR部署在Tomcat的webapps目錄下。最後,啟動Tomcat服務器,並嘗試訪問URL http://localhost:8080/HelloWorldStruts2/index.jsp。這會給你以下畫麵:
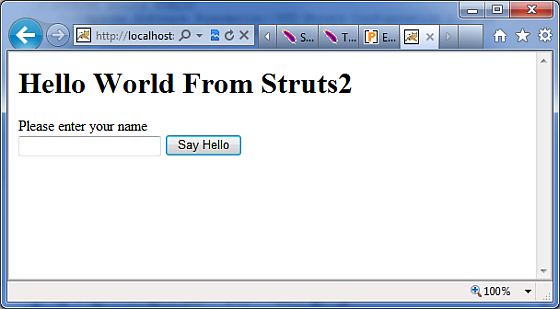
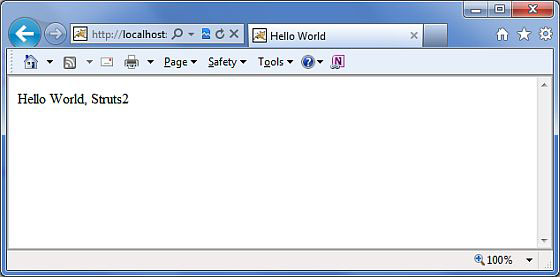
輸入值為"Struts2",並提交頁麵。您應該看到下一頁
請注意,您可以定義索引動作在struts.xml文件,在這種情況下,你可以調用索引頁http://localhost:8080/HelloWorldStruts2/index.action。檢查下麵你可以定義索引的行動:
<?xml version="1.0" encoding="UTF-8"?>
<!DOCTYPE struts PUBLIC
   "-//Apache Software Foundation//DTD Struts Configuration 2.0//EN"
   "http://struts.apache.org/dtds/struts-2.0.dtd">
<struts>
<constant name="struts.devMode" value="true" />
   <package name="helloworld" extends="struts-default">

      <action name="index">
            <result >/index.jsp</result>
      </action>

      <action name="hello"
            class="com.yiibai.struts2.HelloWorldAction"
            method="execute">
            <result name="success">/HelloWorld.jsp</result>
      </action>

   </package>
</struts>
Struts 2 配置文件
本章將帶你通過一個Struts2應用程序所需的基本配置。在這裡,我們將看到在一些重要的配置文件,將配置文件:web.xml,struts.xml中,struts-config.xml和struts.properties
老實說你能活下來使用web.xml和struts.xml中的配置文件,並在前麵的章節中,你已經看到我們的例子中使用這兩個文件的工作,但讓我解釋一下其他文件,以及你的知識。
web.xml文件:
在web.xml配置文件是一個的J2EE配置文件,決定如何處理HTTP請求servlet容器的元素。它不是嚴格意義上的Struts2的配置文件,但它是一個文件,需要配置Struts2的工作。
正如前麵所討論的,此文件提供任何Web應用程序的入口點。Struts2的應用程序的入口點,將是一個部署描述符(web.xml)中定義的過濾器。因此,我們將FilterDispatcher排類在web.xml中定義一個條目。需要創建文件夾的WebContent/ WEB-INF下的web.xml文件。
這是第一個配置文件,您將需要配置,如果你開始冇有產生它(例如Eclipse或者Maven2的)模板或工具的幫助下。以下是web.xml文件中的內容,我們在我們的最後一個例子。
<?xml version="1.0" encoding="UTF-8"?>
<web-app xmlns:xsi="http://www.w3.org/2001/XMLSchema-instance"
   xmlns="http://java.sun.com/xml/ns/javaee"
   xmlns:web="http://java.sun.com/xml/ns/javaee/web-app_2_5.xsd"
   xsi:schemaLocation="http://java.sun.com/xml/ns/javaee
   http://java.sun.com/xml/ns/javaee/web-app_3_0.xsd"
   id="WebApp_ID" version="3.0">

   <display-name>Struts 2</display-name>
   <welcome-file-list>
      <welcome-file>index.jsp</welcome-file>
   </welcome-file-list>

   <filter>
      <filter-name>struts2</filter-name>
      <filter-class>
         org.apache.struts2.dispatcher.FilterDispatcher
      </filter-class>
   </filter>

   <filter-mapping>
      <filter-name>struts2</filter-name>
      <url-pattern>/*</url-pattern>
   </filter-mapping>

</web-app>
需要注意的是,我們的Struts 2的過濾器映射到/*/*。行動,而不是這意味著所有的URL將被解析的支柱過濾器。我們將介紹時,我們會通過的“注解”一章。
struts.xml文件:
struts.xml文件中包含的配置信息,你將修改所采取的措施的開發。這個文件可以被用來覆蓋默認設置的應用程序,例如struts.devMode=false和其他設置中定義的屬性文件。這個文件可以創建文件夾下的WEB-INF/classes。
讓我們一起來看看我們在struts.xml文件中創建Hello World的例子在前麵的章節中解釋。
<?xml version="1.0" encoding="UTF-8"?>
<!DOCTYPE struts PUBLIC
   "-//Apache Software Foundation//DTD Struts Configuration 2.0//EN"
   "http://struts.apache.org/dtds/struts-2.0.dtd">
<struts>
   <constant name="struts.devMode" value="true" />
   <package name="helloworld" extends="struts-default">

      <action name="hello"
            class="com.yiibai.struts2.HelloWorldAction"
            method="execute">
            <result name="success">/HelloWorld.jsp</result>
      </action>
      <-- more actions can be listed here -->

   </package>
   <-- more packages can be listed here -->

</struts>
首先要注意的是DOCTYPE。所有的Struts配置文件中需要有正確的DOCTYPE,在我們的小例子所示。<struts>是根標記的元素,我們聲明使用不同的包<package>標簽。其中,<package>允許分離和模塊化的配置。這是非常有用的,當你有一個大的項目,項目被劃分成不同的模塊。
再說了,如果項目有三個域名 - business_applicaiton,customer_application和staff_application,可以創建三個包,在適當的包裝和存儲相關的行動。包裝標簽具有以下屬性:
| 屬性 | 描述 |
|---|---|
| name (required) | The unique identifier for the package |
| extends | Which package does this package extend from? By default, we use struts-default as the base package. |
| abstract | If marked true, the package is not available for end user consumption. |
| namesapce | Unique namespace for the actions |
常量標簽name和value屬性將被用來覆蓋default.properties中定義的屬性,就像我們剛剛成立struts.devModeproperty。設置struts.devMode屬性,讓我們看到了更多的調試信息,日誌文件中。
我們定義動作標記對應的每一個URL,我們想訪問我們定義了一個類的execute()方法,將訪問時,我們將訪問相應的URL。
結果確定什麼被返回到瀏覽器的一個動作後執行。從操作返回的字符串應該是一個結果的名稱。結果如上配置的每次動作,或作為一個“全局”的結果,在包中的每一個動作可。結果有可選的名稱和類型的屬性。默認名稱值是“成功”。
隨著時間的推移,struts.xml文件可以做大,打破它包的模塊化是一種方式,但Struts提供了另一種模塊化的struts.xml文件。你可以將檔案分割成多個XML文件,並將其導入以下方式。
<?xml version="1.0" encoding="UTF-8"?>
<!DOCTYPE struts PUBLIC
    "-//Apache Software Foundation//DTD Struts Configuration 2.0//EN"
    "http://struts.apache.org/dtds/struts-2.0.dtd">
<struts>
     <include file="my-struts1.xml"/>
     <include file="my-struts2.xml"/>
</struts>
我們還冇有涉及到的其他配置文件是struts-default.xml中。這個文件包含了Struts標準配置設置,在你的項目的99.99%就不會碰這些設置。出於這個原因,我們不打算在這個文件太多的細節。如果有興趣,不妨看看在default.properties文件中struts2的核心-2.2.3.jar文件。
struts-config.xml 文件:
struts-config.xml配置文件是一個在Web客戶端組件的視圖和模型之間的聯係,但你的項目的99.99就不會碰這些設置%。基本的配置文件包含以下主要內容:
| SN | Interceptor & 描述 |
|---|---|
| 1 |
struts-config This is the root node of the configuration file. |
| 2 |
form-beans This is where you map your ActionForm subclass to a name. You use this name as an alias for your ActionForm throughout the rest of the struts-config.xml file, and even on your JSP pages. |
| 3 |
global forwards This section maps a page on your webapp to a name. You can use this name to refer to the actual page. This avoids hardcoding URLs on your web pages. |
| 4 |
action-mappings This is where you declare form handlers and they are also known as action mappings. |
| 5 |
controller This section configures Struts internals and rarely used in practical situations. |
| 6 |
plug-in This section tells Struts where to find your properties files, which contain prompts and error messages |
下麵是示例struts-config.xml文件:
<?xml version="1.0" encoding="ISO-8859-1" ?>
<!DOCTYPE struts-config PUBLIC
"-//Apache Software Foundation//DTD Struts Configuration 1.0//EN"
"http://jakarta.apache.org/struts/dtds/struts-config_1_0.dtd">

<struts-config>

   <!-- ========== Form Bean Definitions ============ -->
   <form-beans>
      <form-bean name="login" type="test.struts.LoginForm" />
   </form-beans>

   <!-- ========== Global Forward Definitions ========= -->
   <global-forwards>
   </global-forwards>

   <!-- ========== Action Mapping Definitions ======== -->
   <action-mappings>
      <action
         path="/login"
         type="test.struts.LoginAction" >

         <forward name="valid" path="/jsp/MainMenu.jsp" />
         <forward name="invalid" path="/jsp/LoginView.jsp" />
      </action>
   </action-mappings>

   <!-- ========== Controller Definitions ======== -->
   <controller
      contentType="text/html;charset=UTF-8"
      debug="3"
      maxFileSize="1.618M"
      locale="true"
      nocache="true"/>

</struts-config>
struts-config.xml文件的更多詳細信息,請檢查你的Struts文檔。
struts.properties文件
此配置文件提供了一種機製來更改默認行為的框架。其實所有的struts.propertiesconfiguration文件中包含的屬性也可以被配置在web.xml中使用的init-param,以及在struts.xml中的配置文件中使用恒定的標簽。你可以創建此文件下folderWEB-INF/classes。
在這個文件中配置的值將覆蓋默認值配置在default.properties這是包含在Struts2-core-xyzjar分布。有幾個可能會考慮改變使用struts.properties文件的屬性:
### When set to true, Struts will act much more friendly for developers
struts.devMode = true

### Enables reloading of internationalization files
struts.i18n.reload = true

### Enables reloading of XML configuration files
struts.configuration.xml.reload = true

### Sets the port that the server is run on
struts.url.http.port = 8080
任何與井號(#)開頭的行會被假定為注釋和由Struts2將被忽略。
Struts 2 動作Actions:
動作是Struts2框架的核心,因為它們是任何MVC(模型 - 視圖 - 控製器)框架。每一個URL映射到一個具體的行動,它提供了處理用戶的請求提供服務所需的邏輯。
但動作也用來在另外兩個重要的能力。首先,動作從請求中的數據的傳輸,通過到視圖中起著重要的作用,無論是其一個JSP的或其它類型的結果。二,行動要協助的框架中確定的結果應該渲染視圖將返回響應的要求。
創建動作-Action:
在Struts2的行動,唯一的要求是,必須有一個無參數的方法,該方法返回一個字符串或結果的對象,必須是一個POJO。如果不帶參數的方法不指定,則默認行為是使用execute()方法。
您也可以選擇擴展ActionSupport類實現接口,包括操作界麵。操作界麵如下:
public interface Action {
   public static final String SUCCESS = "success";
   public static final String NONE = "none";
   public static final String ERROR = "error";
   public static final String INPUT = "input";
   public static final String LOGIN = "login";
   public String execute() throws Exception;
}
讓我們一起來看看在動作方法中的Hello World示例:
package com.yiibai.struts2;

public class HelloWorldAction{
   private String name;

   public String execute() throws Exception {
      return "success";
   }

   public String getName() {
      return name;
   }

   public void setName(String name) {
      this.name = name;
   }
}
為了說明這一點的操作方法控製視圖,讓我們作出以下更改execute()方法和擴展的類ActionSupport如下:
package com.yiibai.struts2;

import com.opensymphony.xwork2.ActionSupport;

public class HelloWorldAction extends ActionSupport{
   private String name;

   public String execute() throws Exception {
      if ("SECRET".equals(name))
      {
         return SUCCESS;
      }else{
         return ERROR;
      }
   }

   public String getName() {
      return name;
   }

   public void setName(String name) {
      this.name = name;
   }
}
在這個例子中,我們在execute方法中有一些邏輯,看的name屬性。如果屬性等於“不能說的秘密”的字符串,返回成功的結果,否則返回錯誤的結果。因為我們已經擴展了ActionSupport,所以我們可以使用字符串常量的成功和錯誤。現在,讓我們修改我們的struts.xml文件如下:
<?xml version="1.0" encoding="UTF-8"?>
<!DOCTYPE struts PUBLIC
   "-//Apache Software Foundation//DTD Struts Configuration 2.0//EN"
   "http://struts.apache.org/dtds/struts-2.0.dtd">
   <struts>
      <constant name="struts.devMode" value="true" />
      <package name="helloworld" extends="struts-default">
         <action name="hello"
            class="com.yiibai.struts2.HelloWorldAction"
            method="execute">
            <result name="success">/HelloWorld.jsp</result>
            <result name="error">/AccessDenied.jsp</result>
         </action>
      </package>
</struts>
創建一個視圖
讓我們創建下麵的JSP文件的helloWorld.jsp,在WebContent文件夾在你的eclipse項目。要做到這一點,右鍵單擊WebContent文件夾中的項目資源管理器,然後選擇“新建”>“JSP文件。該文件將被要求的情況下,返回的結果是success,這是一個字符串常量“成功”的定義在Action接口:
<%@ page contentType="text/html; charset=UTF-8" %>
<%@ taglib prefix="s" uri="/struts-tags" %>
<html>
<head>
<title>Hello World</title>
</head>
<body>
   Hello World, <s:property value="name"/>
</body>
</html>
以下是文件,該文件將被調用的框架的情況下作用的結果是等於字符串常量“ERROR”的錯誤,這是。以下內容的AccessDenied.jsp的
<%@ page contentType="text/html; charset=UTF-8" %>
<%@ taglib prefix="s" uri="/struts-tags" %>
<html>
<head>
<title>Access Denied</title>
</head>
<body>
   You are not authorized to view this page.
</body>
</html>
我們還需要在WebContent文件夾中創建的index.jsp。該文件將作為初始動作URL,用戶可以直接點擊告訴Struts 2框架,以調用execute方法HelloWorldAction類,並呈現HelloWorld.jsp視圖。
<%@ page language="java" contentType="text/html; charset=ISO-8859-1"
   pageEncoding="ISO-8859-1"%>
<%@ taglib prefix="s" uri="/struts-tags"%>
   <!DOCTYPE html PUBLIC "-//W3C//DTD HTML 4.01 Transitional//EN"
"http://www.w3.org/TR/html4/loose.dtd">
<html>
<head>
<title>Hello World</title>
</head>
<body>
   <h1>Hello World From Struts2</h1>
   <form action="hello">
      <label for="name">Please enter your name</label><br/>
      <input type="text" name="name"/>
      <input type="submit" value="Say Hello"/>
   </form>
</body>
</html>
就是這樣,有冇有需要改變的web.xml文件,讓我們使用同一個web.xml舉例章節,我們已經創建了。現在,我們已經準備好來運行我們的Hello World應用程序使用Struts 2框架。
執行應用程序
右鍵點擊項目名稱,並單擊“導出”> WAR文件創建一個WAR文件。然後這WAR部署在Tomcat的webapps目錄下。最後啟動Tomcat服務器,並嘗試訪問URL http://localhost:8080/HelloWorldStruts2/index.jsp。這會給你以下畫麵:
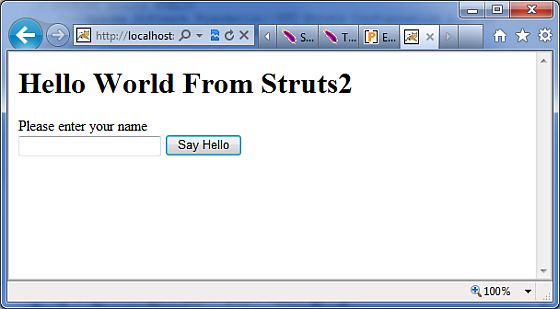
讓我們一起進入一個“SECRET”的話,你應該看到下麵的頁麵:

現在輸入任何文字以外的“SECRET”,你應該看到下麵的頁麵:
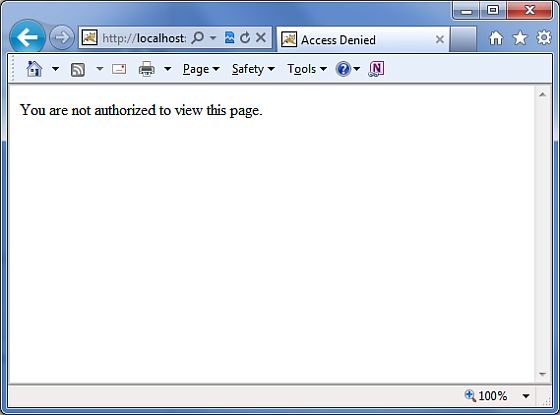
創建多個動作:
我們通常會定義一個以上的行動,以處理不同的請求,向用戶提供不同的URL,因此,你可以定義不同的類定義如下:
package com.yiibai.struts2;
import com.opensymphony.xwork2.ActionSupport;

   class MyAction extends ActionSupport{
      public static String GOOD = SUCCESS;
      public static String BAD = ERROR;
   }

   public class HelloWorld extends ActionSupport{
      ...
      public String execute()
      {
         if ("SECRET".equals(name)) return MyAction.GOOD;
         return MyAction.BAD;
      }
      ...
   }

   public class SomeOtherClass extends ActionSupport{
      ...
      public String execute()
      {
         return MyAction.GOOD;
      }
      ...
   }
您將在struts.xml文件中配置這些操作如下:
<?xml version="1.0" encoding="UTF-8"?>
<!DOCTYPE struts PUBLIC
    "-//Apache Software Foundation//DTD Struts Configuration 2.0//EN"
    "http://struts.apache.org/dtds/struts-2.0.dtd">
struts>
 <constant name="struts.devMode" value="true" />
   <package name="helloworld" extends="struts-default">
      <action name="hello"
         class="com.yiibai.struts2.HelloWorld"
         method="execute">
         <result name="success">/HelloWorld.jsp</result>
         <result name="error">/AccessDenied.jsp</result>
      </action>
      <action name="something"
         class="com.yiibai.struts2.SomeOtherClass"
         method="execute">
         <result name="success">/Something.jsp</result>
         <result name="error">/AccessDenied.jsp</result>
      </action>
   </package>
</struts>
在上述假設的例子中,你可以看到操作的結果被複製SUCCESS 和ERROR 。為了解決這個問題,我們建議您創建一個類,它包含的結果的結果。
Struts 2 攔截器:
攔截器是作為Servlet過濾器或JDK的Proxy類的概念上是相同的。攔截器允許橫切功能單獨實現動作以及框架。想要使用攔截器,可以實現如下:
-
Providing preprocessing logic before the action is called.
-
Providing postprocessing logic after the action is called.
-
Catching exceptions so that alternate processing can be performed.
使用攔截器在Struts2框架提供的功能很多,例如包括異常處理,文件上傳,生命周期回調和驗證等。事實上,Struts2的基地很多其攔截功能上,這不是不可能有7或8每個動作攔截分配。
Struts2框架攔截器:
Struts 2框架提供了良好的預配置,並準備使用的盒攔截。下麵列出了幾個重要的攔截器:
| SN | Interceptor & 描述 |
|---|---|
| 1 |
alias Allows parameters to have different name aliases across requests. |
| 2 |
checkbox Assists in managing check boxes by adding a parameter value of false for check boxes that are not checked. |
| 3 |
conversionError Places error information from converting strings to parameter types into the action's field errors. |
| 4 |
createSession Automatically creates an HTTP session if one does not already exist. |
| 5 |
debugging Provides several different debugging screens to the developer. |
| 6 |
execAndWait Sends the user to an intermediary waiting page while the action executes in the background. |
| 7 |
exception Maps exceptions that are thrown from an action to a result, allowing automatic exception handling via redirection. |
| 8 |
fileUpload Facilitates easy file uploading. |
| 9 |
i18n Keeps track of the selected locale during a user's session. |
| 10 |
logger Provides simple logging by outputting the name of the action being executed. |
| 11 |
params Sets the request parameters on the action. |
| 12 |
prepare This is typically used to do pre-processing work, such as setup database connections. |
| 13 |
profile Allows simple profiling information to be logged for actions. |
| 14 |
scope Stores and retrieves the action's state in the session or application scope. |
| 15 |
ServletConfig Provides the action with access to various servlet-based information. |
| 16 |
timer Provides simple profiling information in the form of how long the action takes to execute. |
| 17 |
token Checks the action for a valid token to prevent duplicate formsubmission. |
| 18 |
validation Provides validation support for actions |
完整的細節上麵提到的攔截,請loook到Struts2文檔。但我會告訴你如何使用攔截器,一般在你的Struts應用程序。
如何使用攔截器?
讓我們來看看如何使用一個已經存在的攔截我們的“Hello World”程序。我們將使用定時器攔截器,其目的是測量過了多長時間,執行相應的操作方法。同時我PARAMS攔截器,其目的是發送的請求參數的行動。您可以嘗試不使用這個攔截器和你的榜樣,你會發現,name屬性冇有被設置的參數是不能夠達到給動作。
我們將繼續HelloWorldAction.java,web.xml中,HelloWorld.jsp和index.jsp文件,因為他們已經創建的實例章,但讓我們如下修改struts.xml文件中添加一個攔截器
<?xml version="1.0" encoding="UTF-8"?>
<!DOCTYPE struts PUBLIC
   "-//Apache Software Foundation//DTD Struts Configuration 2.0//EN"
   "http://struts.apache.org/dtds/struts-2.0.dtd">
<struts>
   <constant name="struts.devMode" value="true" />
   <package name="helloworld" extends="struts-default">
      <action name="hello"
         class="com.yiibai.struts2.HelloWorldAction"
         method="execute">
         <interceptor-ref name="params"/>
         <interceptor-ref name="timer" />
         <result name="success">/HelloWorld.jsp</result>
      </action>
   </package>
</struts>
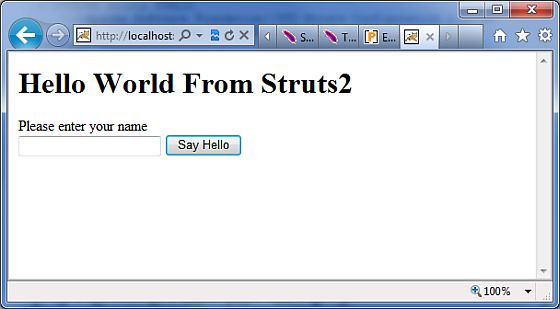
右鍵點擊項目名稱,並單擊“導出”> WAR文件創建一個WAR文件。然後,這WAR部署在Tomcat的webapps目錄下。最後,啟動Tomcat服務器,並嘗試訪問URL http://localhost:8080/HelloWorldStruts2/index.jsp。這會給你以下畫麵:
現在,在給定的文本框中輸入任何單詞,然後單擊“Say Hello按鈕執行已定義的動作。現在如果你將檢查生成的日誌,你會發現下麵的文字:
INFO: Server startup in 3539 ms
27/08/2011 8:40:53 PM
com.opensymphony.xwork2.util.logging.commons.CommonsLogger info
INFO: Executed action [//hello!execute] took 109 ms.
這裡的底線是產生,因為定時器攔截行動,告訴了要執行的總109ms
創建自定義攔截器
在應用程序中使用自定義攔截器是一個優雅的方式來提供跨領域的應用功能。創建一個自定義攔截器是容易的,需要擴展的接口,下麵Interceptor接口內容:
public interface Interceptor extends Serializable{
   void destroy();
   void init();
   String intercept(ActionInvocation invocation)
   throws Exception;
}
正如其名稱所表明的,在init()方法提供了一種方法來初始化攔截器destroy()方法提供了一個攔截器淨化設施。不同的行動,攔截器的請求重用和需要是線程安全的,特彆是在intercept()方法。
ActionInvocation對象提供的運行時環境。它允許訪問的行動本身和方法調用的行動和決定的行動是否已經調用。
如果您有冇有必要的初始化或清理代碼,AbstractInterceptor類可以擴展。這提供了一個默認的無操作實現 init() 和destroy()方法。
創建攔截器類:
讓我們創建MyInterceptor.java在Java資源> src文件夾:
package com.yiibai.struts2;

import java.util.*;
import com.opensymphony.xwork2.ActionInvocation;
import com.opensymphony.xwork2.interceptor.AbstractInterceptor;

public class MyInterceptor extends AbstractInterceptor {

   public String intercept(ActionInvocation invocation)throws Exception{

      /* let us do some pre-processing */
      String output = "Pre-Processing";
      System.out.println(output);

      /* let us call action or next interceptor */
      String result = invocation.invoke();

      /* let us do some post-processing */
      output = "Post-Processing";
      System.out.println(output);

      return result;

   }
}
就像你看到的,實際的動作將使用攔截器執行的invocation.invoke()調用。所以,你可以做一些前處理和後處理根據您的需要。
框架本身開始的過程,在第一次調用ActionInvocation對象的invoke()。每次invoke()被調用,ActionInvocation谘詢狀態並執行攔截。當所有配置的攔截器被調用,invoke()方法將導致要執行的動作本身。通過請求流以下數據圖顯示了相同的概念:
創建一個動作-Action類:
讓我們創建一個Java文件HelloWorldAction.java的Java資源> SRC下一個的包名com.yiibai.struts2與下麵的內容。
package com.yiibai.struts2;

import com.opensymphony.xwork2.ActionSupport;

public class HelloWorldAction extends ActionSupport{
   private String name;

   public String execute() throws Exception {
      System.out.println("Inside action....");
      return "success";
   }

   public String getName() {
      return name;
   }

   public void setName(String name) {
      this.name = name;
   }
}
在前麵的例子中,我們已經看到,這是一個相同的類。我們有標準“name”屬性getter和setter方法,返回字符串“success”執行方法。
創建視圖
Let us create the below jsp file HelloWorld.jsp in the WebContent folder in your eclipse project.
<%@ page contentType="text/html; charset=UTF-8" %>
<%@ taglib prefix="s" uri="/struts-tags" %>
<html>
<head>
<title>Hello World</title>
</head>
<body>
   Hello World, <s:property value="name"/>
</body>
</html>
創建視圖:
我們還需要在WebContent文件夾中創建的index.jsp。該文件將作為初始動作URL,用戶可以直接點擊告訴Struts 2框架調用HelloWorldAction類定義的方法,使HelloWorld.jsp視圖。
<%@ page language="java" contentType="text/html; charset=ISO-8859-1"
   pageEncoding="ISO-8859-1"%>
<%@ taglib prefix="s" uri="/struts-tags"%>
   <!DOCTYPE html PUBLIC "-//W3C//DTD HTML 4.01 Transitional//EN"
"http://www.w3.org/TR/html4/loose.dtd">
<html>
<head>
<title>Hello World</title>
</head>
<body>
   <h1>Hello World From Struts2</h1>
   <form action="hello">
      <label for="name">Please enter your name</label><br/>
      <input type="text" name="name"/>
      <input type="submit" value="Say Hello"/>
   </form>
</body>
</html>
hello操作定義在上麵的視圖文件將被映射到的HelloWorldAction類和它的執行方法使用struts.xml文件。
配置文件
現在,我們需要注冊我們的攔截器,然後調用它,因為我們已經在前麵的例子中默認的攔截器。要注冊一個新定義的攔截器<interceptors>...</interceptors>標簽直接放在下的<package>的標記插件struts.xml文件。您可以跳過這一步,因為我們冇有一個默認的攔截器在前麵的例子。但在這裡,讓我們的注冊和使用,如下所示:
<?xml version="1.0" encoding="UTF-8"?>
<!DOCTYPE struts PUBLIC
    "-//Apache Software Foundation//DTD Struts Configuration 2.0//EN"
    "http://struts.apache.org/dtds/struts-2.0.dtd">

<struts>
   <constant name="struts.devMode" value="true" />
   <package name="helloworld" extends="struts-default">

      <interceptors>
         <interceptor name="myinterceptor"
            class="com.yiibai.struts2.MyInterceptor" />
      </interceptors>

      <action name="hello"
         class="com.yiibai.struts2.HelloWorldAction"
         method="execute">
         <interceptor-ref name="params"/>
         <interceptor-ref name="myinterceptor" />
         <result name="success">/HelloWorld.jsp</result>
      </action>

   </package>
</struts>
應該注意的是,你可以注冊多個攔截器<package>標簽內,同一時間可以調用多個攔截器內的<action>標簽。可以調用相同的攔截器與不同的動作。
需要創建WebContent/WEB-INF文件夾下web.xml文件下如下:
<?xml version="1.0" encoding="UTF-8"?>
<web-app xmlns:xsi="http://www.w3.org/2001/XMLSchema-instance"
   xmlns="http://java.sun.com/xml/ns/javaee"
   xmlns:web="http://java.sun.com/xml/ns/javaee/web-app_2_5.xsd"
   xsi:schemaLocation="http://java.sun.com/xml/ns/javaee
   http://java.sun.com/xml/ns/javaee/web-app_3_0.xsd"
   id="WebApp_ID" version="3.0">

   <display-name>Struts 2</display-name>
   <welcome-file-list>
      <welcome-file>index.jsp</welcome-file>
   </welcome-file-list>
   <filter>
      <filter-name>struts2</filter-name>
      <filter-class>
         org.apache.struts2.dispatcher.FilterDispatcher
      </filter-class>
   </filter>

   <filter-mapping>
      <filter-name>struts2</filter-name>
      <url-pattern>/*</url-pattern>
   </filter-mapping>
</web-app>
右鍵點擊項目名稱,並單擊“導出”> WAR文件創建一個WAR文件。然後,這WAR部署在Tomcat的webapps目錄下。最後,啟動Tomcat服務器,並嘗試訪問URL http://localhost:8080/HelloWorldStruts2/index.jsp。這會給你以下畫麵:
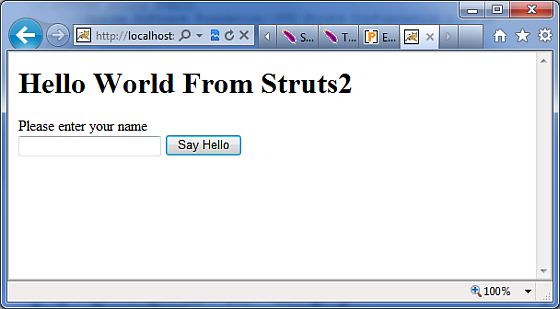
現在,在給定的文本框中輸入任何單詞,然後單擊“Say Hello按鈕執行已定義的動作。現在,如果你將檢查生成的日誌,你會發現下麵的文字在底部:
Pre-Processing
Inside action....
Post-Processing
堆疊多個攔截器:
正如你想像,配置多個攔截器的每個動作很快就會變得非常難以控製。出於這個原因,攔截器的攔截器棧管理。下麵是一個例子,直接從在struts-default.xml文件:
<interceptor-stack name="basicStack">
   <interceptor-ref name="exception"/>
   <interceptor-ref name="servlet-config"/>
   <interceptor-ref name="prepare"/>
   <interceptor-ref name="checkbox"/>
   <interceptor-ref name="params"/>
   <interceptor-ref name="conversionError"/>
</interceptor-stack>
上述權被稱為basicStack,並且可以用於在您的配置中,如下所示。此配置節點被放置下<package.../>節點。每個<interceptor-ref.../>標簽引用了一個攔截器或攔截器棧已配置在當前的攔截器棧。因此,這是非常重要的,以確保名稱是唯一在所有攔截器和攔截器棧配置時,配置初始攔截器和攔截器棧。
我們已經看到了如何應用攔截器的作用,應用攔截器棧是冇有什麼不同。事實上,我們都使用完全相同的標簽:
<action name="hello" class="com.yiibai.struts2.MyAction">
   <interceptor-ref name="basicStack"/>
   <result>view.jsp</result>
</action
所有的6個攔截器,上述登記注冊完成股權“basicStack”hello操作。他們在配置應該指出的是攔截器執行的順序。例如,在上述情況下,異常將被執行第一,servlet配置第二等。
Struts 2 Results and Result Types
正如前麵提到的,<results>標簽Struts2的MVC框架的視圖中所扮演的角色。動作是負責執行業務邏輯。執行業務邏輯後,下一步是使用<results>標簽顯示視圖。
經常有一些導航規則附加的結果。例如,如果在動作方法是對用戶進行驗證,有三種可能的結果。 (a)成功登錄失敗的登錄. (b)用戶名或密碼不正確.(c)帳戶鎖定。
的操作方法在這種情況下,將配置有三種可能的結果字符串和三種不同的視圖呈現結果。在前麵的例子我們已經看到。
但是,Struts2不配合使用JSP作為視圖技術。畢竟了MVC模式的整個目的是保持層分離和高度可配置。例如,對於一個Web2.0客戶端,您可能要返回XML或JSON作為輸出。在這種情況下,你可以創建一個新的結果類型為XML或JSON,實現這一目標。
Struts的一些預定義的結果類型,無論我們已經看到了,這是默認的結果類型,這是用來調度派遣到JSP頁麵。 Struts允許使用的其他標記語言的技術,目前的結果和流行的選擇,包括Velocity, Freemaker, XSLT 和Tiles。
分發調度結果類型:
調度的結果類型是默認的類型,是用來指定,如果冇有其他的結果類型。它被用來轉發到一個servlet,JSP,HTML頁麵等等,在服務器上它使用RequestDispatcher.forward()方法。
在我們前麵的例子中,我們看到了“shorthand”版本,在這裡我們提供了一個JSP的路徑作為身體的結果標記。
<result name="success">
   /HelloWorld.jsp
</result>
We can also specify the JSP file using a <param name="location"> tag within the <result...> element as follows:
<result name="success" type="dispatcher">
   <param name="location">
      /HelloWorld.jsp
   </param >
</result>
我們還可以提供一個分析參數,默認值是true。解析參數的位置參數確定是否將被解析為OGNL表達式。
FreeMaker結果類型:
在這個例子中,我們將看到我們如何使用FreeMaker作為視圖技術。 freemaker是一種流行的模板引擎,用於生成輸出,使用預定義的模板。讓我們創建一個Freemaker模板文件hello.fm以下內容:
Hello World ${name}
在此以上的文件是一個模板,其中名稱是使用已定義的動作外,將通過放慢參數。在你的CLASSPATH中將保存該文件。接下來讓我們修改struts.xml中指定的結果如下:
<?xml version="1.0" encoding="UTF-8"?>
<!DOCTYPE struts PUBLIC
"-//Apache Software Foundation//DTD Struts Configuration 2.0//EN"
"http://struts.apache.org/dtds/struts-2.0.dtd">

<struts>
   <constant name="struts.devMode" value="true" />
   <package name="helloworld" extends="struts-default">

      <action name="hello"
         class="com.yiibai.struts2.HelloWorldAction"
         method="execute">
         <result name="success" type="freemarker">
            <param name="location">/hello.fm</param>
         </result>
      </action>

   </package>

</struts>
讓我們保持我們的HelloWorldAction.java,HelloWorldAction.jsp和index.jsp文件,為我們創造了他們的例子章。現在,右鍵單擊該項目上的名稱和clickExport> WAR文件創建一個WAR文件。然後,這WAR部署在Tomcat的webapps目錄下。最後,啟動Tomcat服務器,並嘗試訪問URL http://localhost:8080/HelloWorldStruts2/index.jsp。這會給你以下畫麵:
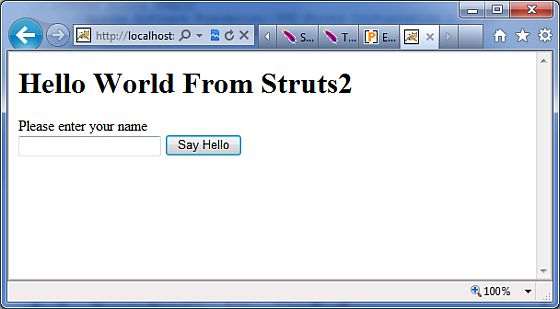
值“Struts2”,並提交頁麵。您應該看到下一頁
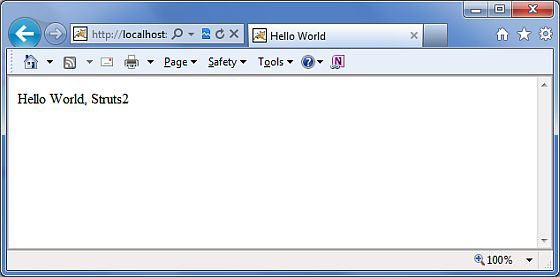
正如你可以看到,這是完全一樣的不同之處在於,我們是不依賴於使用JSP作為視圖技術的JSP視圖。在這個例子中,我們已經使用Freemaker。
重定向結果類型:
重定向結果的類型調用標準 response.sendRedirect() 方法,使瀏覽器來創建一個新的請求給定的位置。
我們可以提供的位置無論是在體內的<result...>元素或作為一個<param name="location">元素。重定向也支持解析的參數。下麵是一個例子使用XML配置:
<action name="hello"
   class="com.yiibai.struts2.HelloWorldAction"
   method="execute">
   <result name="success" type="redirect">
       <param name="location">
         /NewWorld.jsp
      </param >
   </result>
</action>
因此,隻要修改struts.xml文件中定義重定向上述類型,並創建一個新的的文件NewWorld.jpg在那裡你會被重定向hello操作時,將返回成功。
Struts2值棧/ OGNL
值棧:
值棧是一組的幾個對象保持中的下列對象提供的順序:
| SN | Objects & 描述 |
|---|---|
| 1 |
Temporary Objects There are various temporary objects which are created during execution of a page. For example the current iteration value for a collection being looped over in a JSP tag. |
| 2 |
The Model Object If you are using model objects in your struts application, the current model object is placed before the action on the value stack |
| 3 |
The Action Object This will be the current action object which is being executed. |
| 4 |
Named Objects These objects include #application, #session, #request, #attr and #parameters and refer to the corresponding servlet scopes |
值棧可以通過標簽提供JSP,Velocity或者Freemarker的。在單獨的章節中,我們將研究有不同的標簽,被用來獲取和設置Struts 2.0的值棧。您可以在你的行動值棧對象如下:
ActionContext.getContext().getValueStack()
一旦你擁有了值對象,您可以使用以下方法來操作該對象:
| SN | ValueStack Methods & 描述 |
|---|---|
| 1 |
Object findValue(String expr) Find a value by evaluating the given expression against the stack in the default search order. |
| 2 |
CompoundRoot getRoot() Get the CompoundRoot which holds the objects pushed onto the stack. |
| 3 |
Object peek() Get the object on the top of the stack without changing the stack. |
| 4 |
Object pop() Get the object on the top of the stack and remove it from the stack. |
| 5 |
void push(Object o) Put this object onto the top of the stack. |
| 6 |
void set(String key, Object o) Sets an object on the stack with the given key so it is retrievable by findValue(key,...) |
| 7 |
void setDefaultType(Class defaultType) Sets the default type to convert to if no type is provided when getting a value. |
| 8 |
void setValue(String expr, Object value) Attempts to set a property on a bean in the stack with the given expression using the default search order. |
| 9 |
int size() Get the number of objects in the stack. |
OGNL:
對象圖導航語言(OGNL)是一個功能強大的表達式語言,用於引用和操作數據的值棧。OGNL還可以在數據傳輸和類型轉換。
OGNL是非常相似的JSP表達式語言。 OGNL是基於的思想具有根或缺省對象的範圍內的。默認的根對象的屬性可以參考使用的標記符號,這是英鎊符號。
正如前麵提到的,OGNL根據上下文和Struts建立一個ActionContext中使用OGNL地圖。ActionContext中的地圖由下列組成:
-
application - 應用程序範圍內的變量
-
session - 會話範圍的變量
-
root / value stack -所有操作變量都存儲在這裡
-
request - 請求範圍的變量
-
parameters - 請求參數
-
atributes - 存儲的屬性頁麵,請求,會話和應用範圍
重要的是要明白,值棧中的操作對象是始終可用。所以,因此,如果你的行動對象的屬性x和y有隨時可供您使用。
在ActionContext中的對象被稱為使用英鎊符號,但是,值棧中的對象可以直接引用,例如,如果員工是一個動作類的屬性的話,就可以得到參考如下:
<s:property value="name"/>
而不是
<s:property value="#name"/>
如果你有所謂的“login”會話中的屬性,你可以找回如下:
<s:property value="#session.login"/>
OGNL還支持處理的集合 - 即地圖,List和Set。例如,以顯示顏色的下拉列表中,你可以這樣做:
<s:select name="color" list="{'red','yellow','green'}" />
OGNL表達式是巧妙地解釋了 "red","yellow","green"顏色和此基礎上建立一個列表。
OGNL表達式將被廣泛使用在接下來的章節中,我們將研究不同的標簽。因此,而不是孤立地看著他們,讓我們來看看的表格標簽/控製標簽/數據標簽和Ajax標簽部分在使用中的一些例子。
值棧/OGNL例:
創建動作:
讓我們考慮下麵的操作類,我們訪問值棧,然後設置幾個鍵,我們將在我們的觀點,即訪問使用OGNL。JSP頁麵。
package com.yiibai.struts2;

import java.util.*;

import com.opensymphony.xwork2.util.ValueStack;
import com.opensymphony.xwork2.ActionContext;
import com.opensymphony.xwork2.ActionSupport;

public class HelloWorldAction extends ActionSupport{
   private String name;

   public String execute() throws Exception {
      ValueStack stack = ActionContext.getContext().getValueStack();
      Map<String, Object> context = new HashMap<String, Object>();

      context.put("key1", new String("This is key1"));
      context.put("key2", new String("This is key2"));
      stack.push(context);

      System.out.println("Size of the valueStack: " + stack.size());
      return "success";
   }

   public String getName() {
      return name;
   }

   public void setName(String name) {
      this.name = name;
   }
}
其實,Struts 2增加值棧的頂部時動作執行。因此,通常的方法把東西值棧是增加值getter/setter方法Action類和然後使用<s:property>的標簽,訪問值。但我展示你究竟是如何的ActionContext中和值棧在struts的工作。
創建視圖
讓我們創建下麵的JSP文件helloWorld.jsp,在WebContent文件夾在eclipse項目。這種觀點的情況下采取行動的成功返回,將顯示:
<%@ page contentType="text/html; charset=UTF-8" %>
<%@ taglib prefix="s" uri="/struts-tags" %>
<html>
<head>
<title>Hello World</title>
</head>
<body>
   Entered value : <s:property value="name"/><br/>
   Value of key 1 : <s:property value="key1" /><br/>
   Value of key 2 : <s:property value="key2" /> <br/>
</body>
</html>
我們還需要創建index.jsp在WebContent文件夾下,其內容如下:
<%@ page language="java" contentType="text/html; charset=ISO-8859-1"
   pageEncoding="ISO-8859-1"%>
<%@ taglib prefix="s" uri="/struts-tags"%>
   <!DOCTYPE html PUBLIC "-//W3C//DTD HTML 4.01 Transitional//EN"
"http://www.w3.org/TR/html4/loose.dtd">
<html>
<head>
<title>Hello World</title>
</head>
<body>
   <h1>Hello World From Struts2</h1>
   <form action="hello">
      <label for="name">Please enter your name</label><br/>
      <input type="text" name="name"/>
      <input type="submit" value="Say Hello"/>
   </form>
</body>
</html>
配置文件
以下是struts.xml文件的內容:
<?xml version="1.0" encoding="UTF-8"?>
<!DOCTYPE struts PUBLIC
    "-//Apache Software Foundation//DTD Struts Configuration 2.0//EN"
    "http://struts.apache.org/dtds/struts-2.0.dtd">

<struts>
   <constant name="struts.devMode" value="true" />
   <package name="helloworld" extends="struts-default">

      <action name="hello"
         class="com.yiibai.struts2.HelloWorldAction"
         method="execute">
         <result name="success">/HelloWorld.jsp</result>
      </action>

   </package>
</struts>
以下是web.xml文件中的內容:
<?xml version="1.0" encoding="UTF-8"?>
<web-app xmlns:xsi="http://www.w3.org/2001/XMLSchema-instance"
   xmlns="http://java.sun.com/xml/ns/javaee"
   xmlns:web="http://java.sun.com/xml/ns/javaee/web-app_2_5.xsd"
   xsi:schemaLocation="http://java.sun.com/xml/ns/javaee
   http://java.sun.com/xml/ns/javaee/web-app_3_0.xsd"
   id="WebApp_ID" version="3.0">

   <display-name>Struts 2</display-name>
   <welcome-file-list>
      <welcome-file>index.jsp</welcome-file>
   </welcome-file-list>
   <filter>
      <filter-name>struts2</filter-name>
      <filter-class>
         org.apache.struts2.dispatcher.FilterDispatcher
      </filter-class>
   </filter>

   <filter-mapping>
      <filter-name>struts2</filter-name>
      <url-pattern>/*</url-pattern>
   </filter-mapping>
</web-app>
右鍵點擊項目名稱,並單擊“導出”> WAR文件創建一個WAR文件。然後,這WAR部署在Tomcat的webapps目錄下。最後,啟動Tomcat服務器,並嘗試訪問URL http://localhost:8080/HelloWorldStruts2/index.jsp。這會給你以下畫麵:
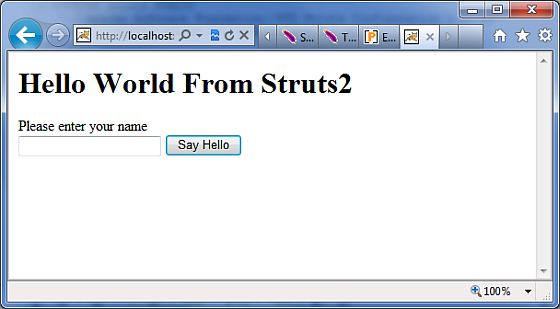
現在,在給定的文本框中輸入任何單詞,然後點擊“Say Hello”按鈕執行已定義的動作。現在,如果你將檢查生成的日誌,你會發現下麵的文字在底部:
Size of the valueStack: 3
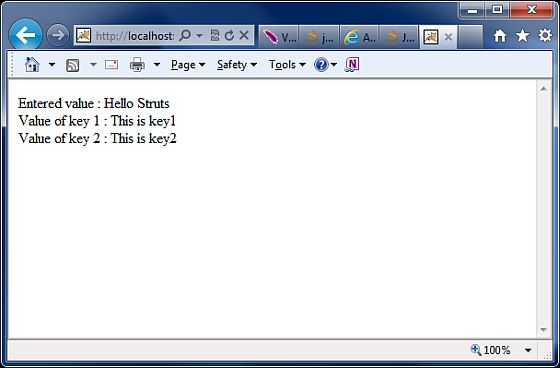
這將顯示下麵的屏幕,它會顯示任何價值,你將進入和值key1和key2,我們賦上了值棧。
結論:
希望你有較好的了解Struts 2概念。如果願意了解更多的細節和進一步的例子,如上傳文件,發送電子郵件,表單驗證等,然後可以去通過完整教學。


